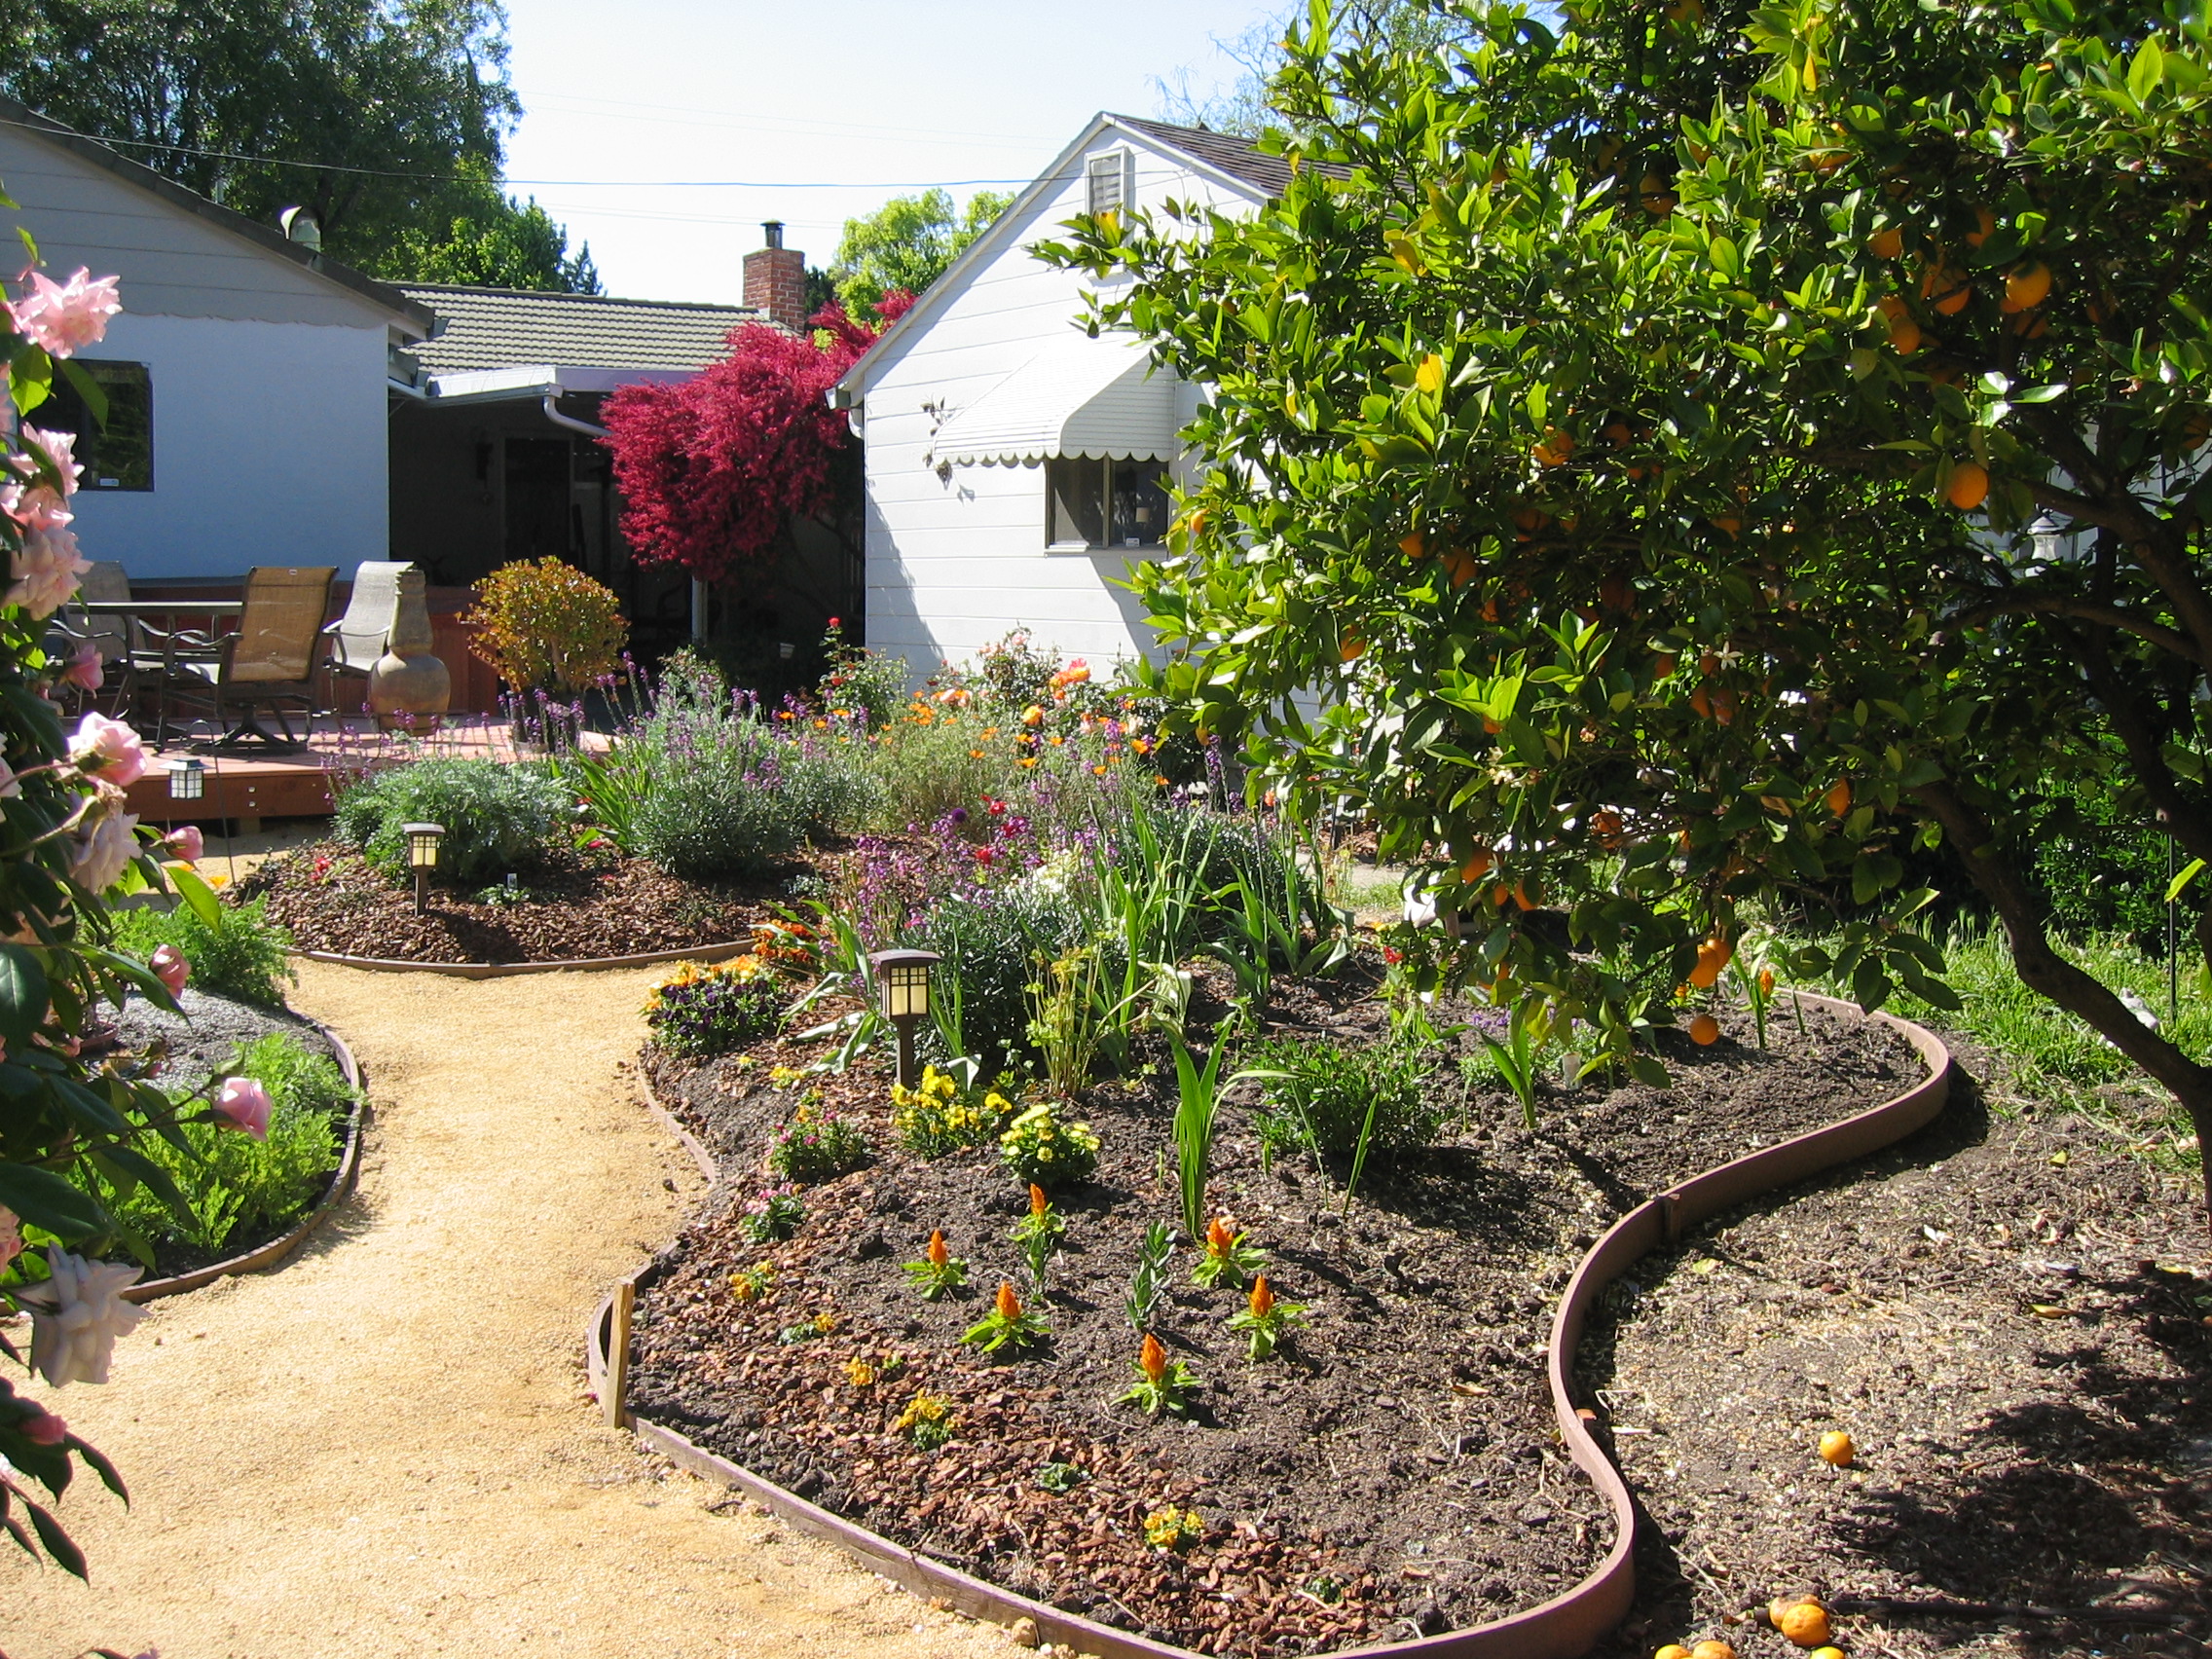
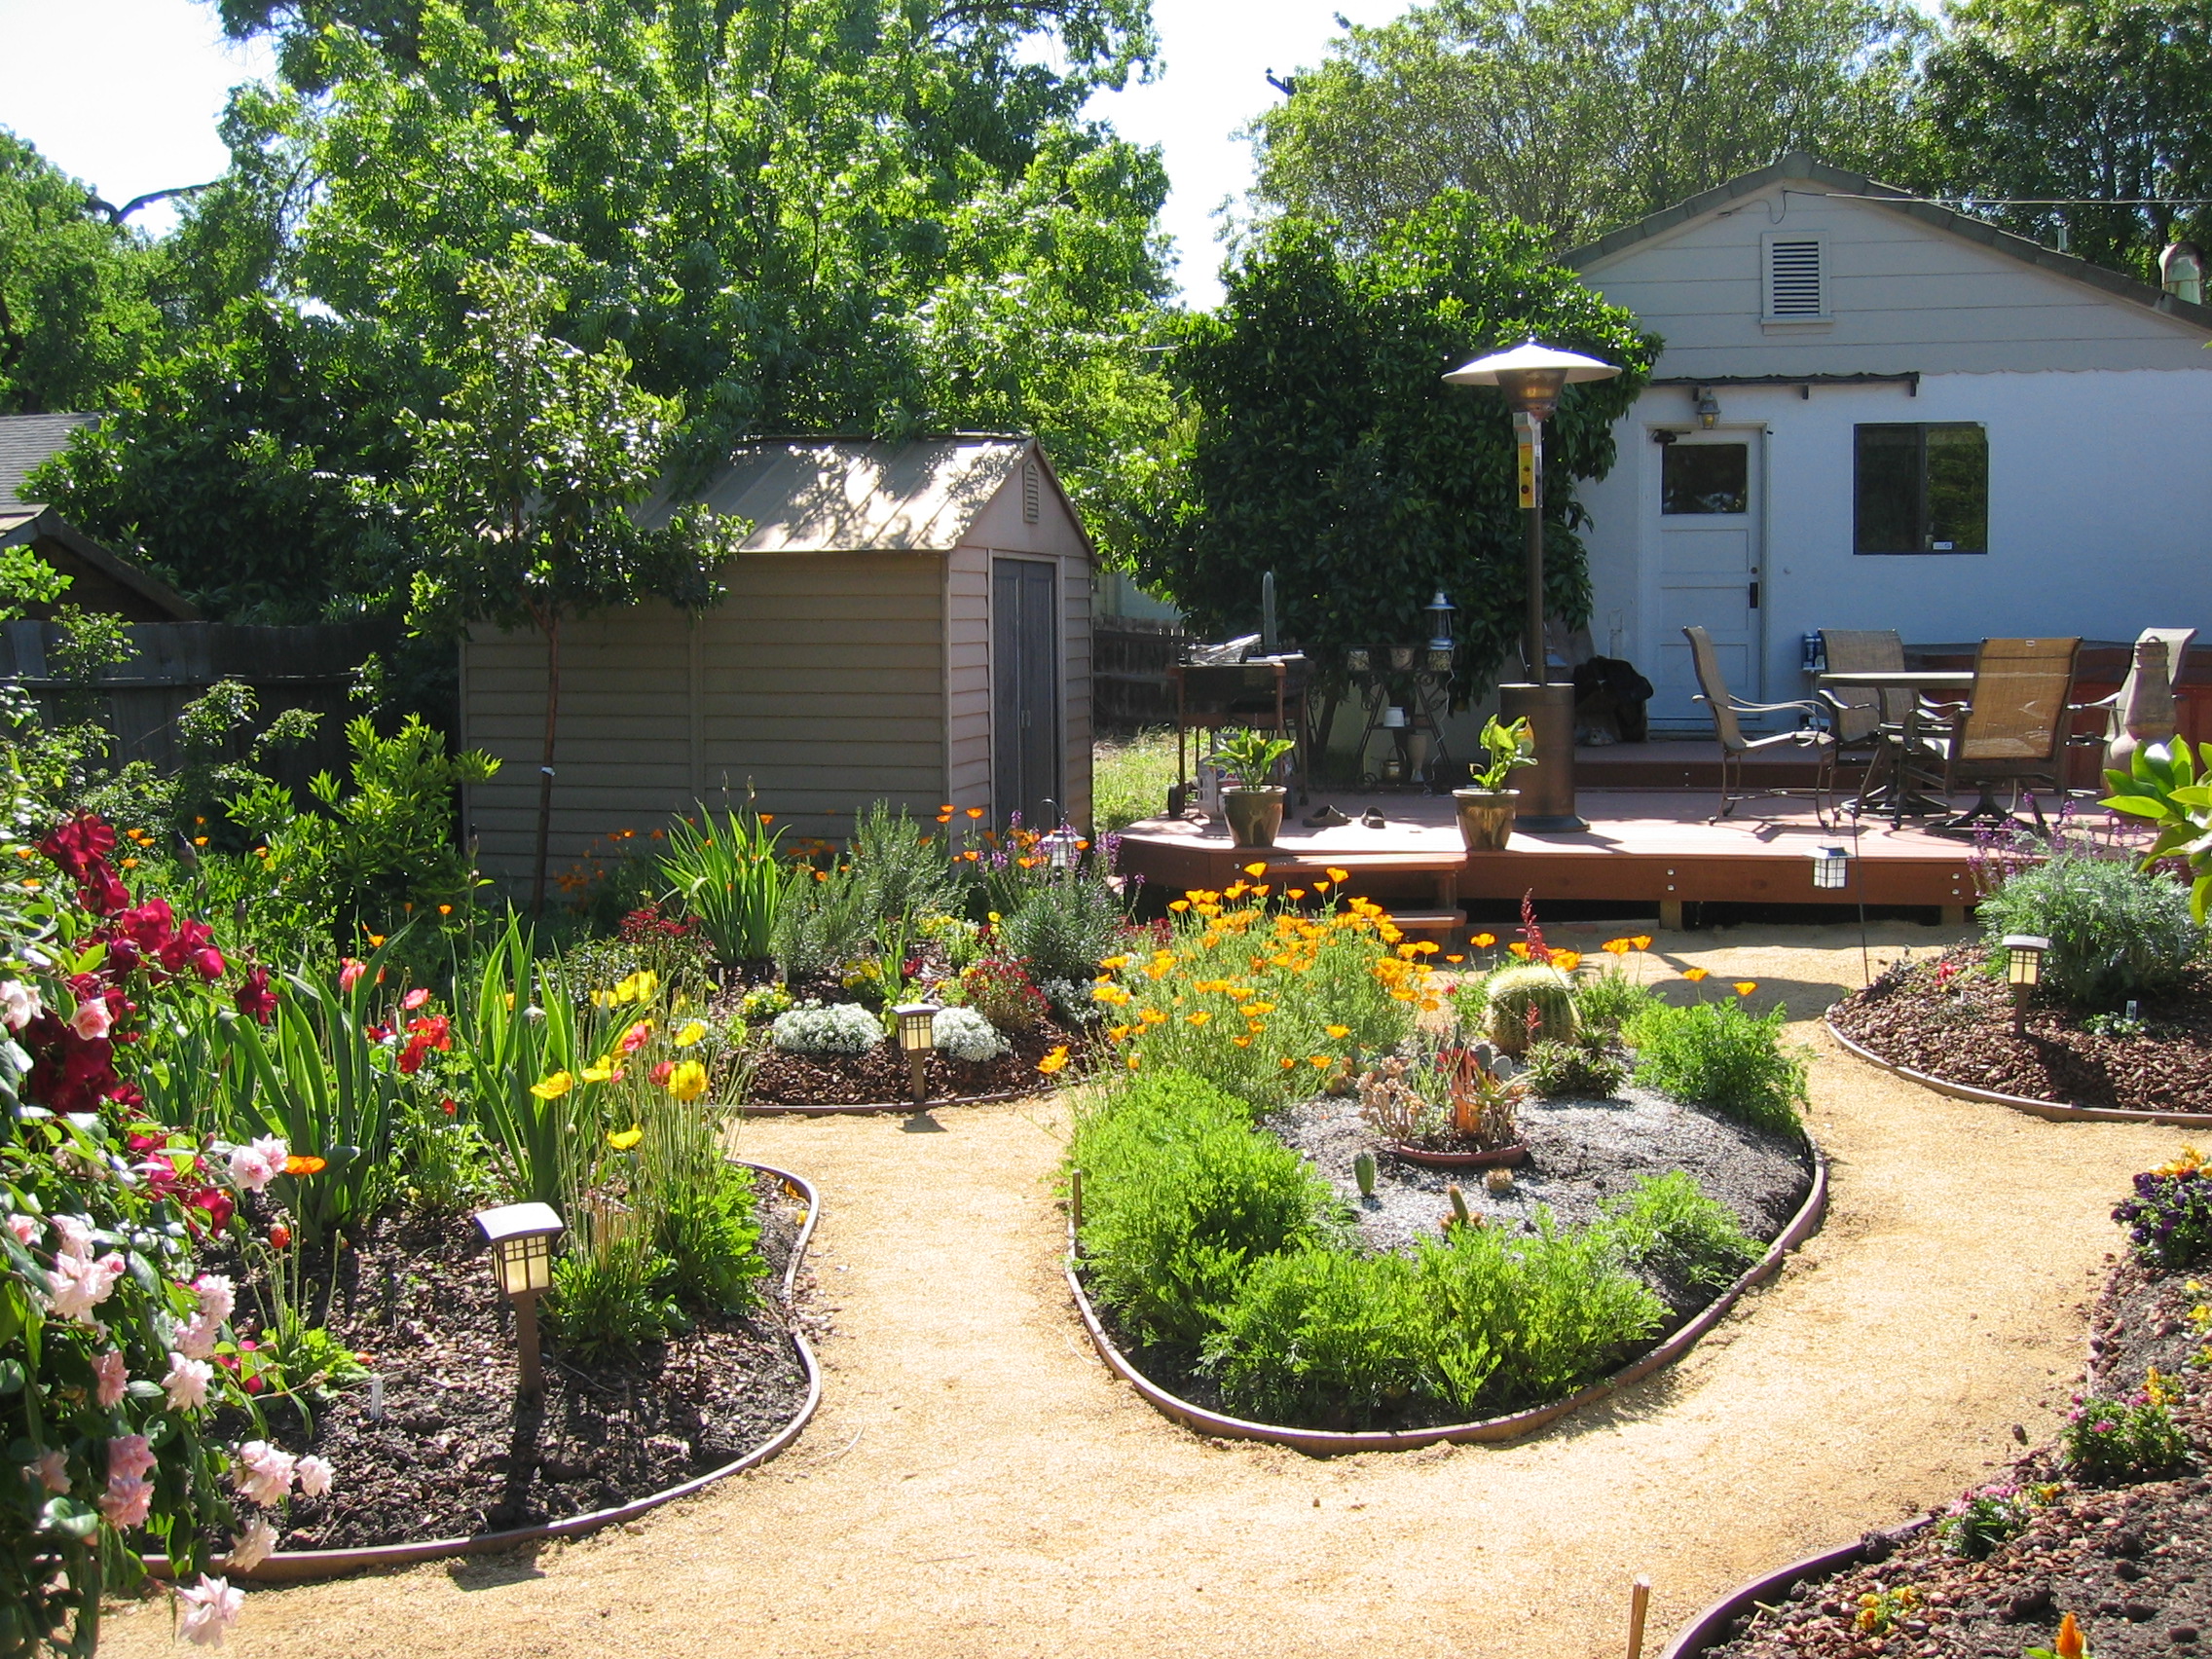
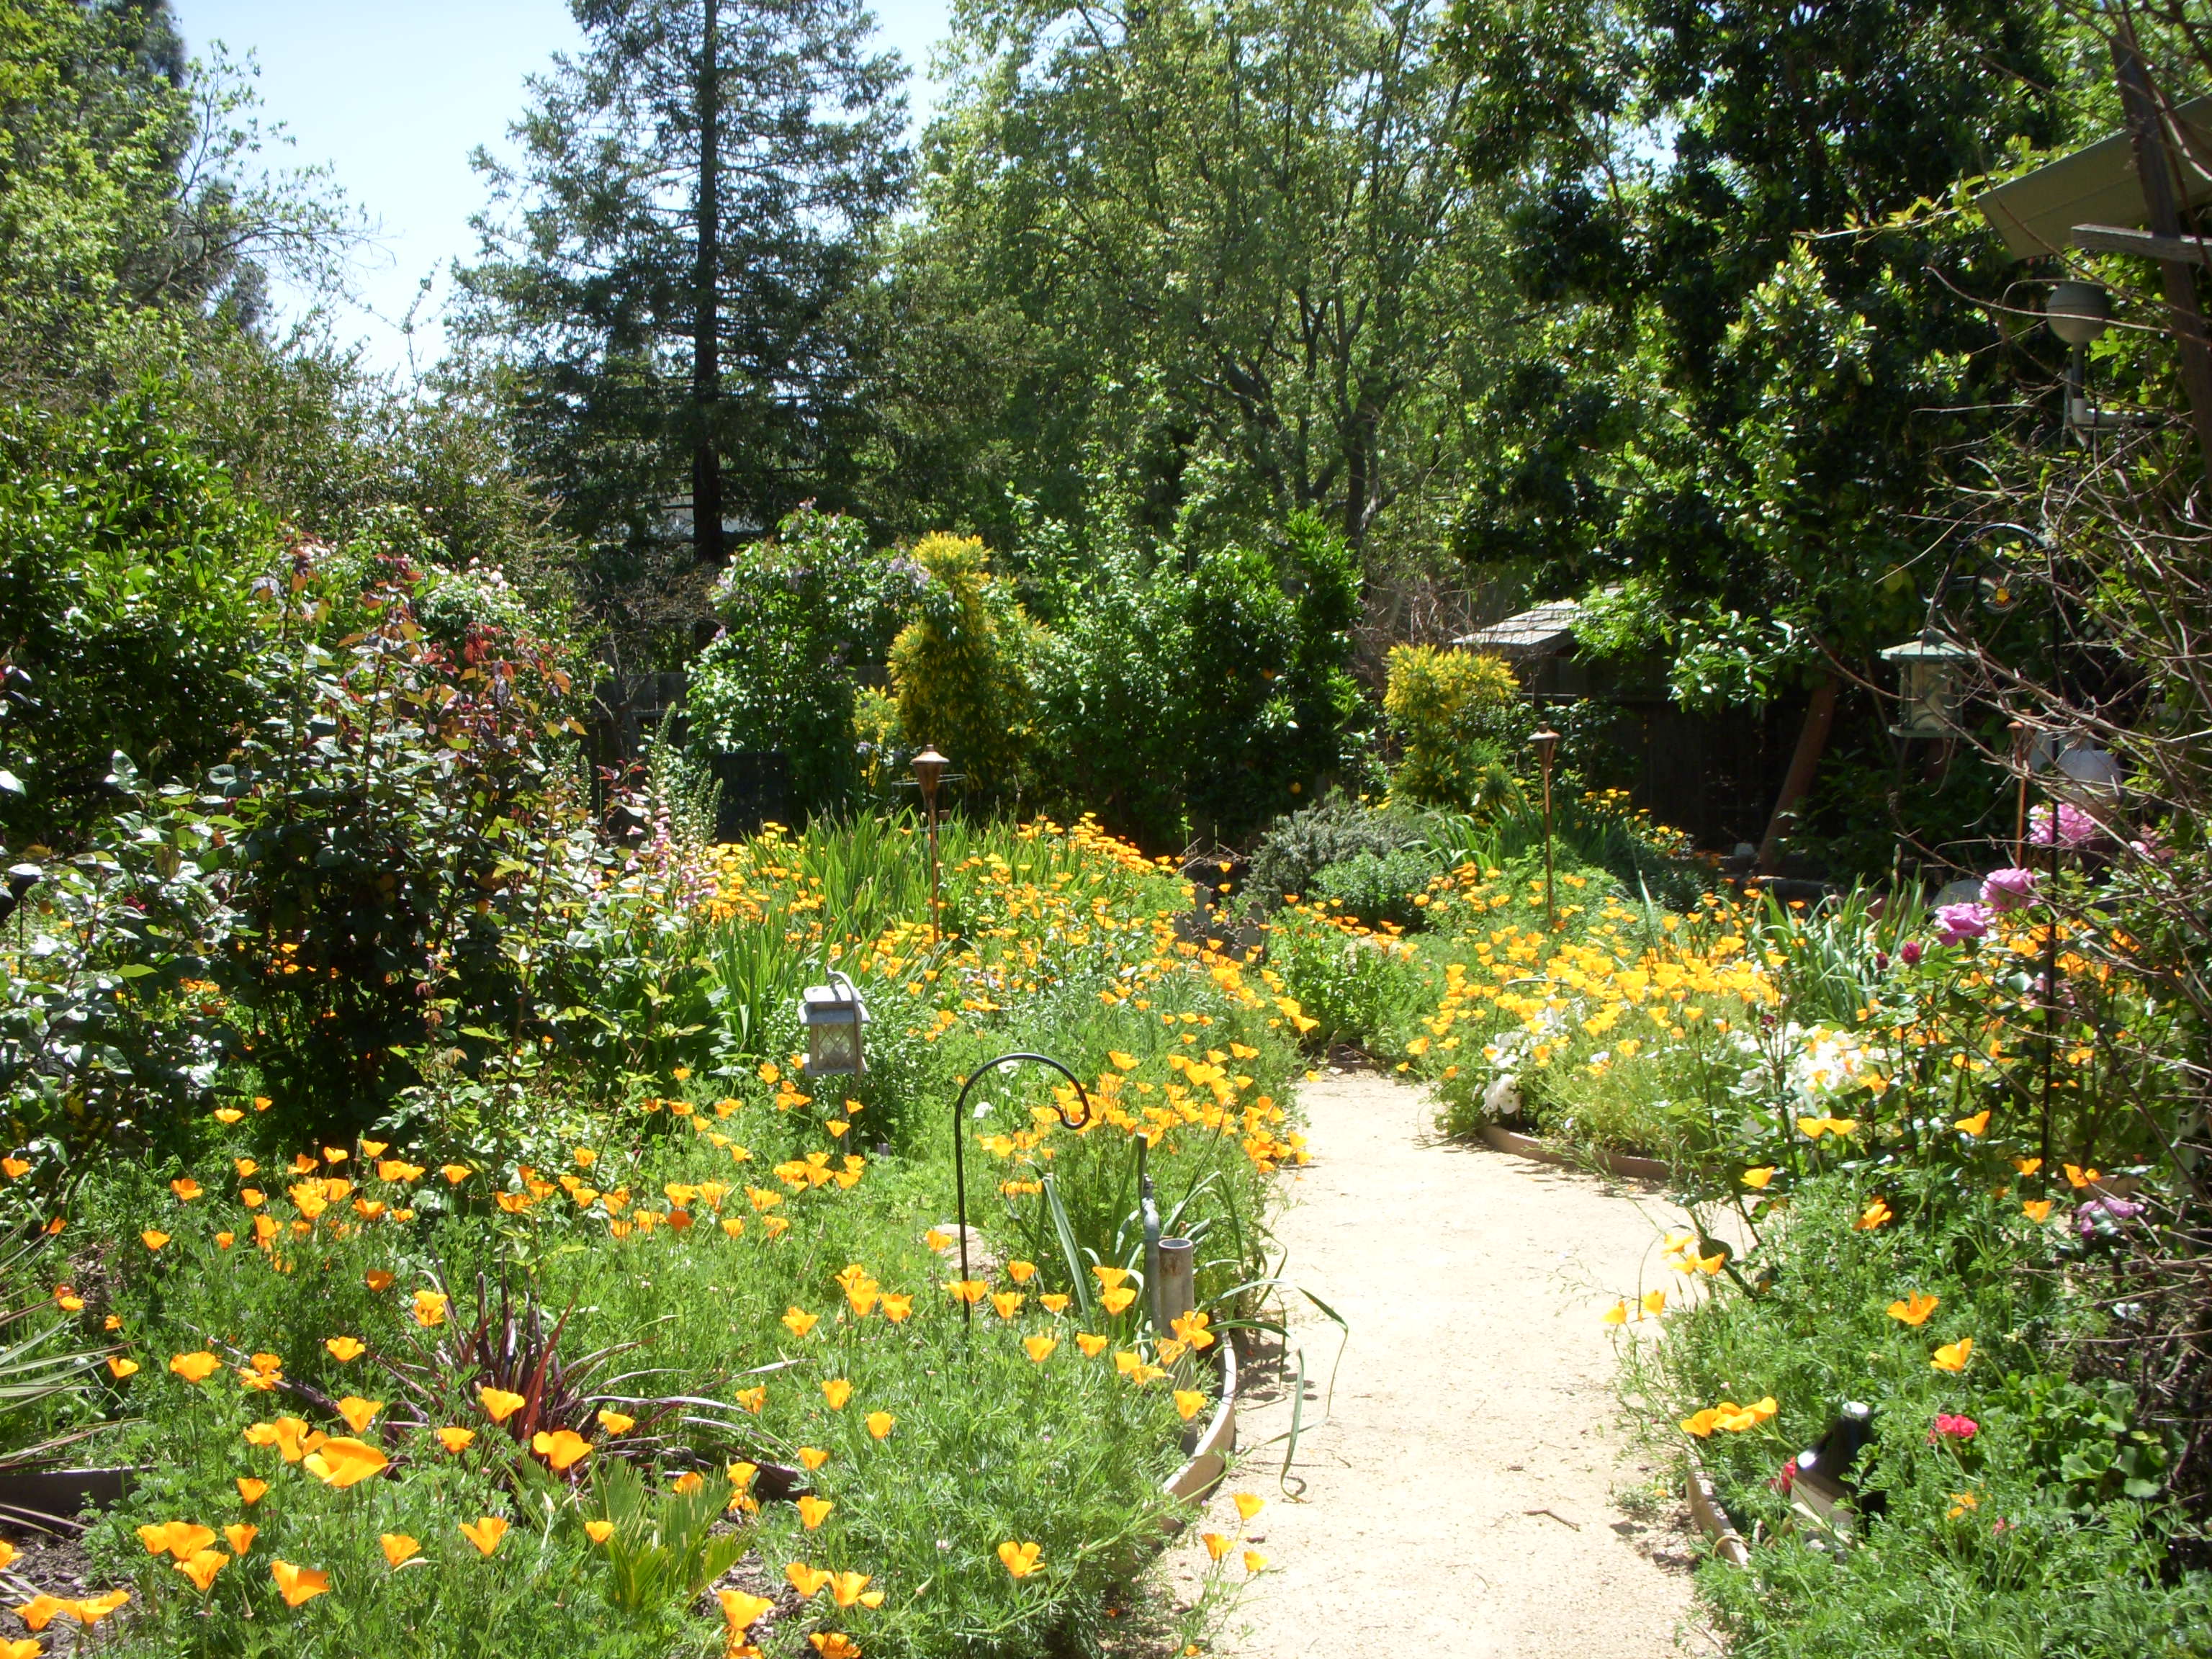
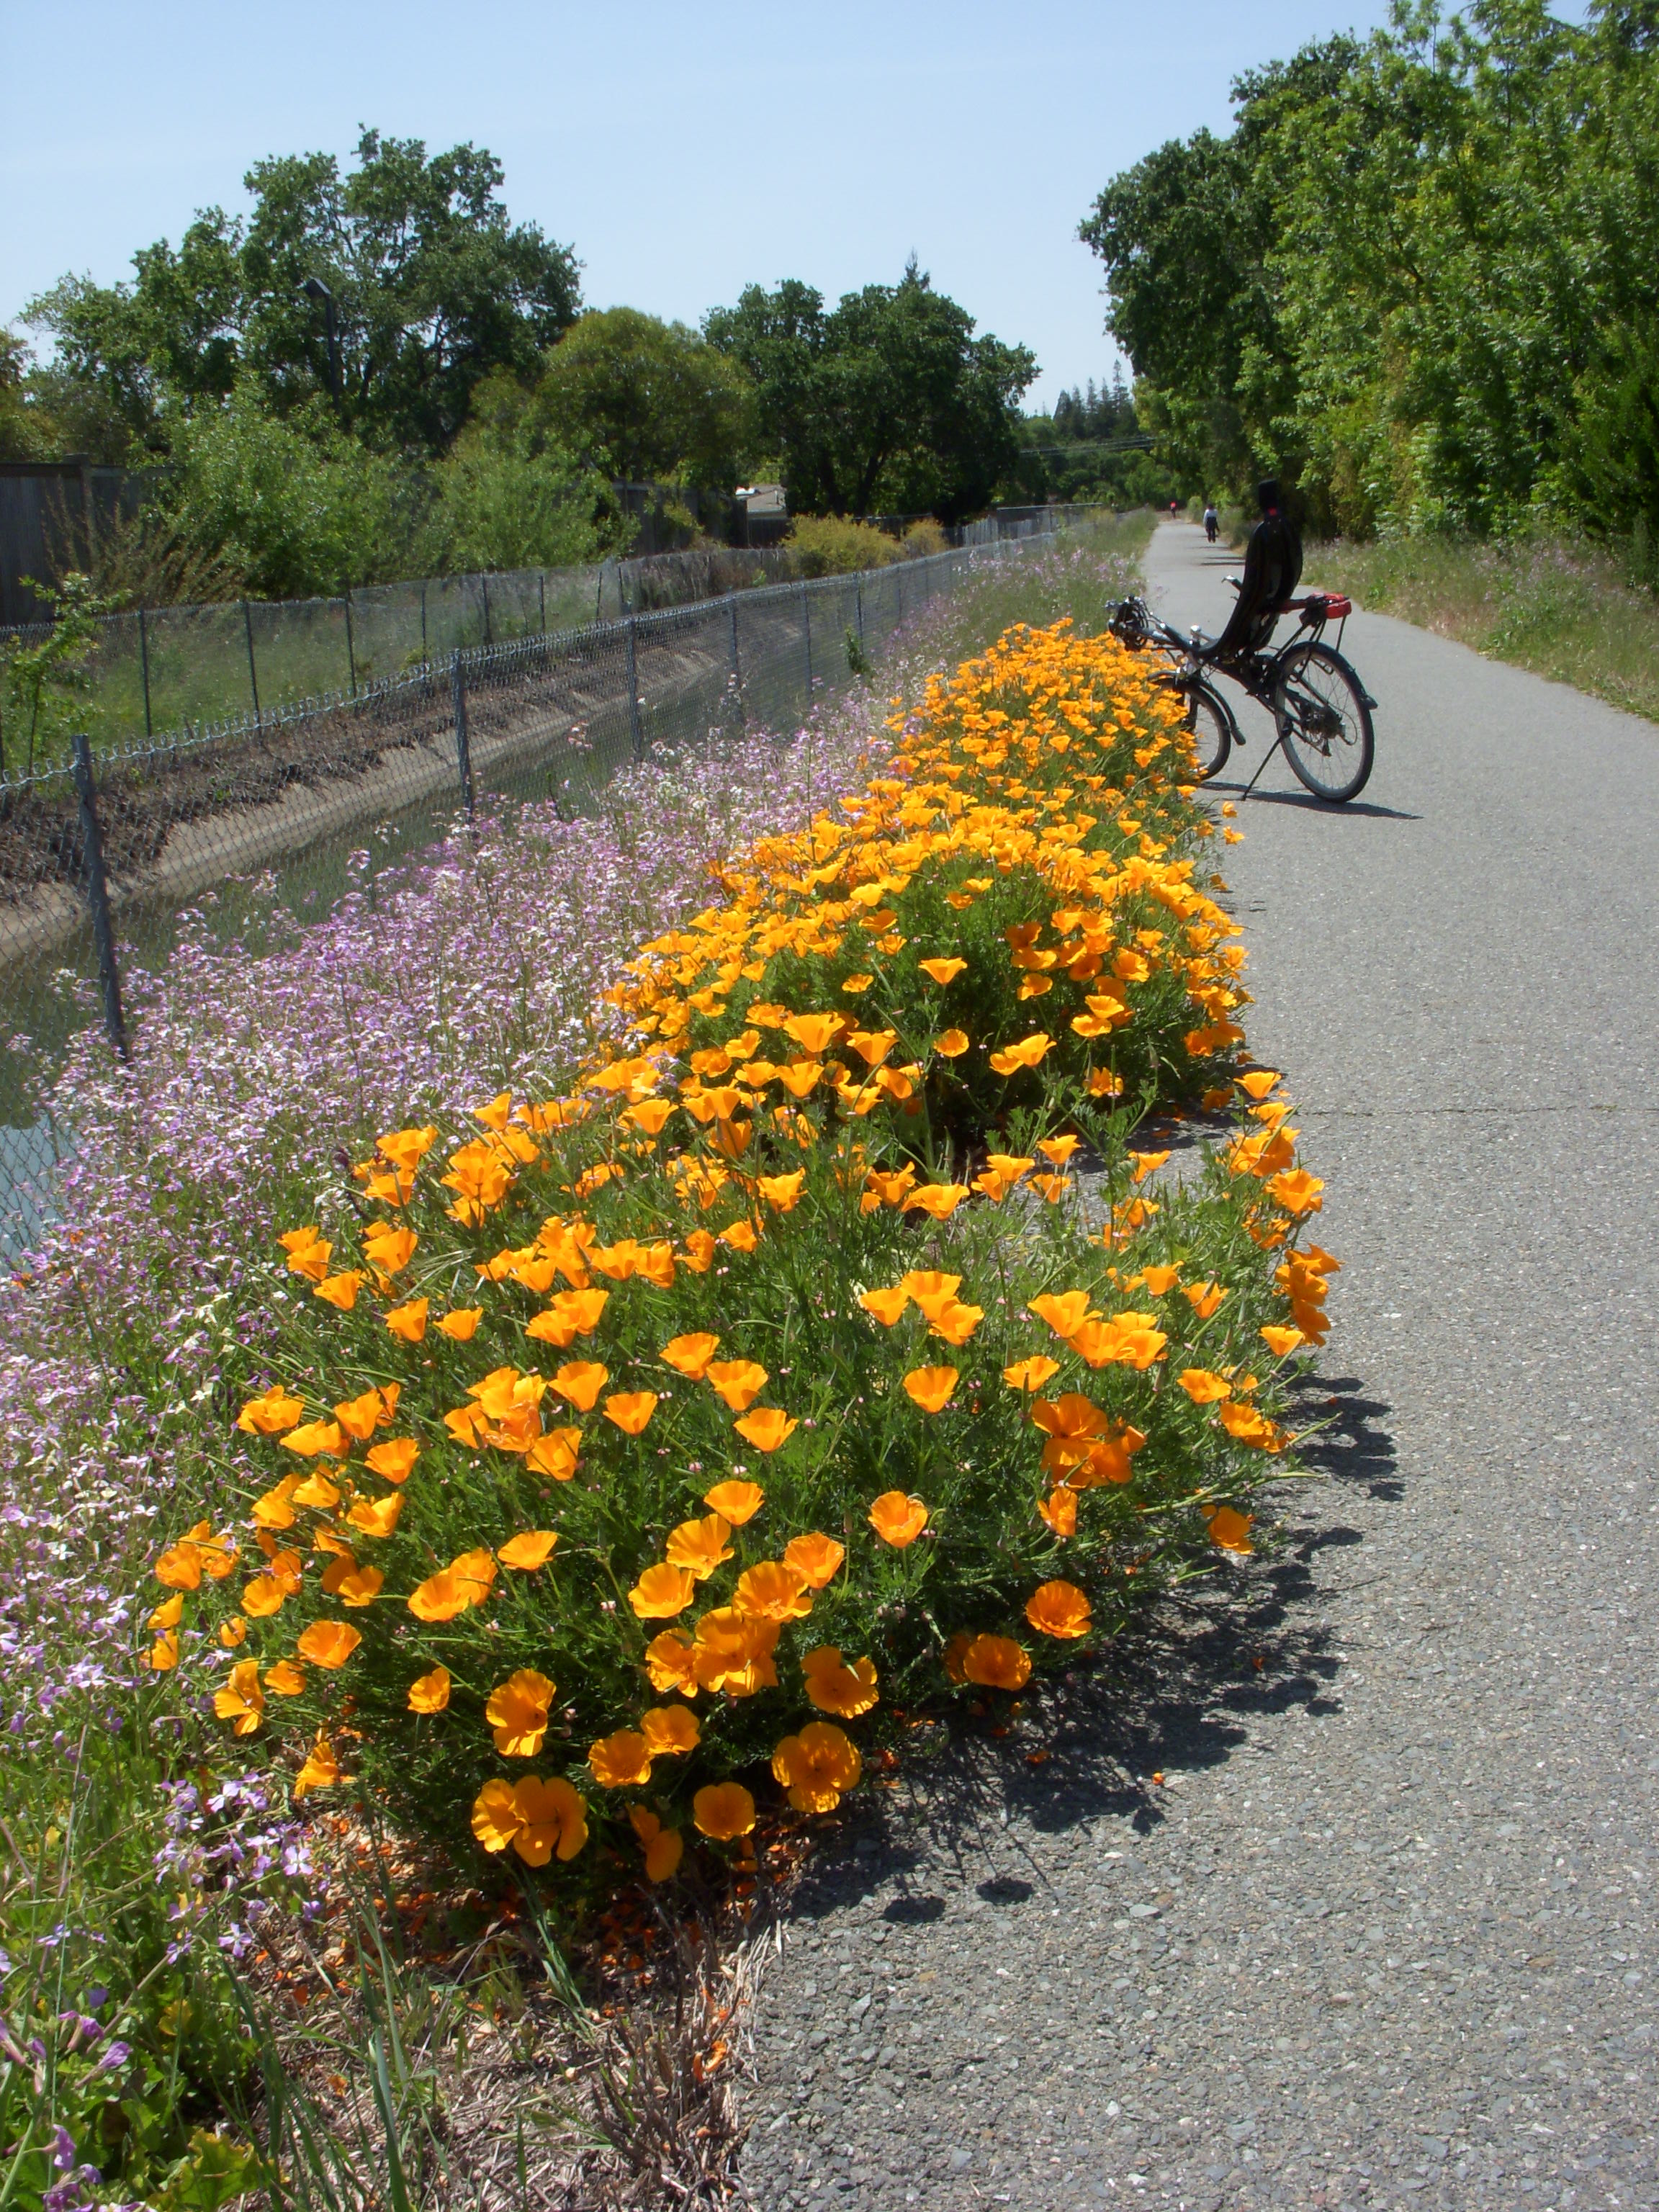
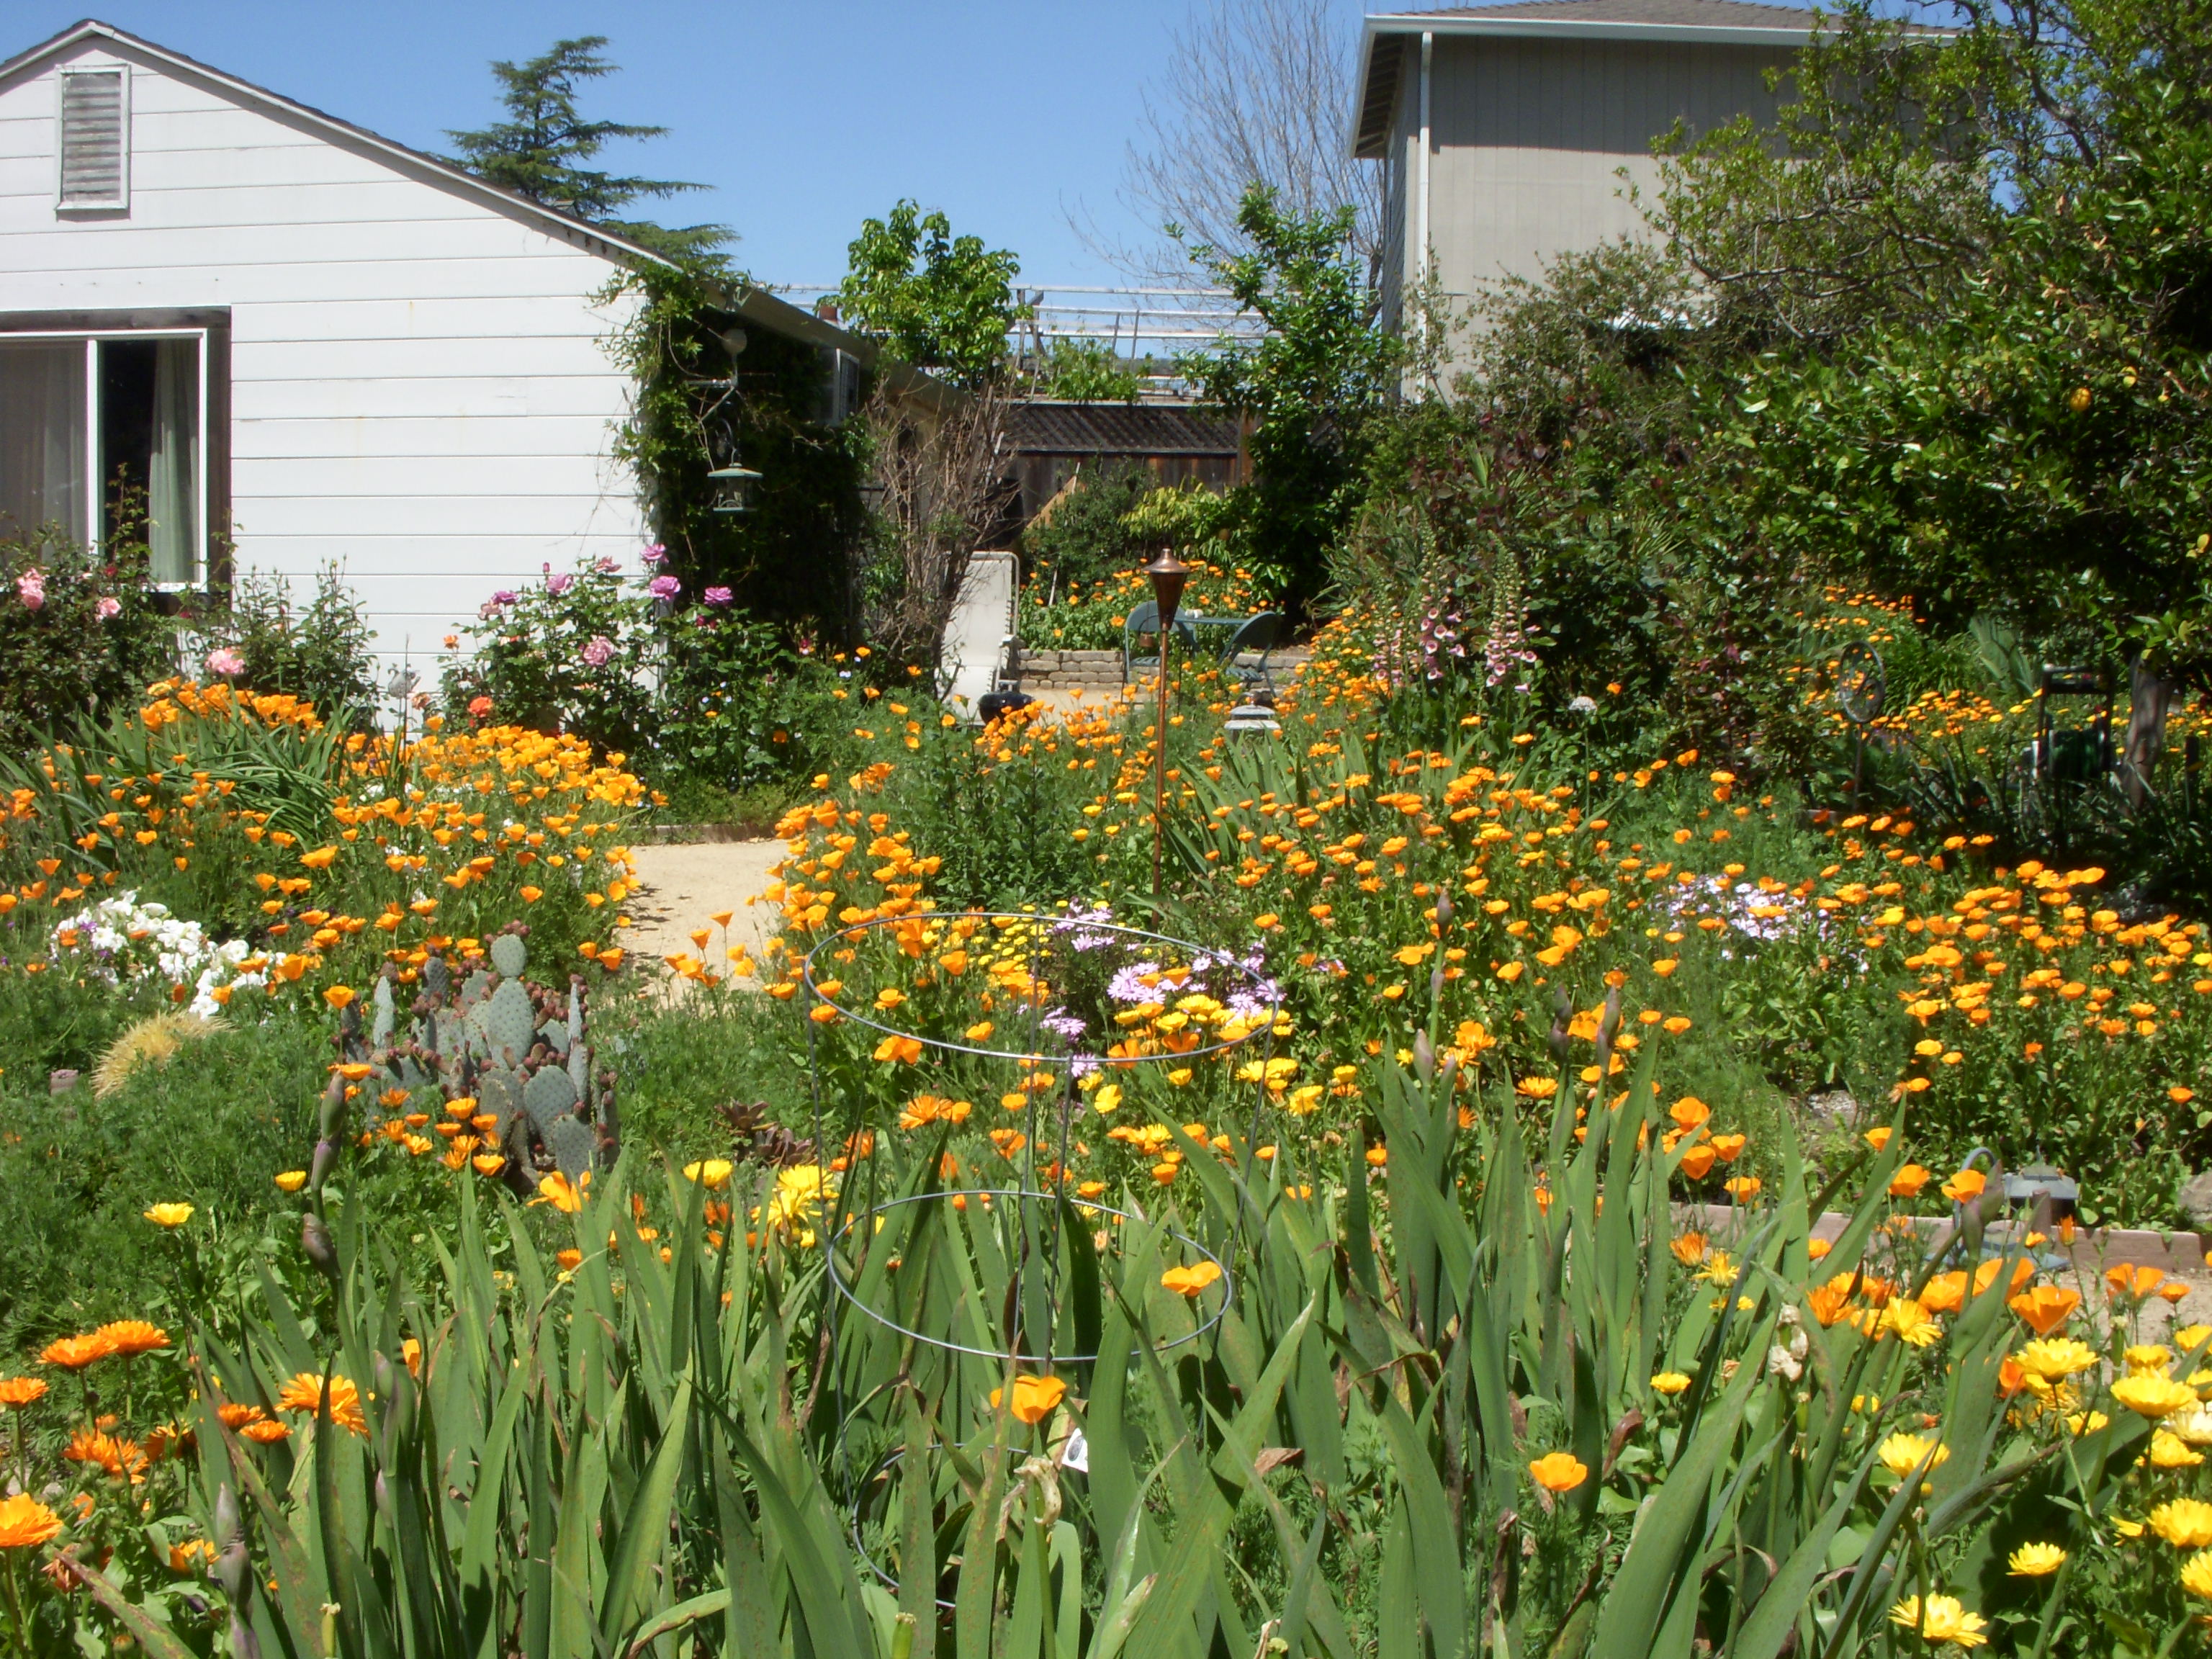
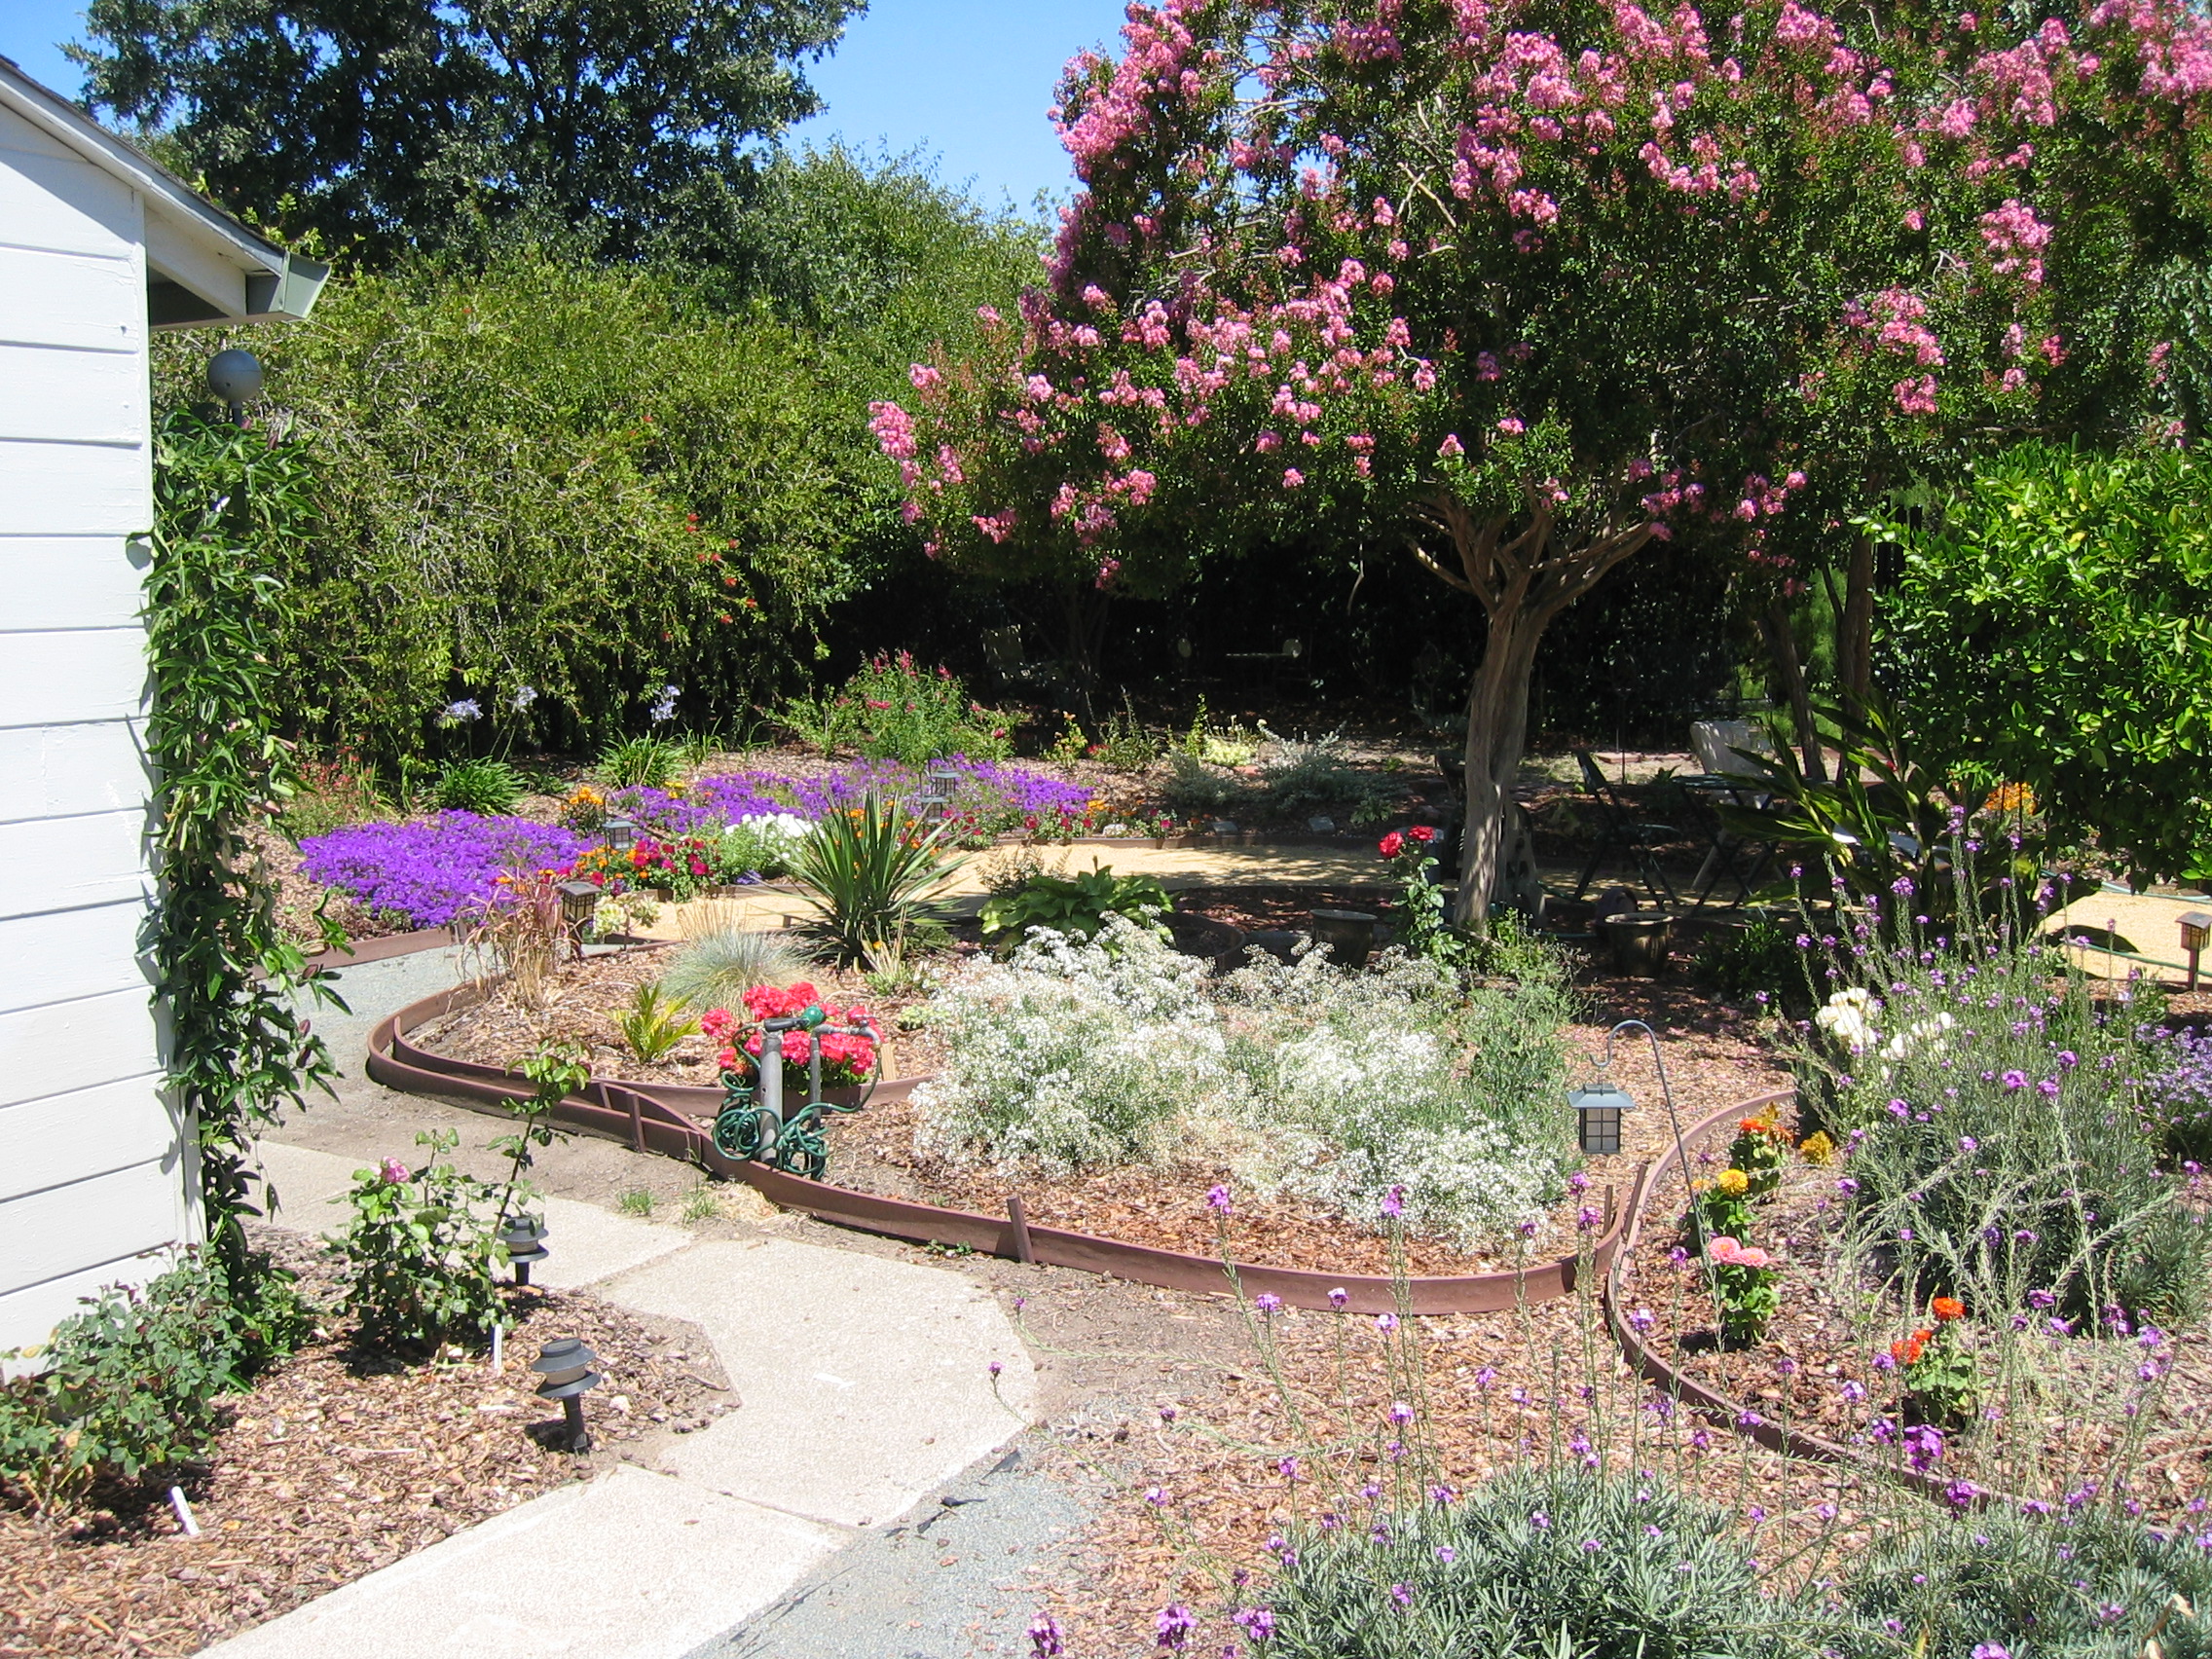
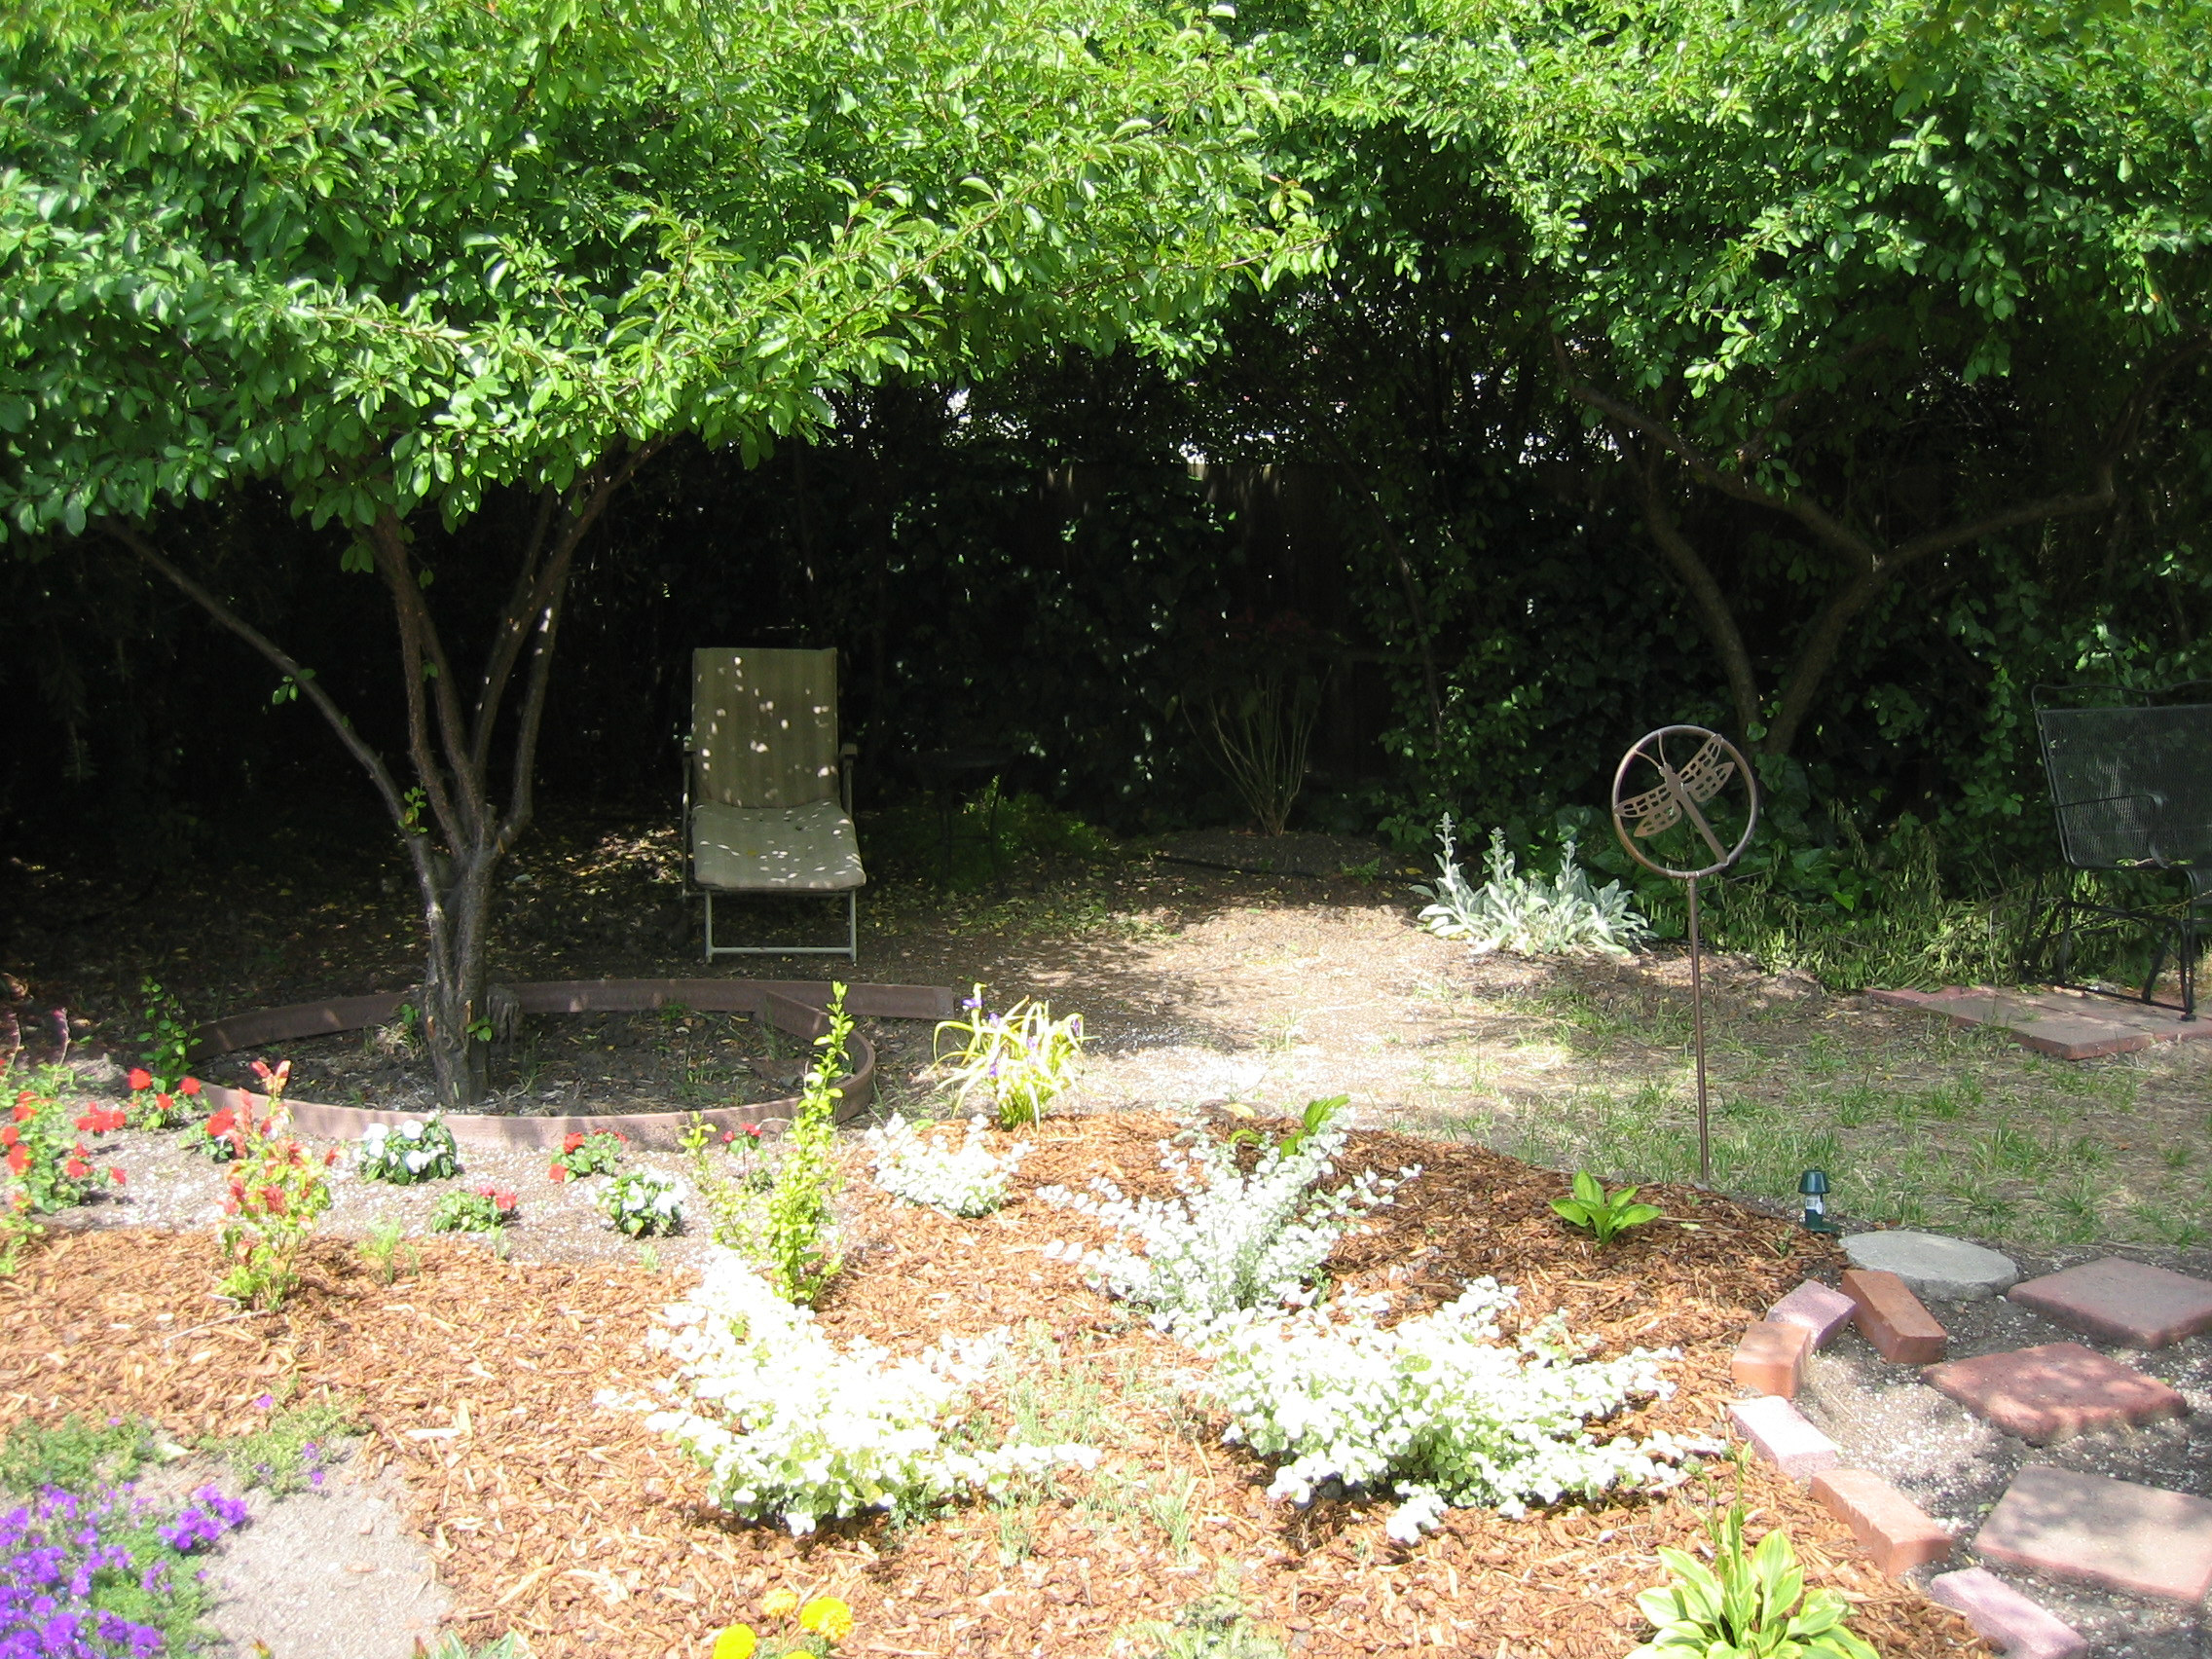
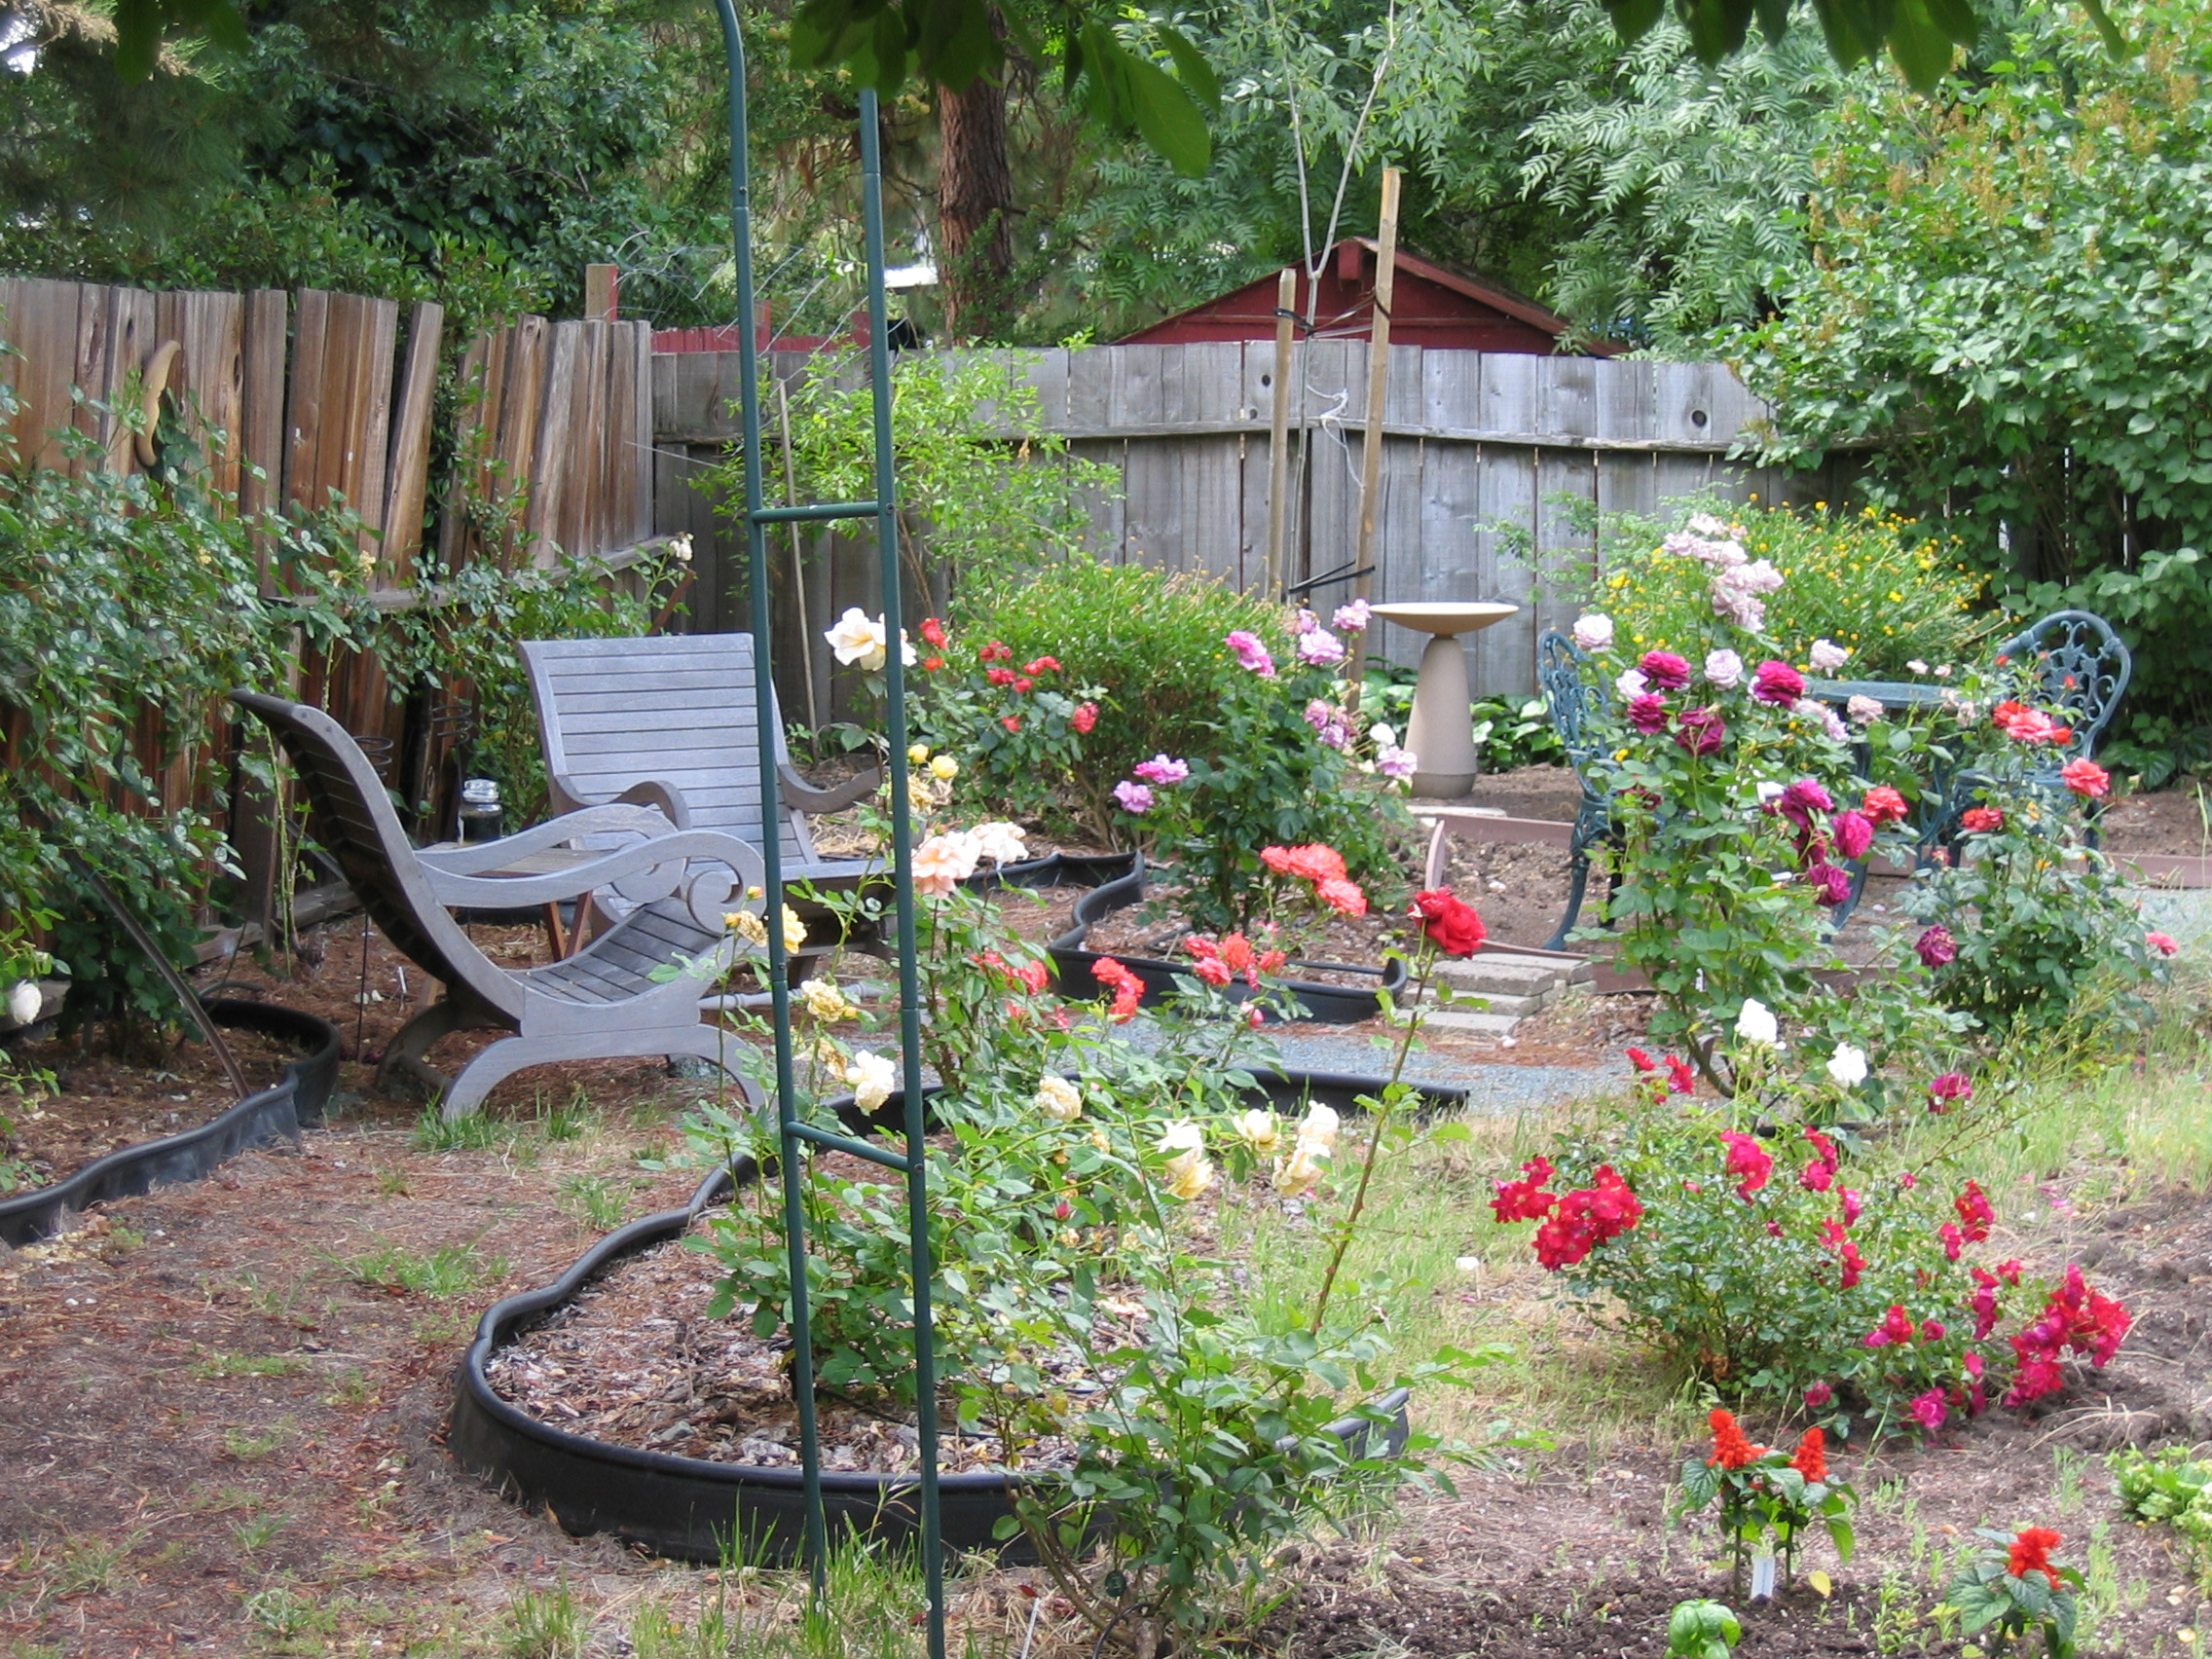
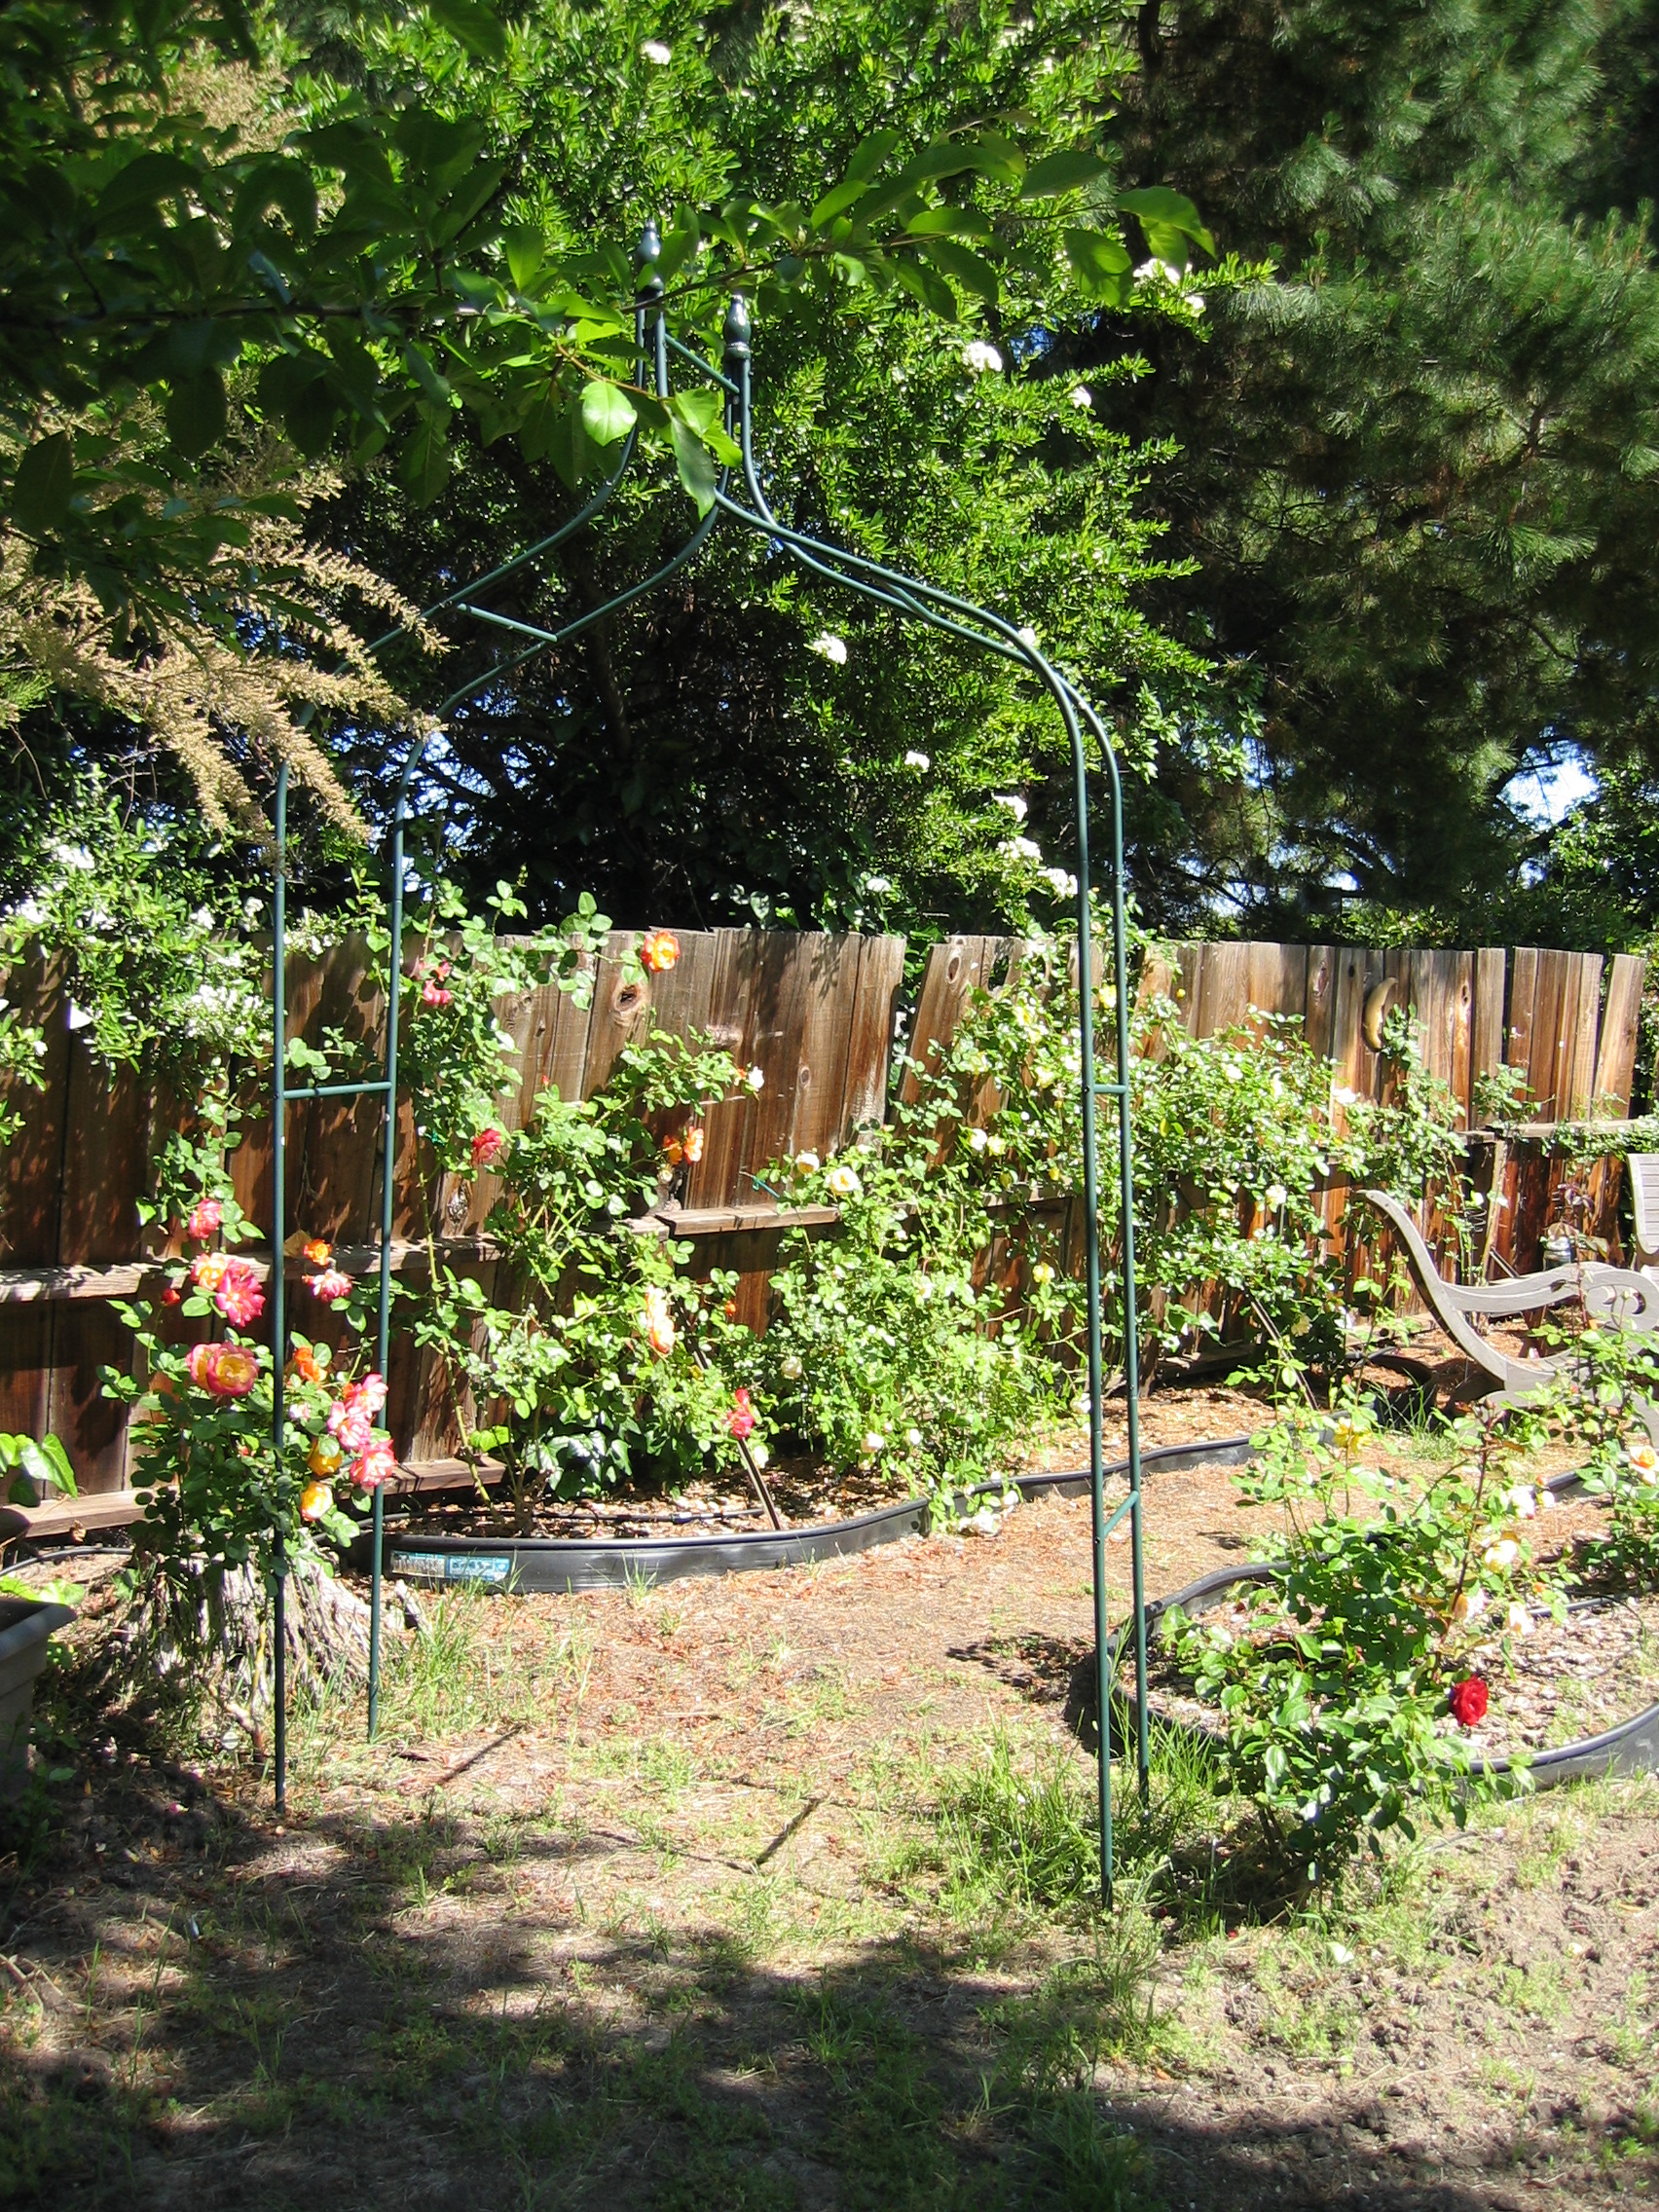
Iterative re-factoring of our garden


larry_headshot                                                  initial deck view

Larry Mellon                                                      Click here for more pictures

Game Developer, Computer Scientist,

    & the original Maggot Rancher


Michelle and I got involved in gardening as part of a home improvement project. We had bought a semi-fixed up fixer-upper, and the tangled masses of weeds everywhere were just another project at the start. But once we got into it, we found it was very relaxing to create order out of chaos and paint beautiful pictures with living landscapes! When we moved to California, we decided to get a place with a large yard to experiment with some gardening ideas. We're both learning junkies and take a lot of pleasure in the learning process. So rather than do the practical thing and simply read a few books on gardening, we decided to do a series of experiments and see what worked best.

As the years went on, I saw more and more similarities between the incremental re-factoring we were doing of the garden space with the re-factoring we were doing for the massively multiplayer game, The Sims Online. Basically, it came down to you don't really know if the spot is"enjoyable" until you can actually have people in that spot, and see if they enjoy it! So the optimal approach is to invest in cheap, rapid prototypes that one can experiment with, in actual use conditions, and incrementally grow those prototypes into a finished system. This is a little different from how prototypes used to be viewed. The prototypes were little, throwaway experiments; You were supposed to take the knowledge gleaned from prototypes and see that into a properly engineered final system. But this rarely gets done, as time runs out and prototypes become what you ship. Additionally, there is an instinctive reaction to not walk away from something that sort of works. What we found with The Sims Online is that we could use automated testing to keep the prototypes stable enough for experimentation, even while dozens of people were continually modifying the system. Then the engineering and test times being accelerated, we could refactor for stability and scale, in both the live servers and the code base. And because it let me kill two obsessive birds with one stone, I decided to work on a book about iterative innovation in games and gardens! With that in mind, the following pictures might make more sense:-)

The garden breaks down into several zones, each with a different look and feel. I will add some more pictures of the zones, but basically we orient beds around seating areas: the main deck, the side deck, the central zone, the two cottage zones, the Rose Room zone and the plum tree zone.

The regions are first determined by a visual look & feel test, where we looked for basic coolness but also uniqueness: we didn't want every zone to feel the same. Line of sight and sun/shade variables became quite important in the later phases: testing had shown the sun is just brutal in California. If you plan to spend a lot of time outdoors, you'd better have a lot of shade!


Back To The Top


 the original deck  new deck, level one
the first version of our deck!
20' x 10' for the main segment.
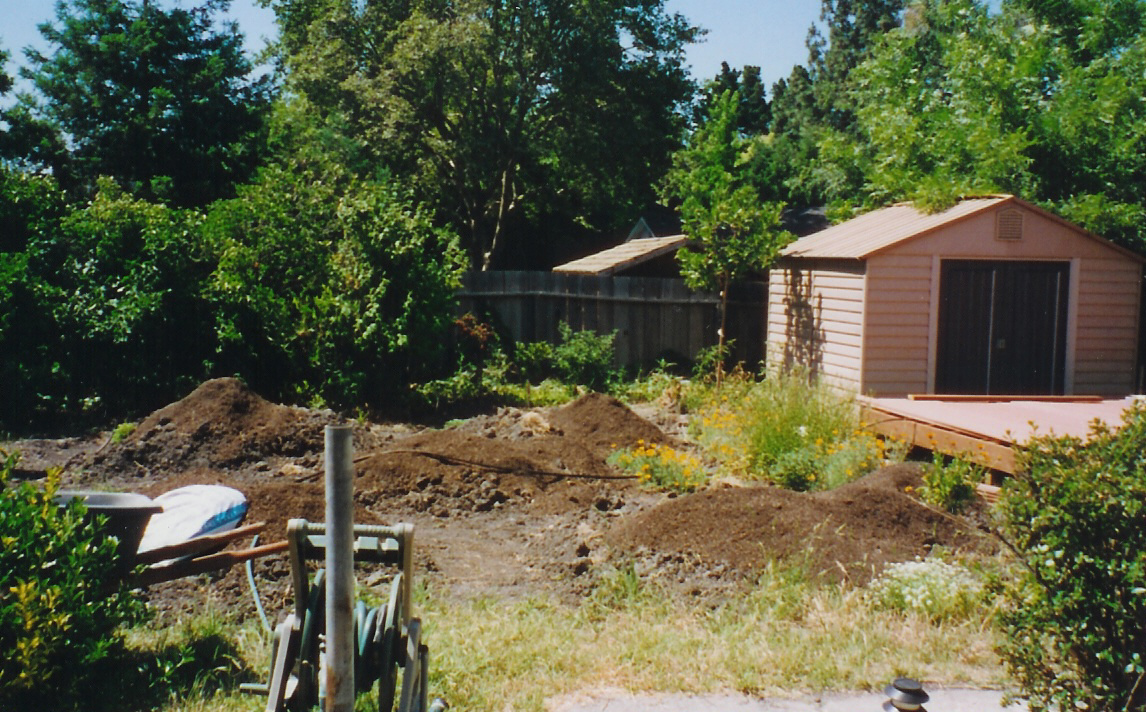
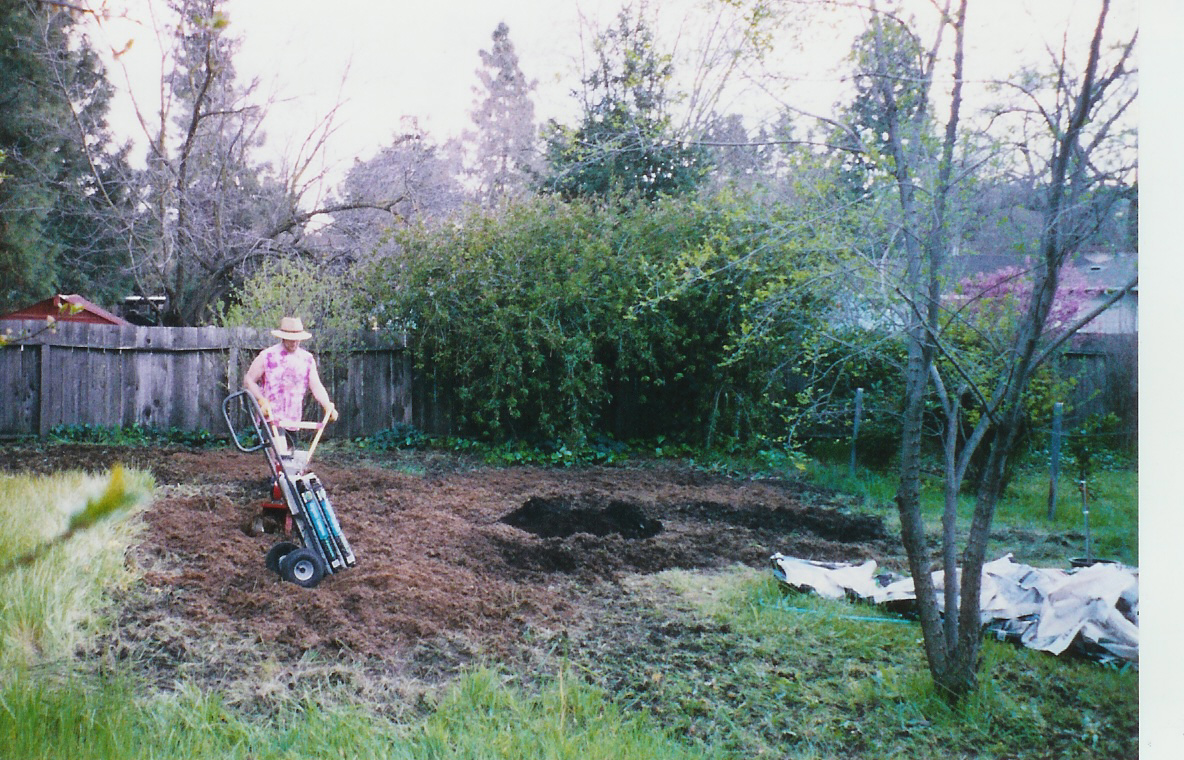
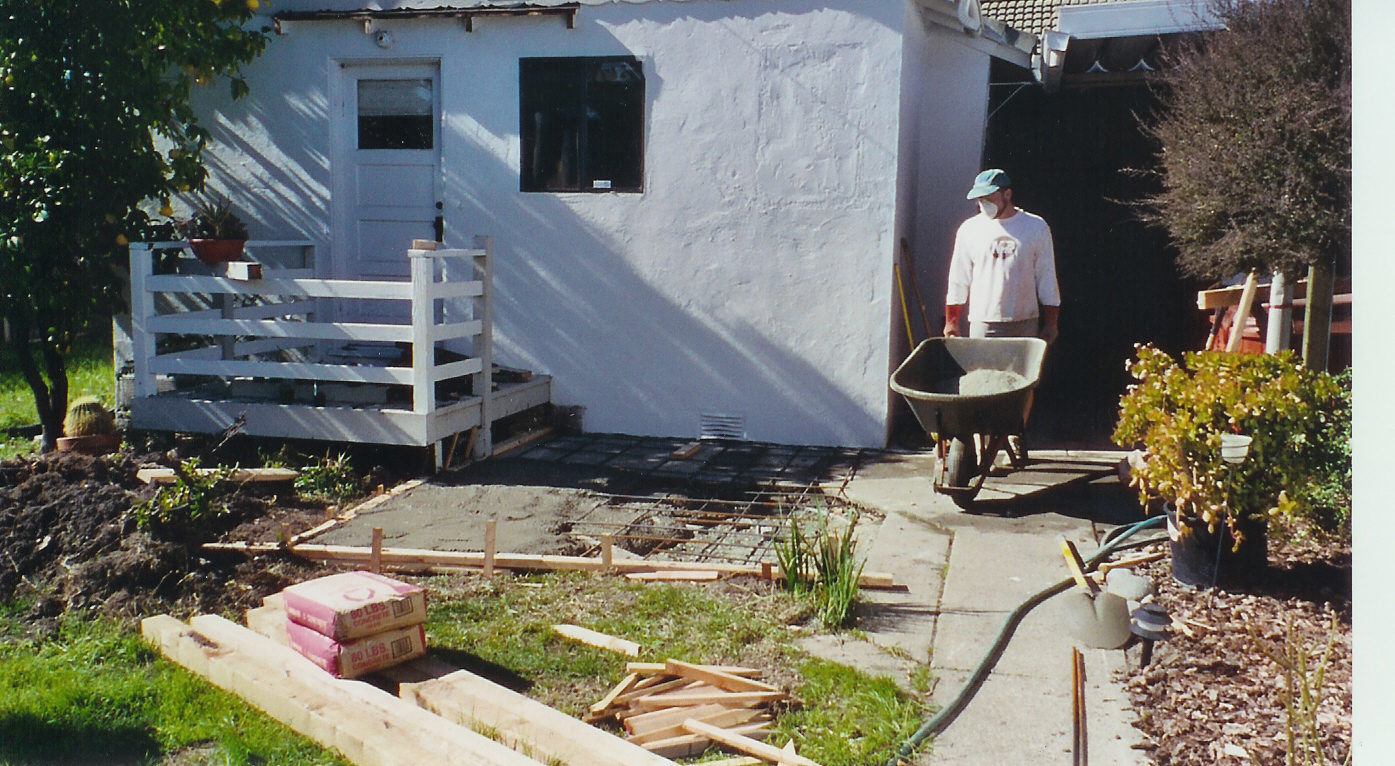
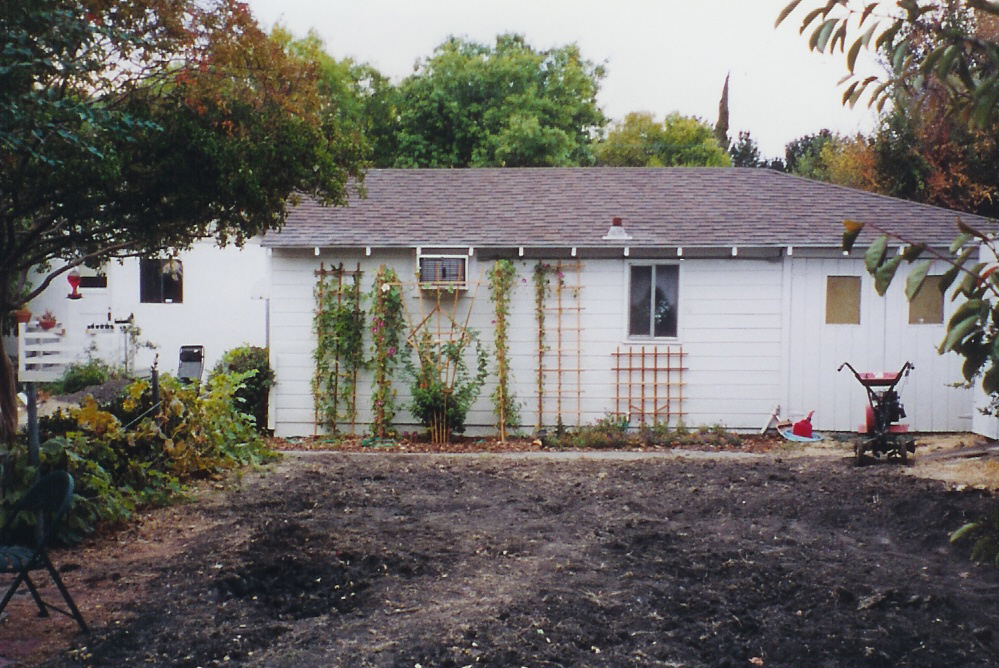
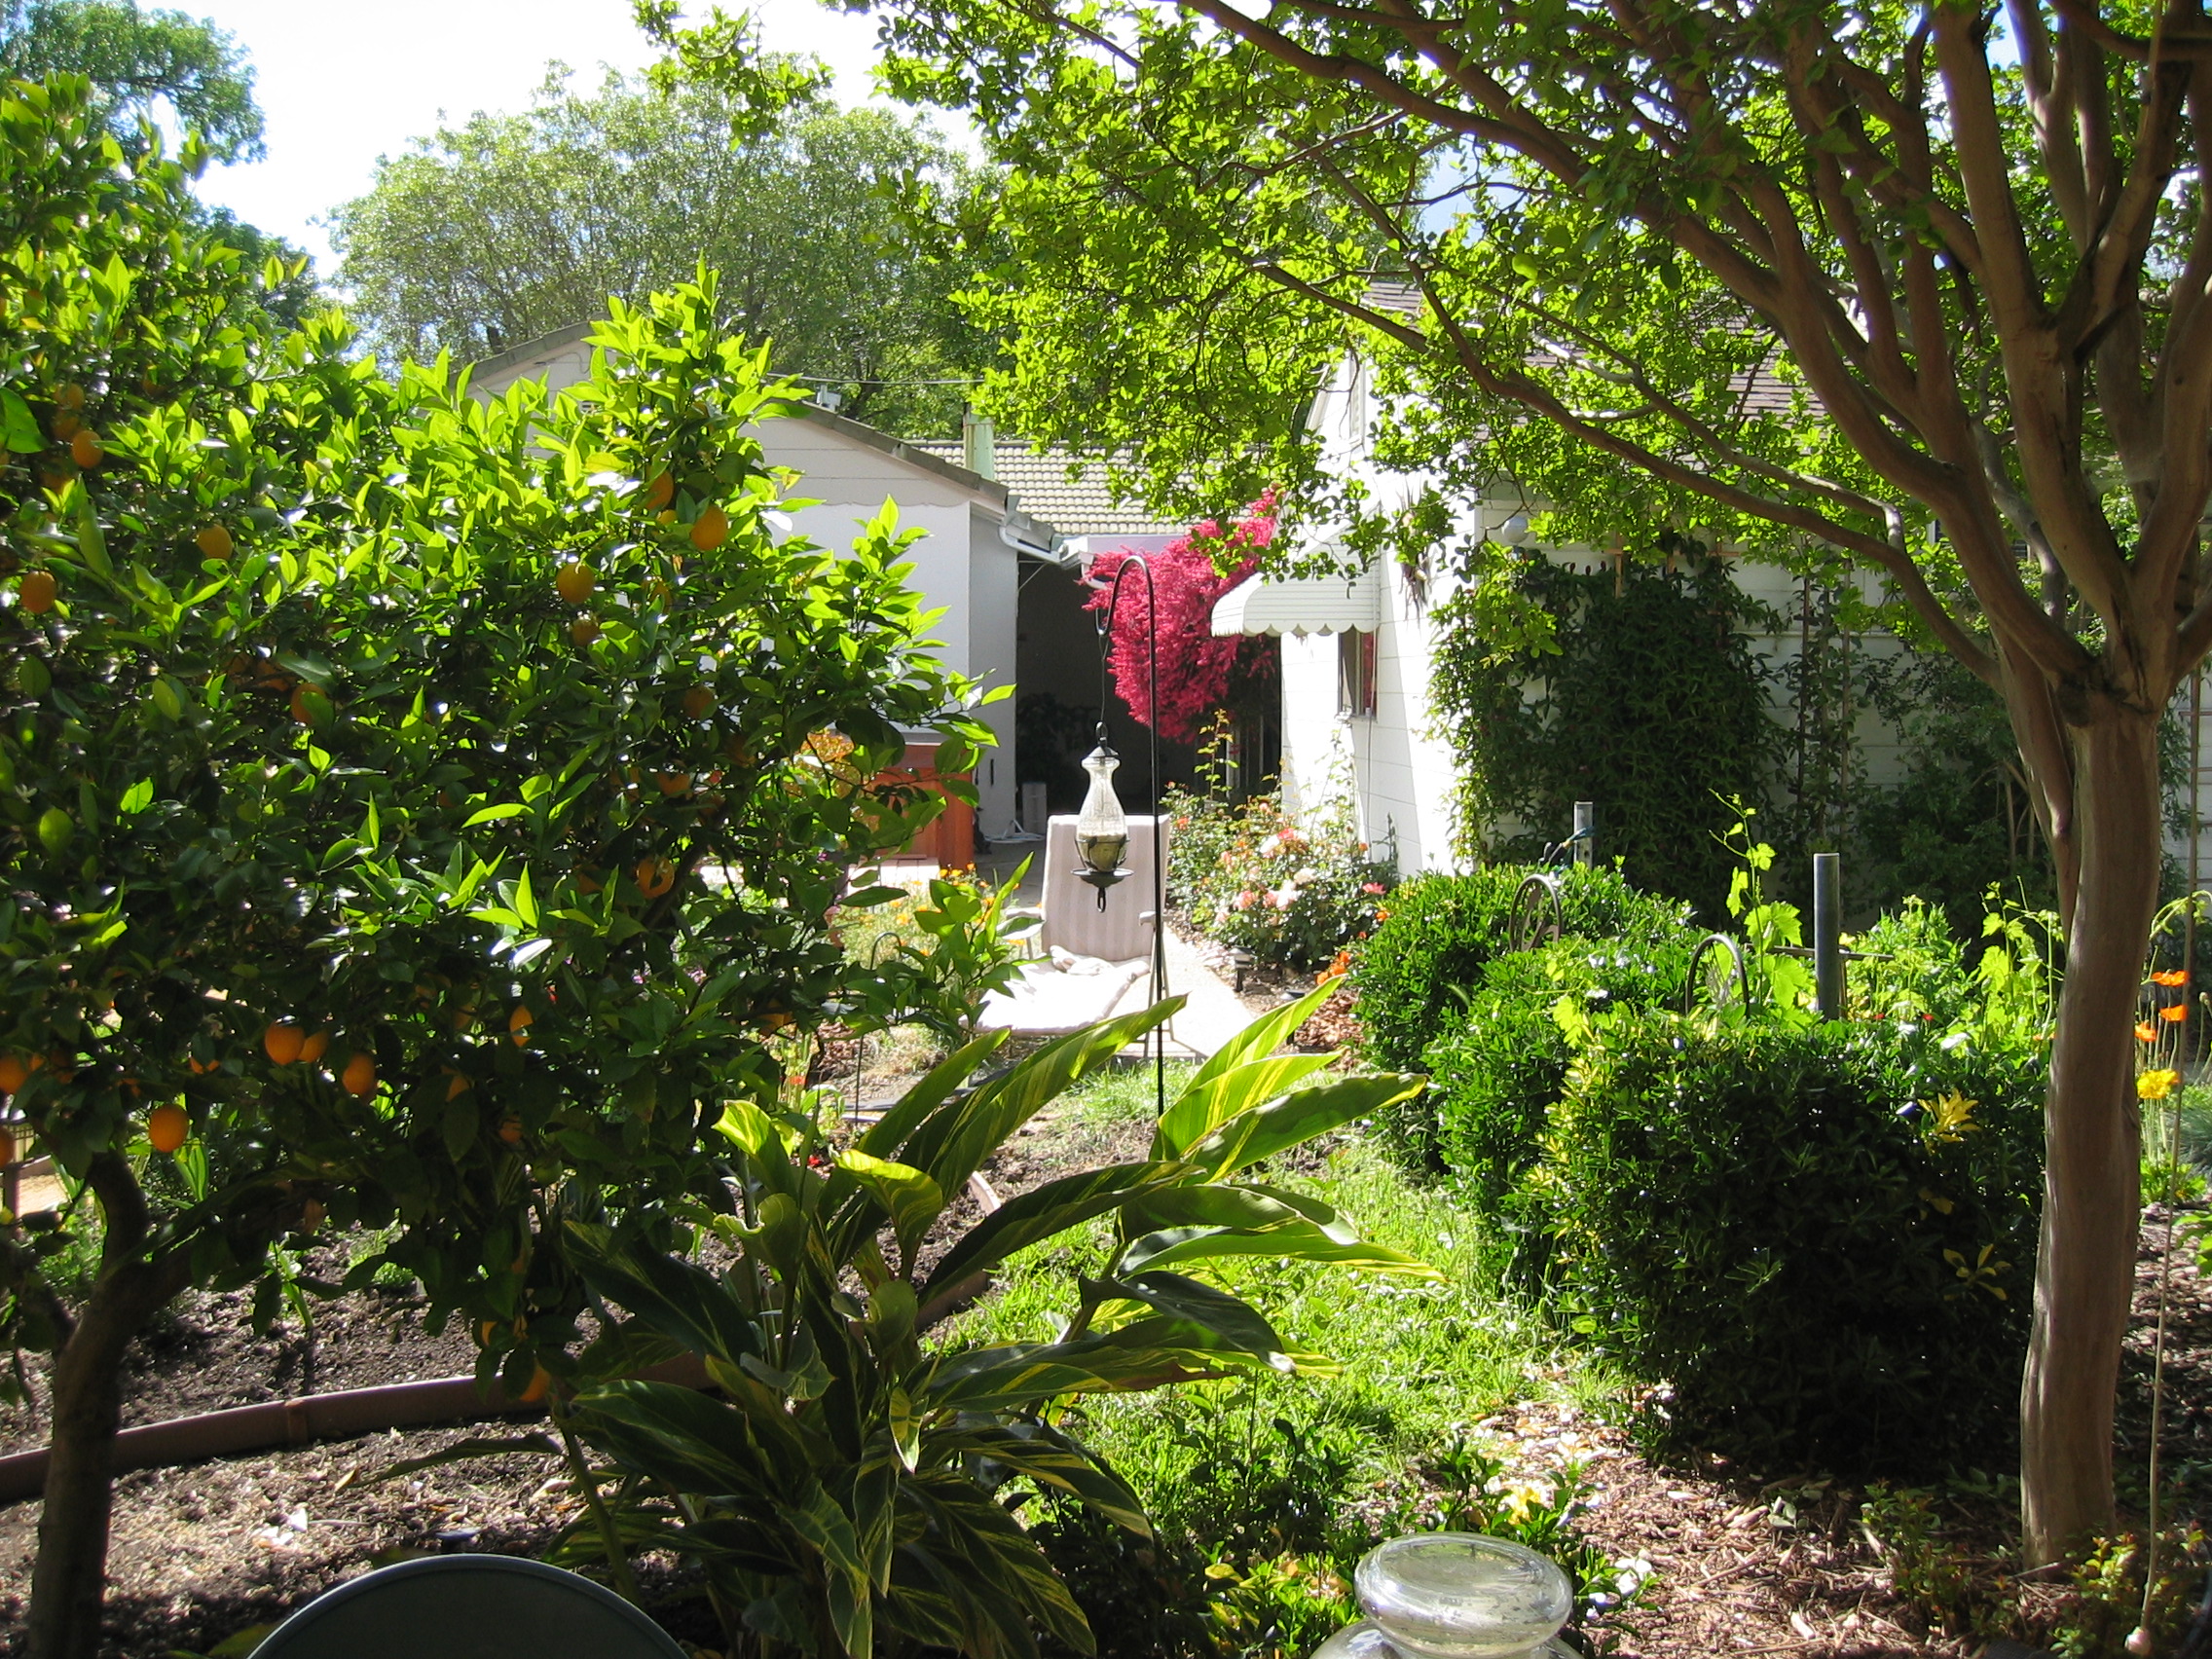
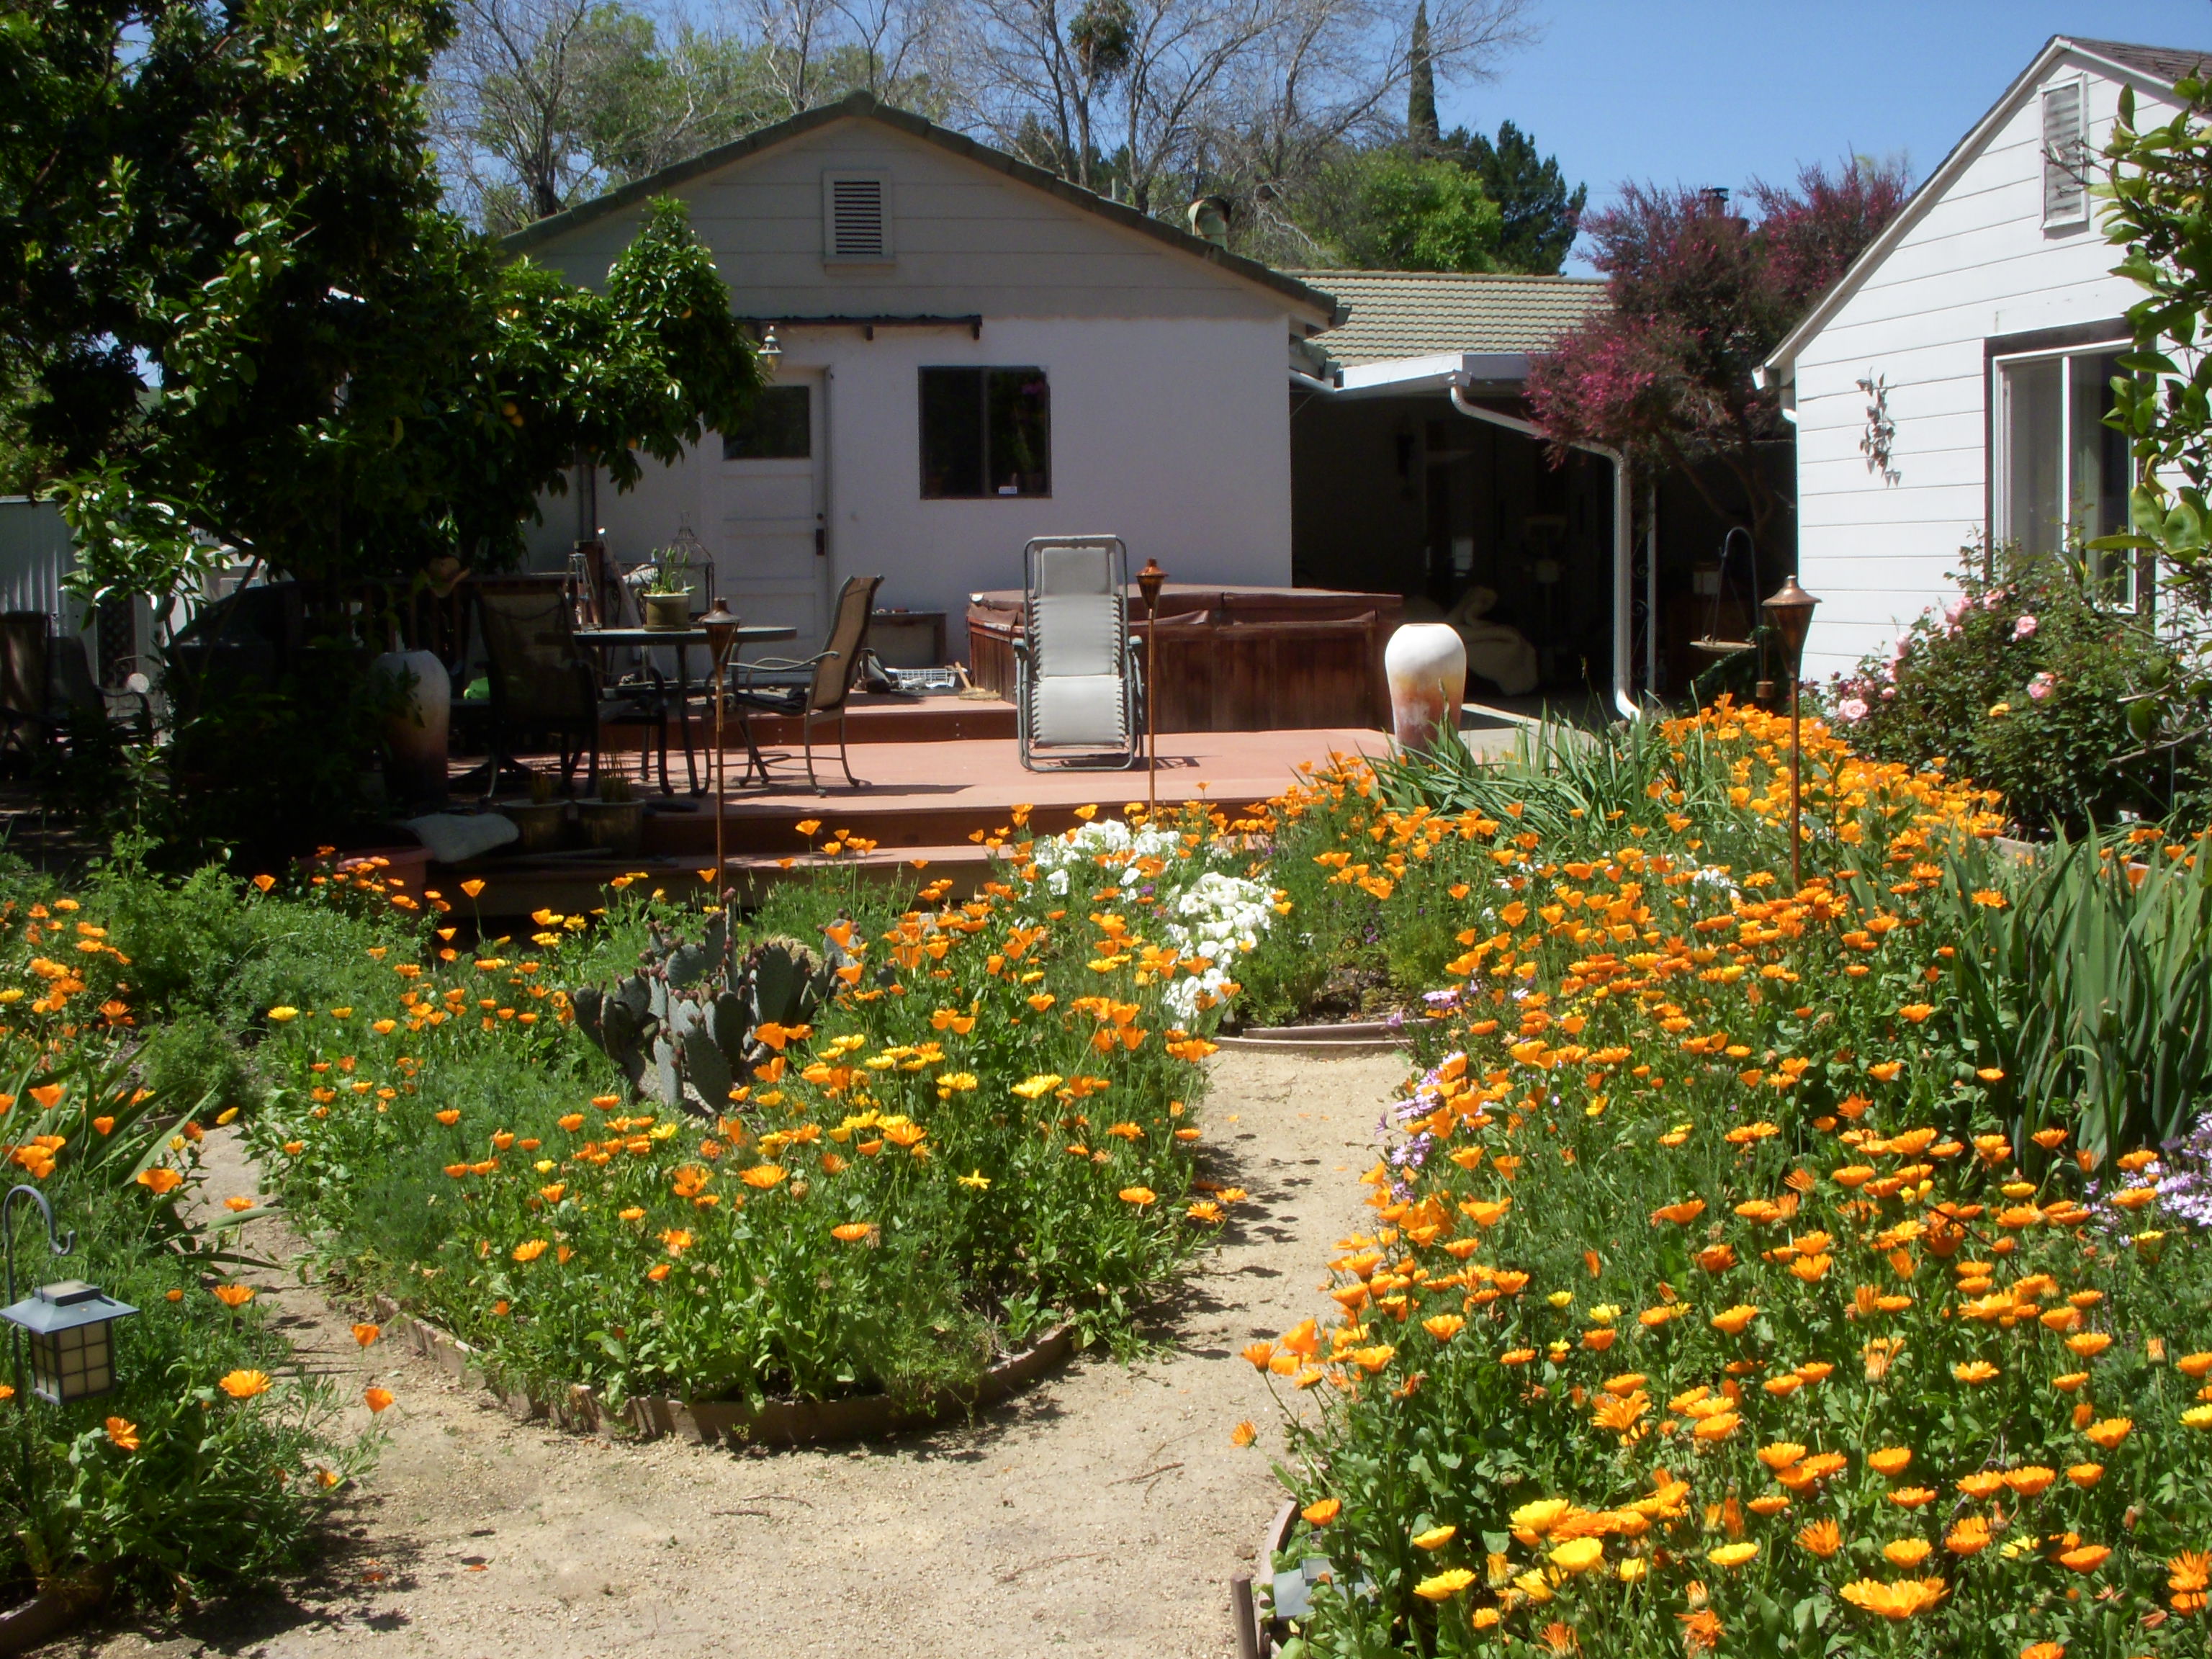
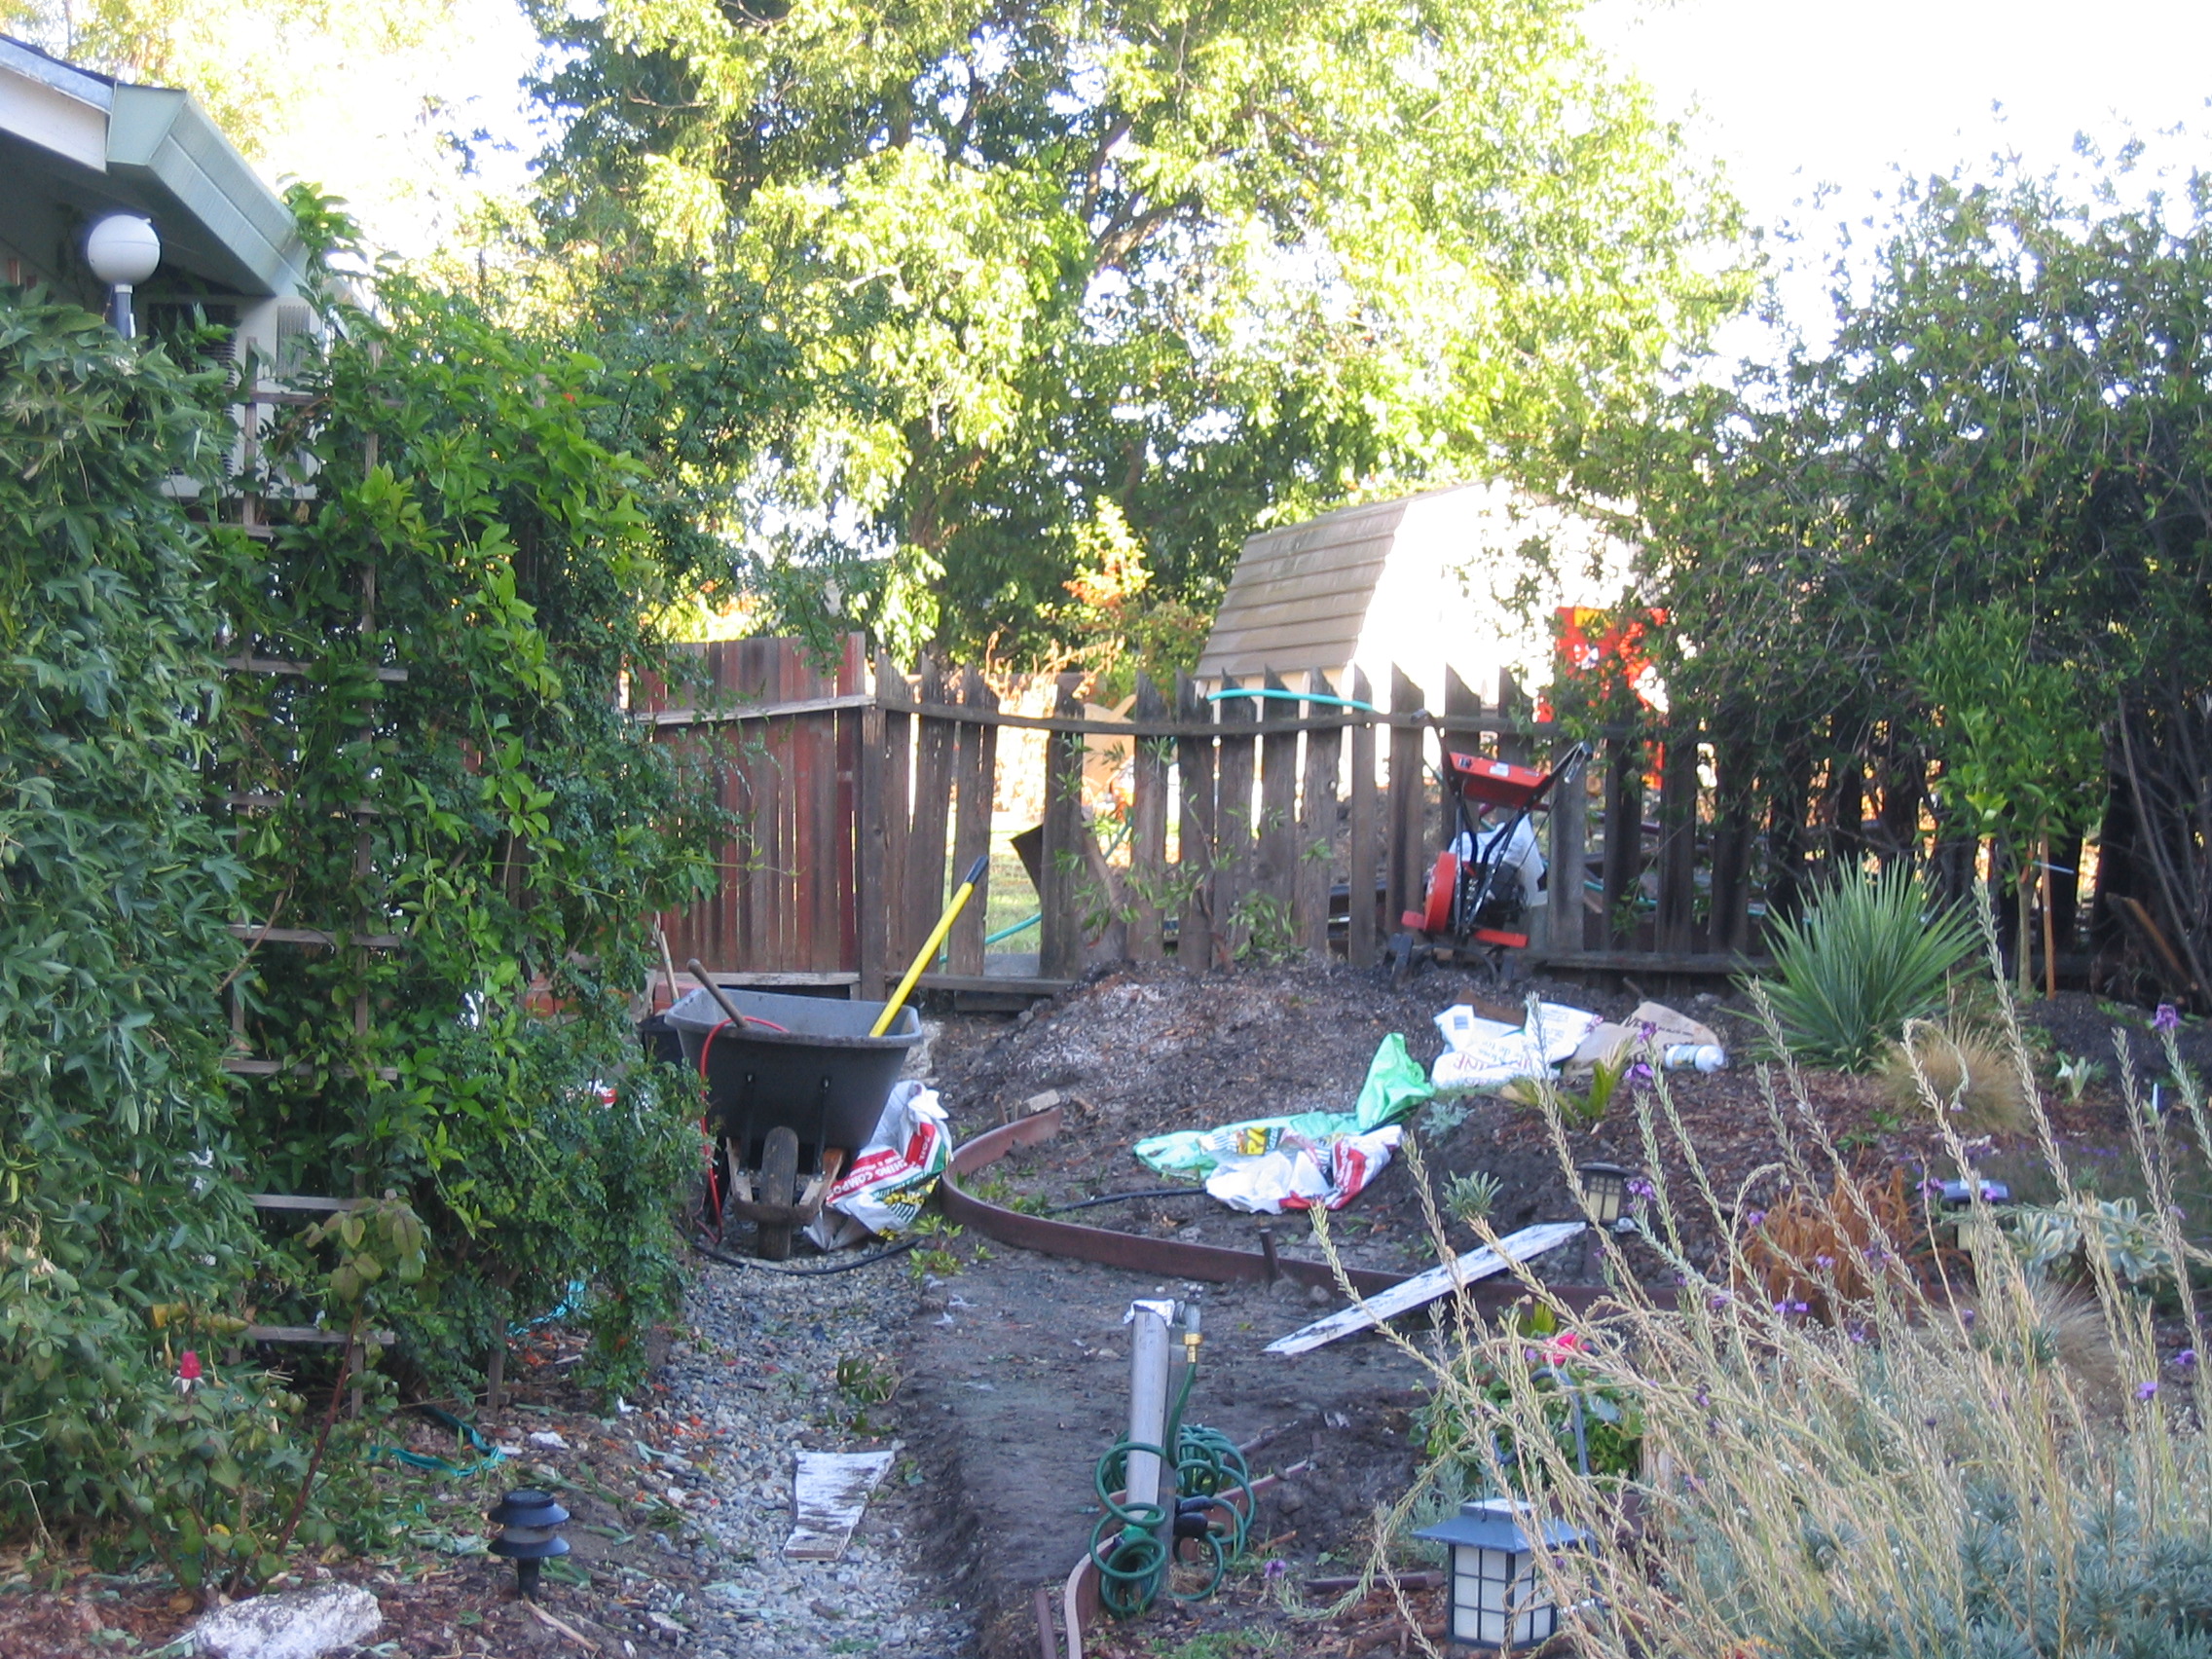
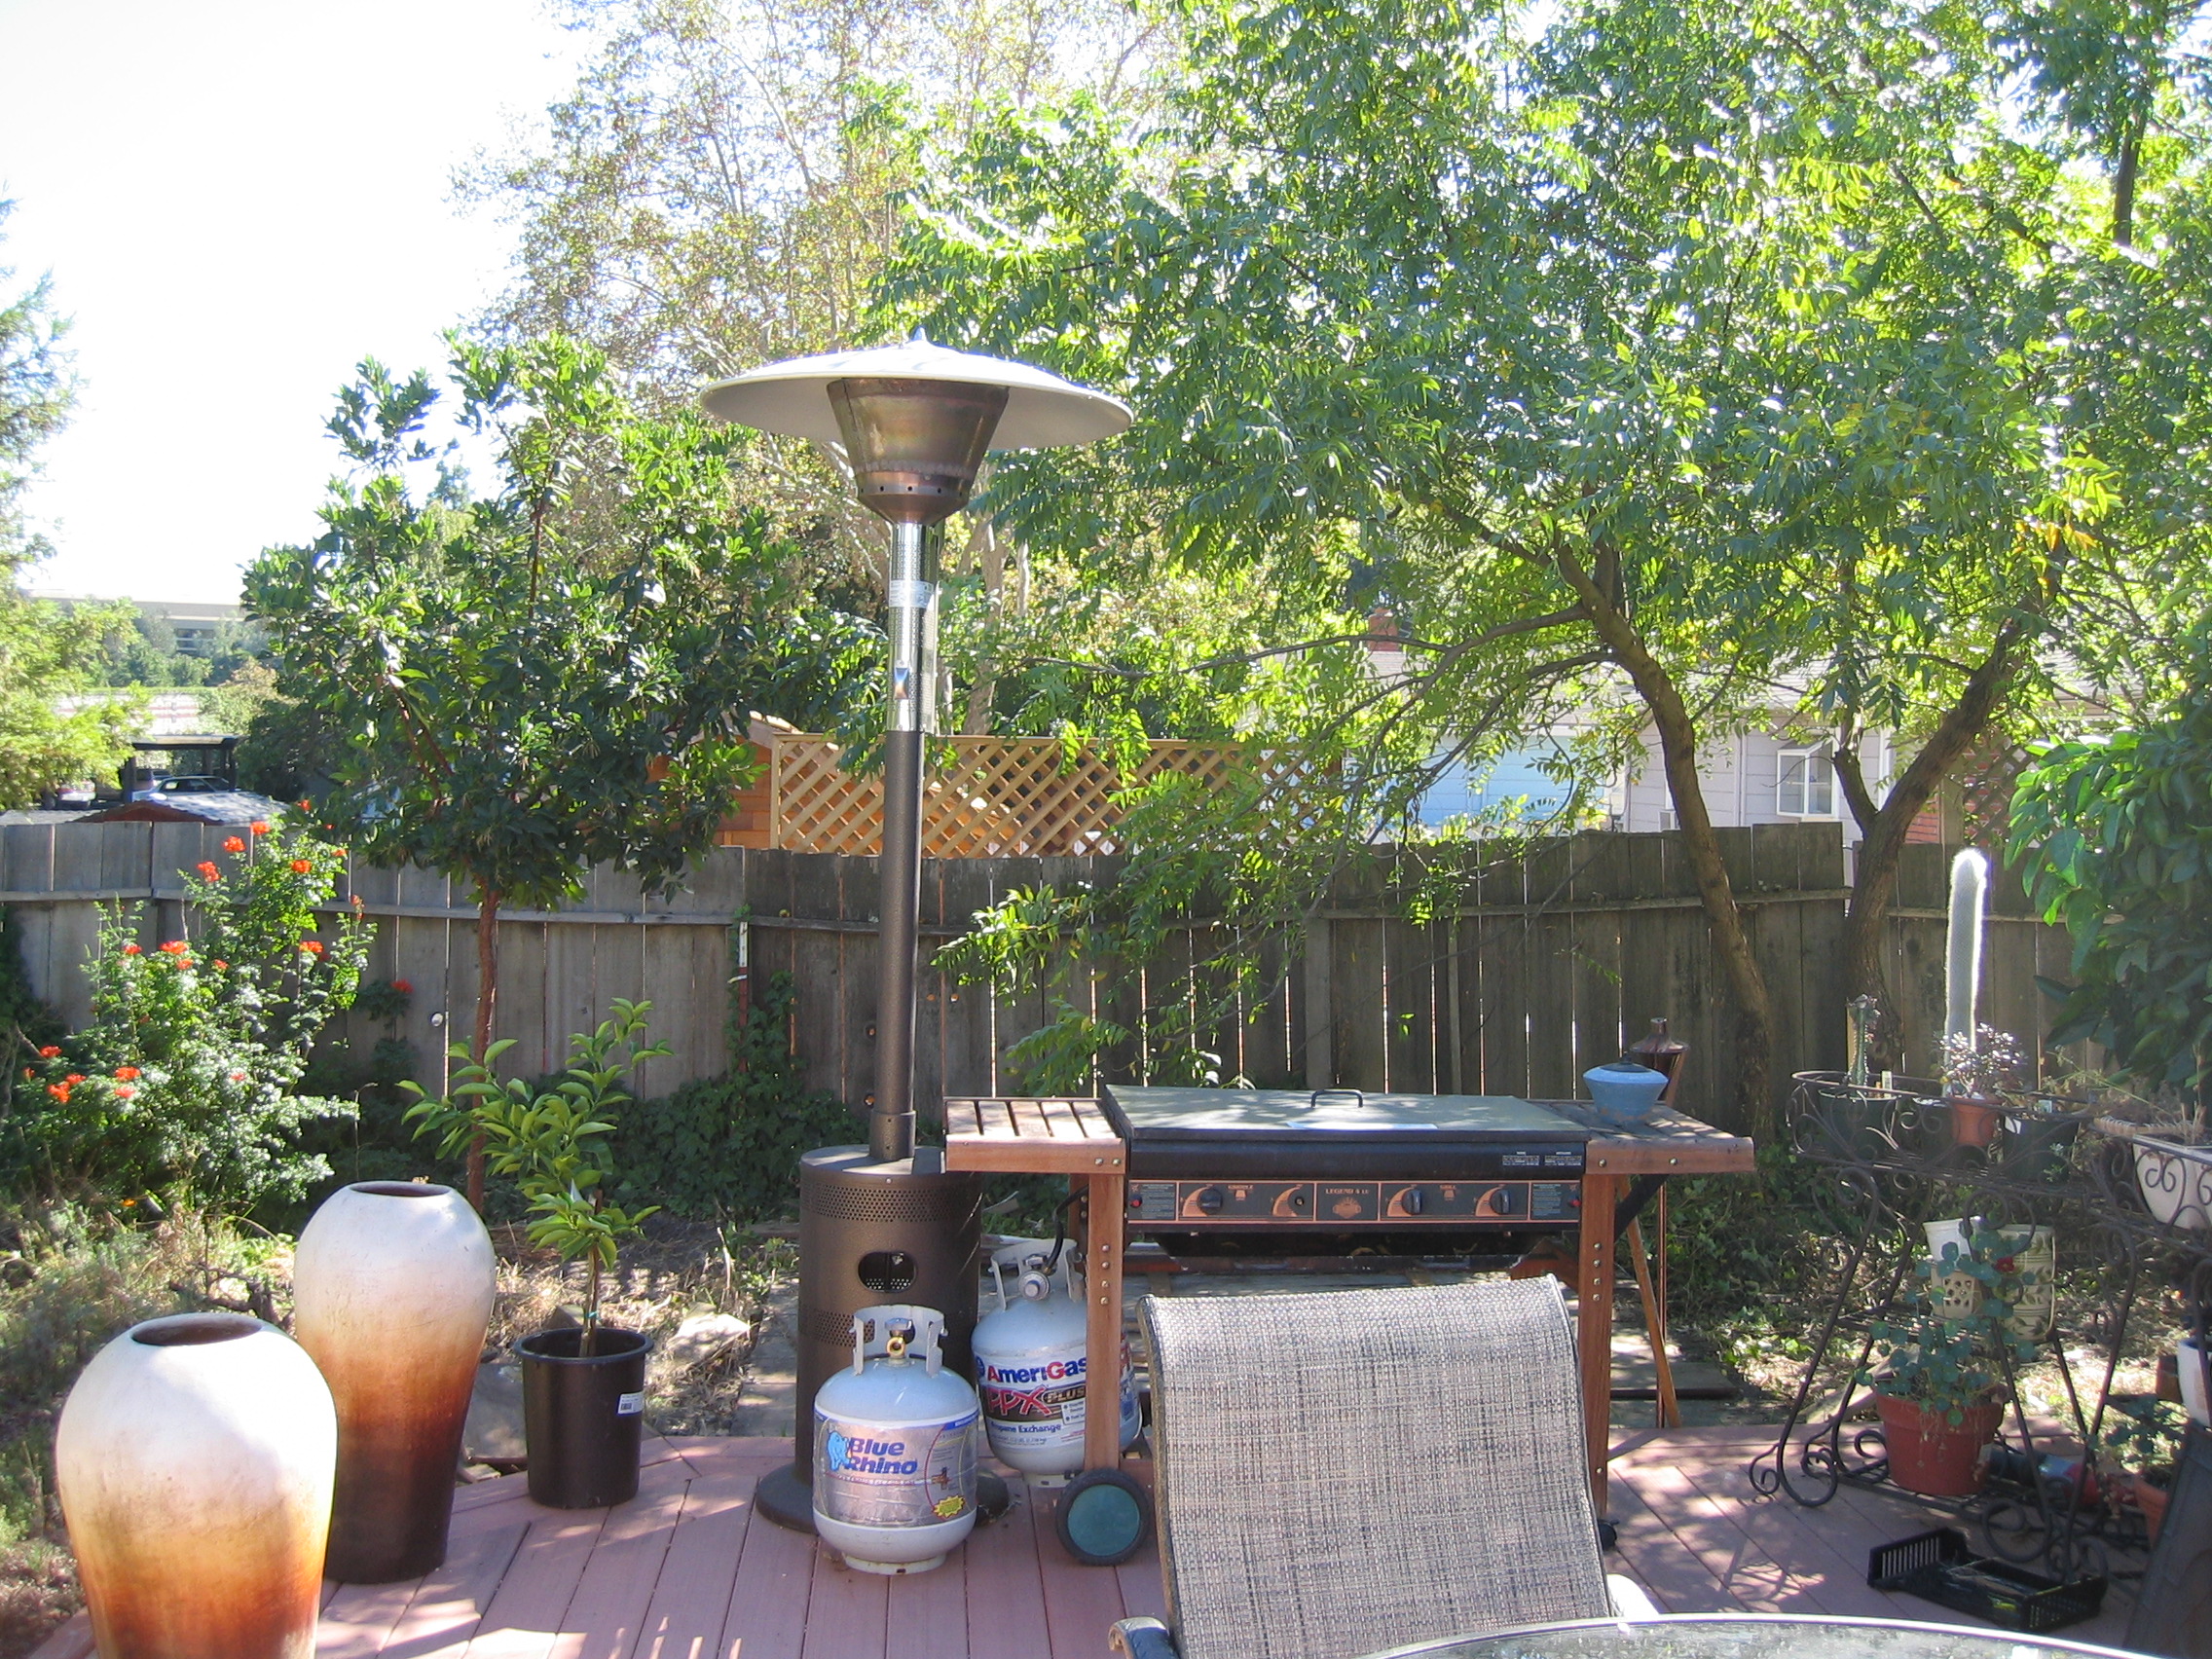
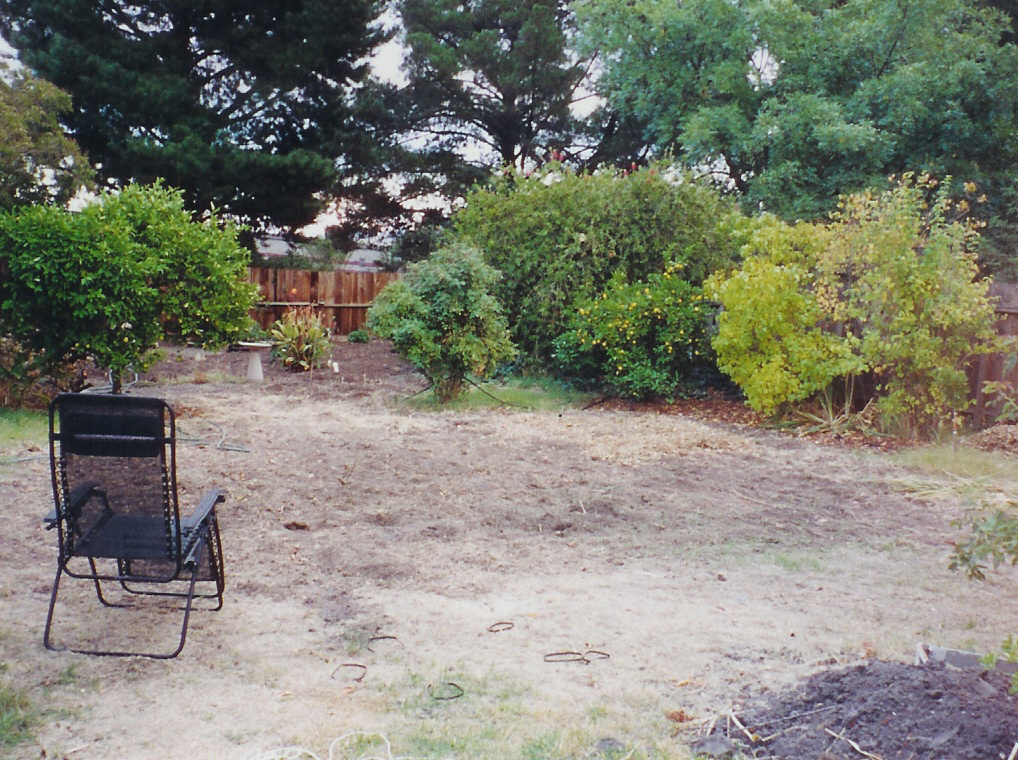
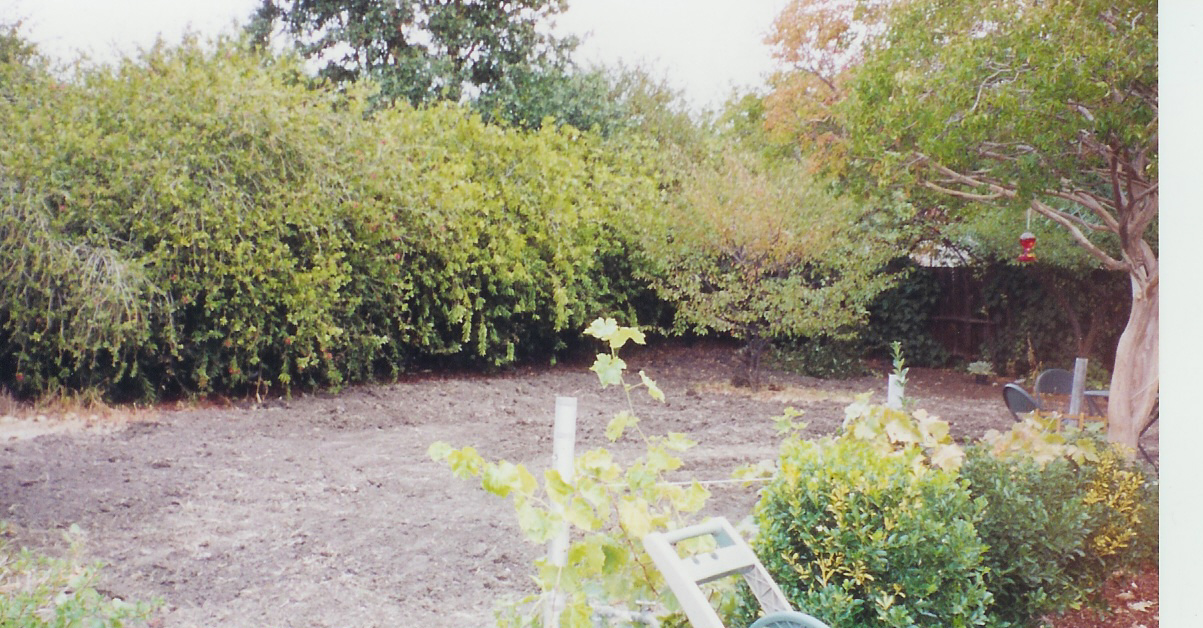
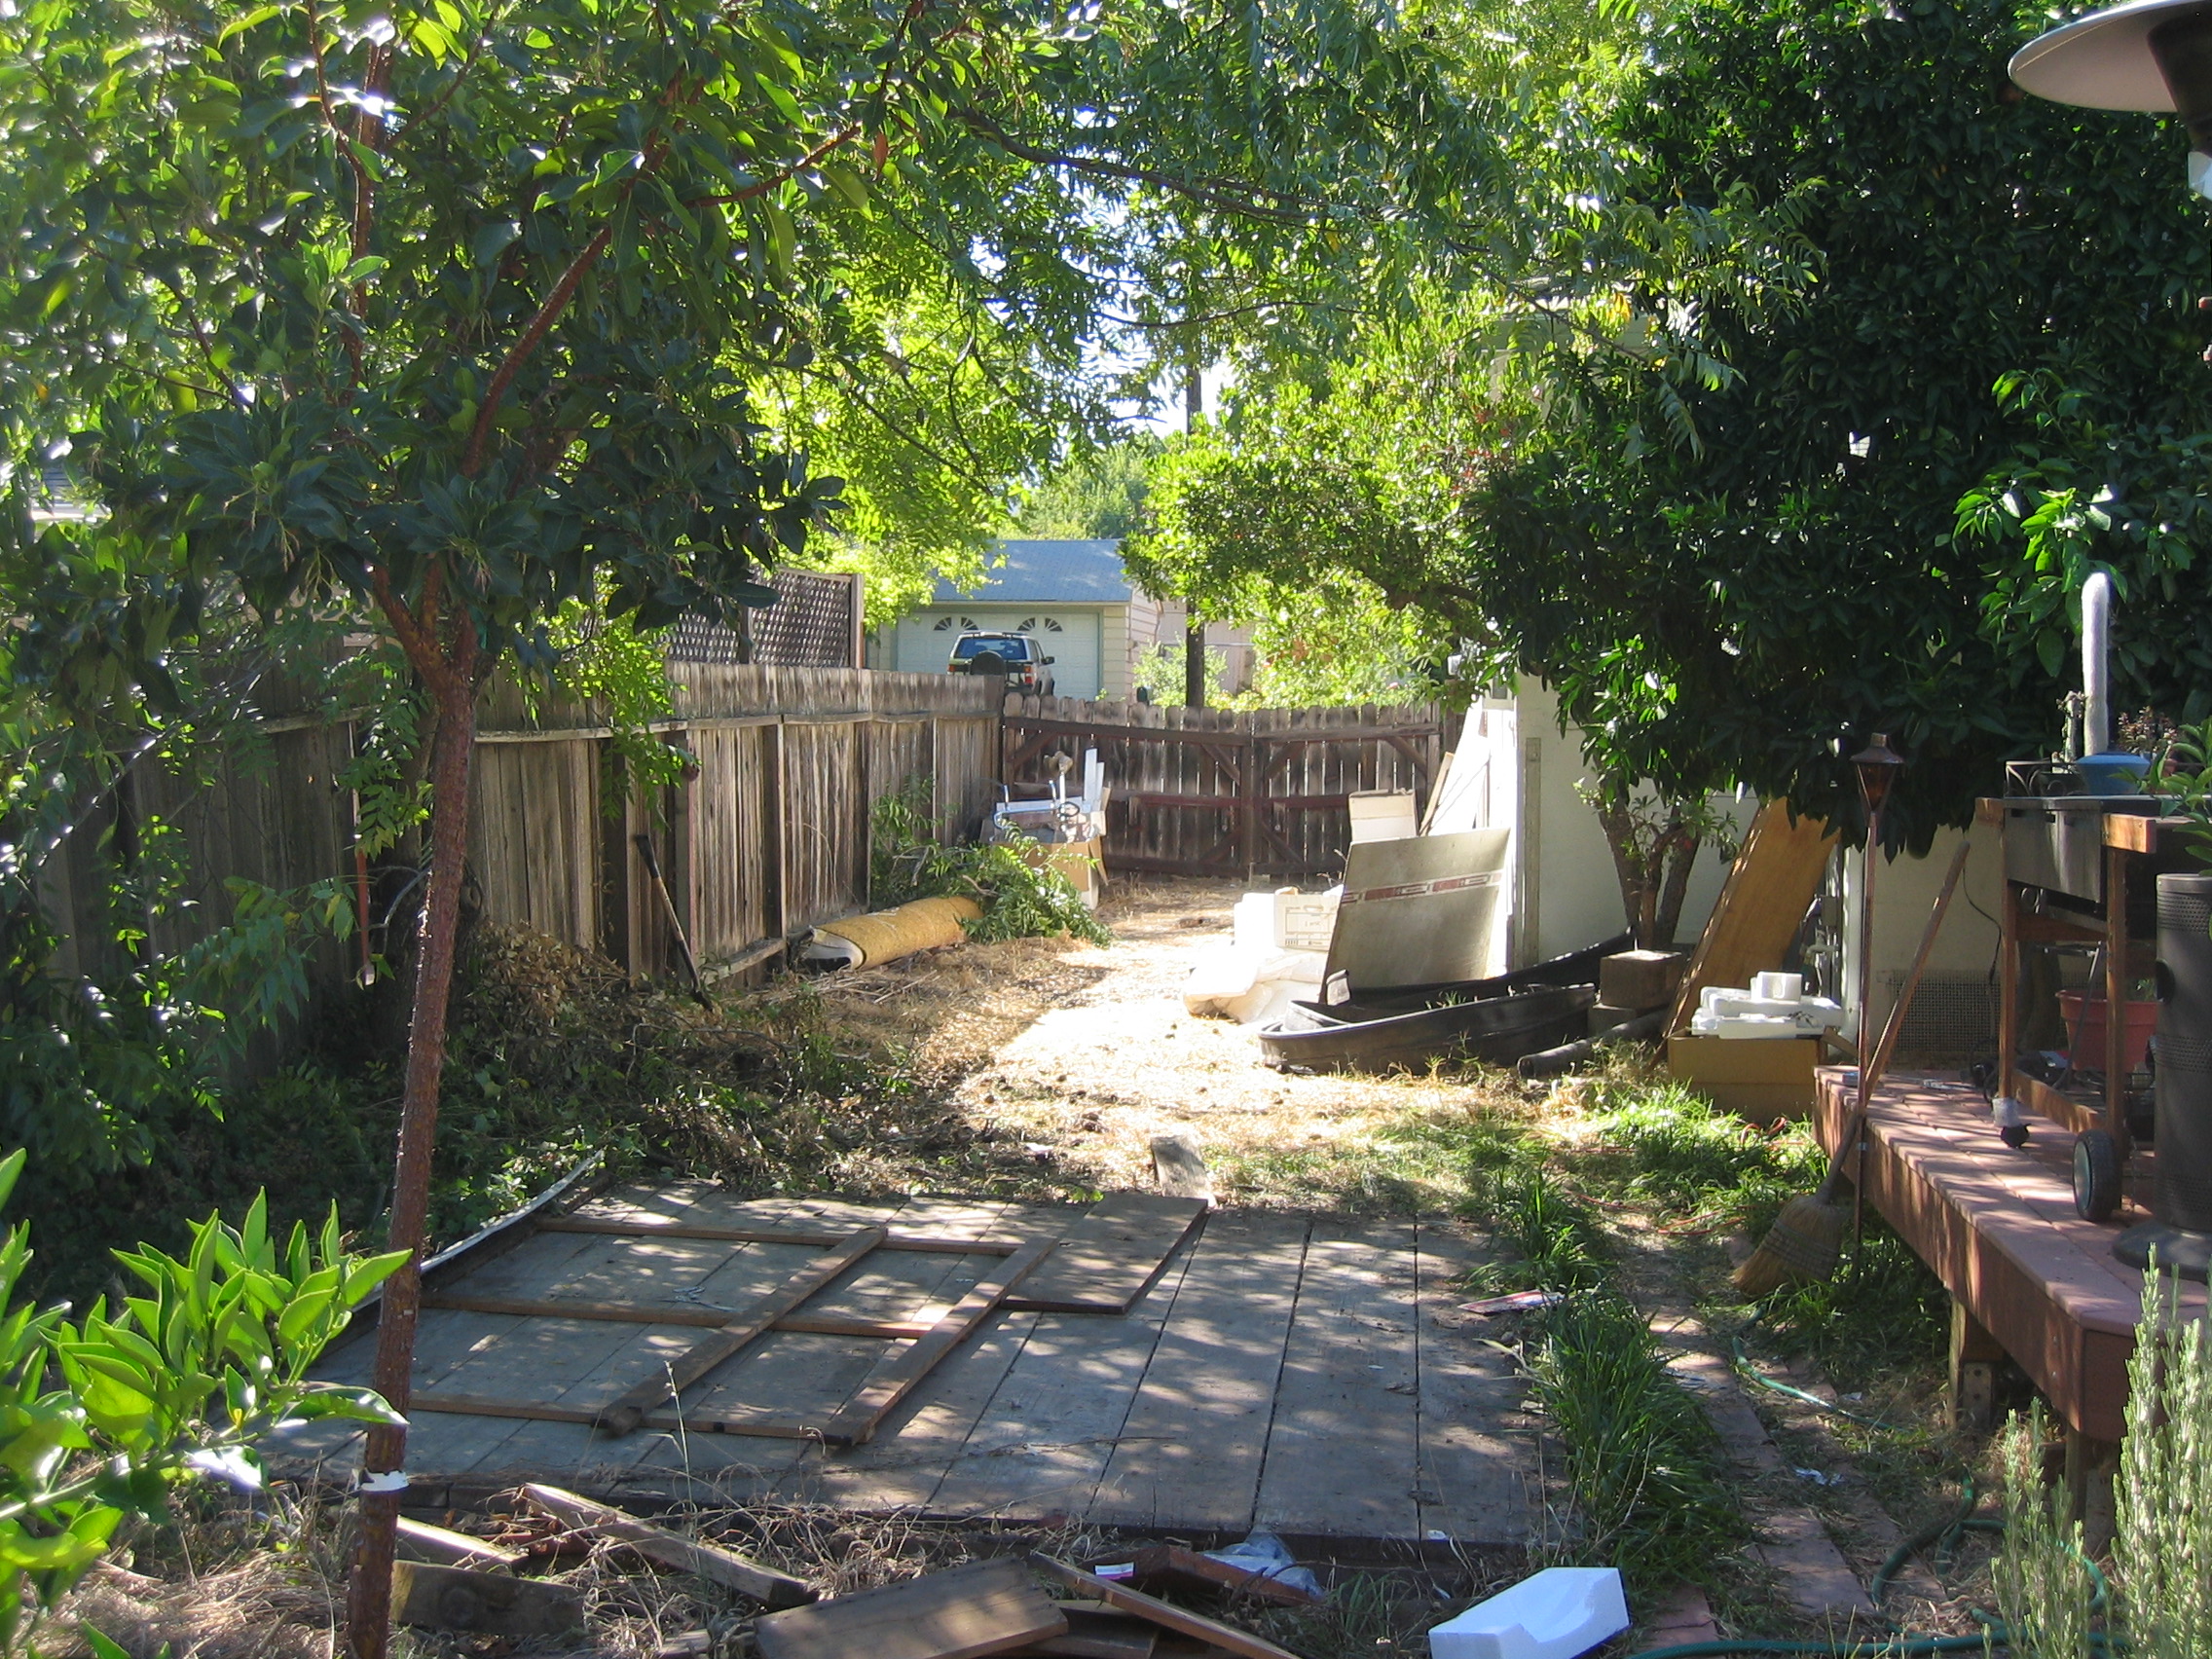
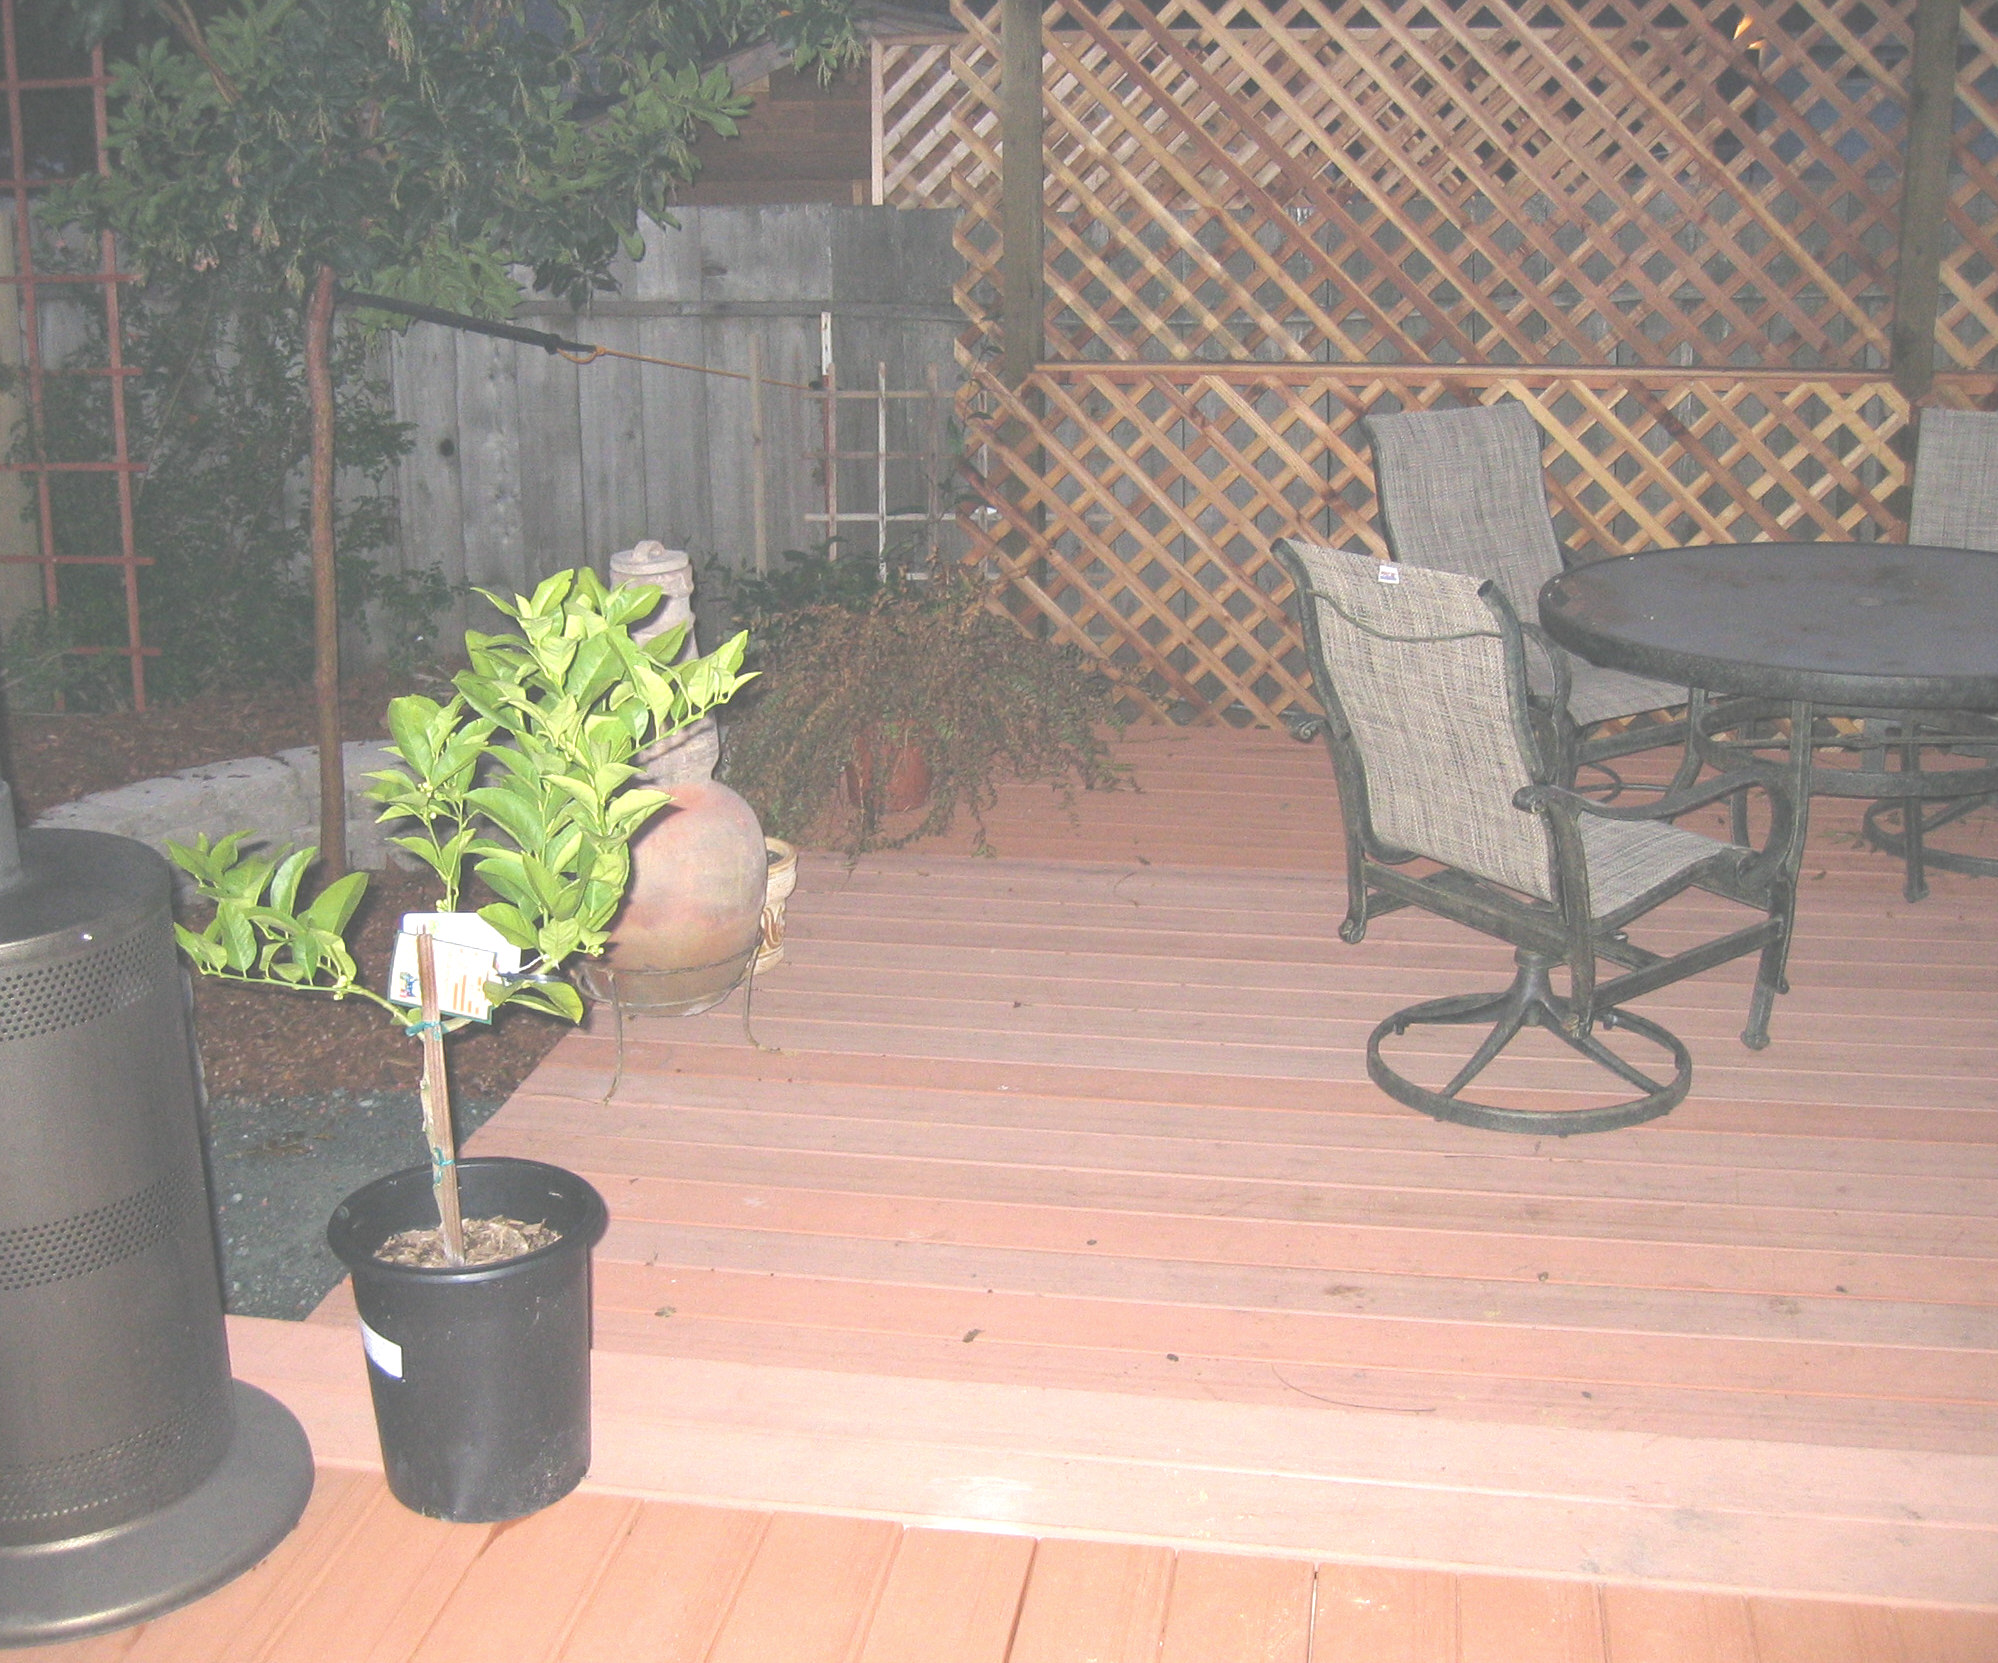
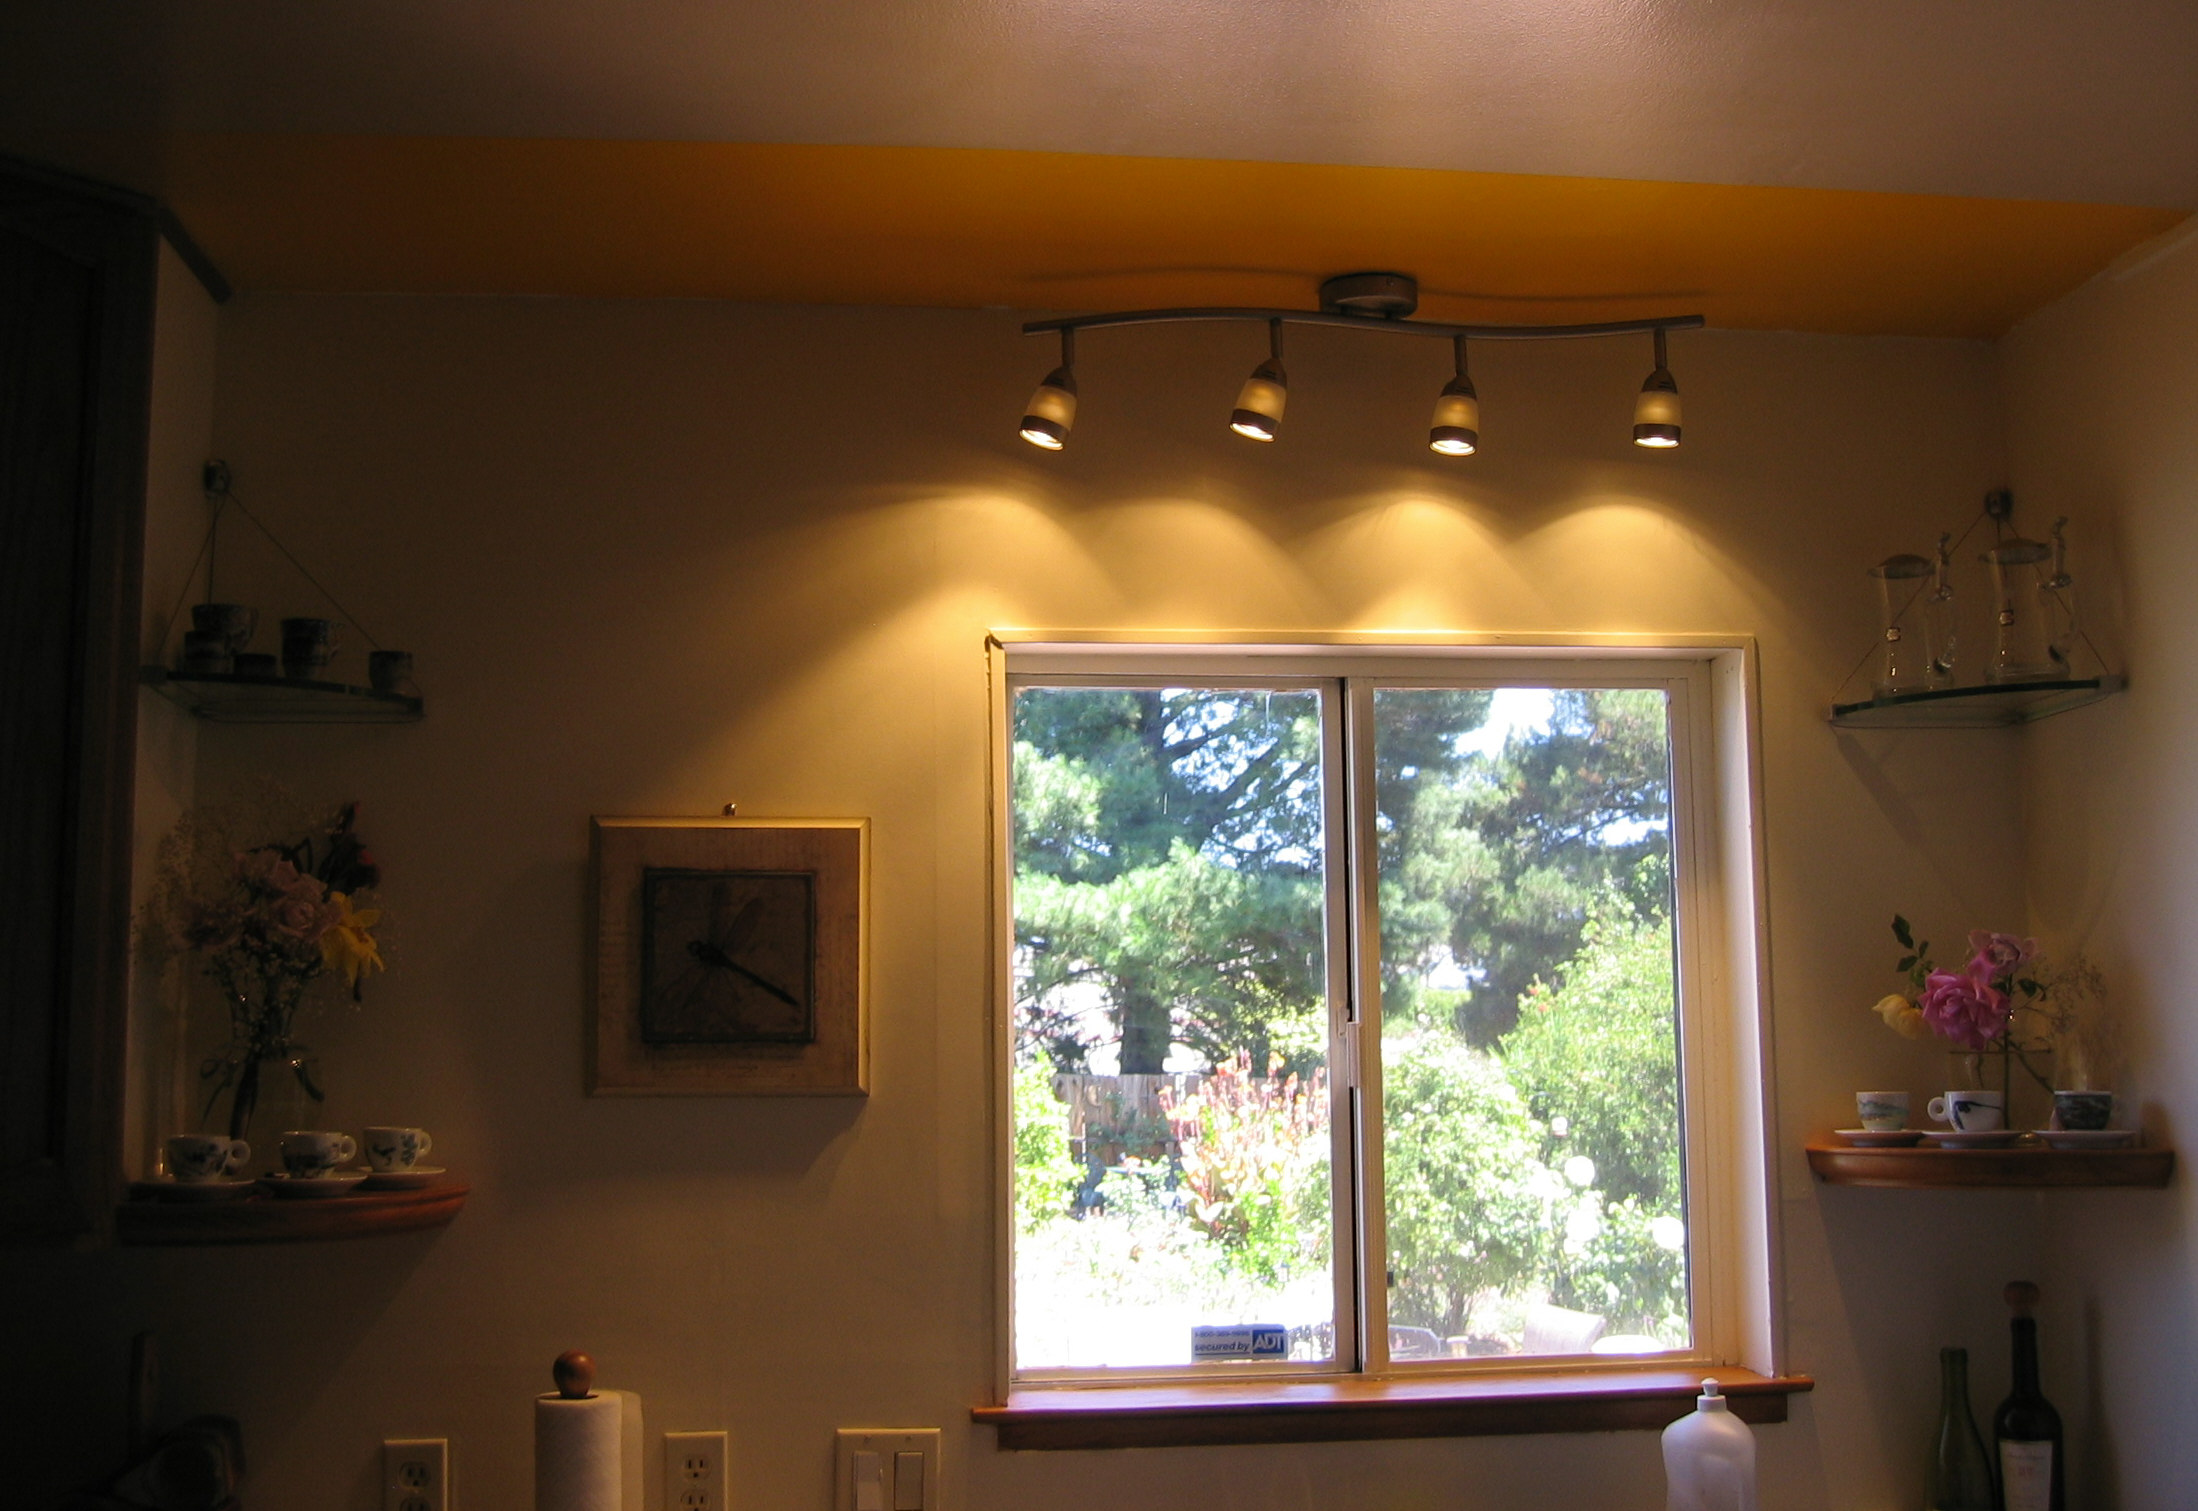
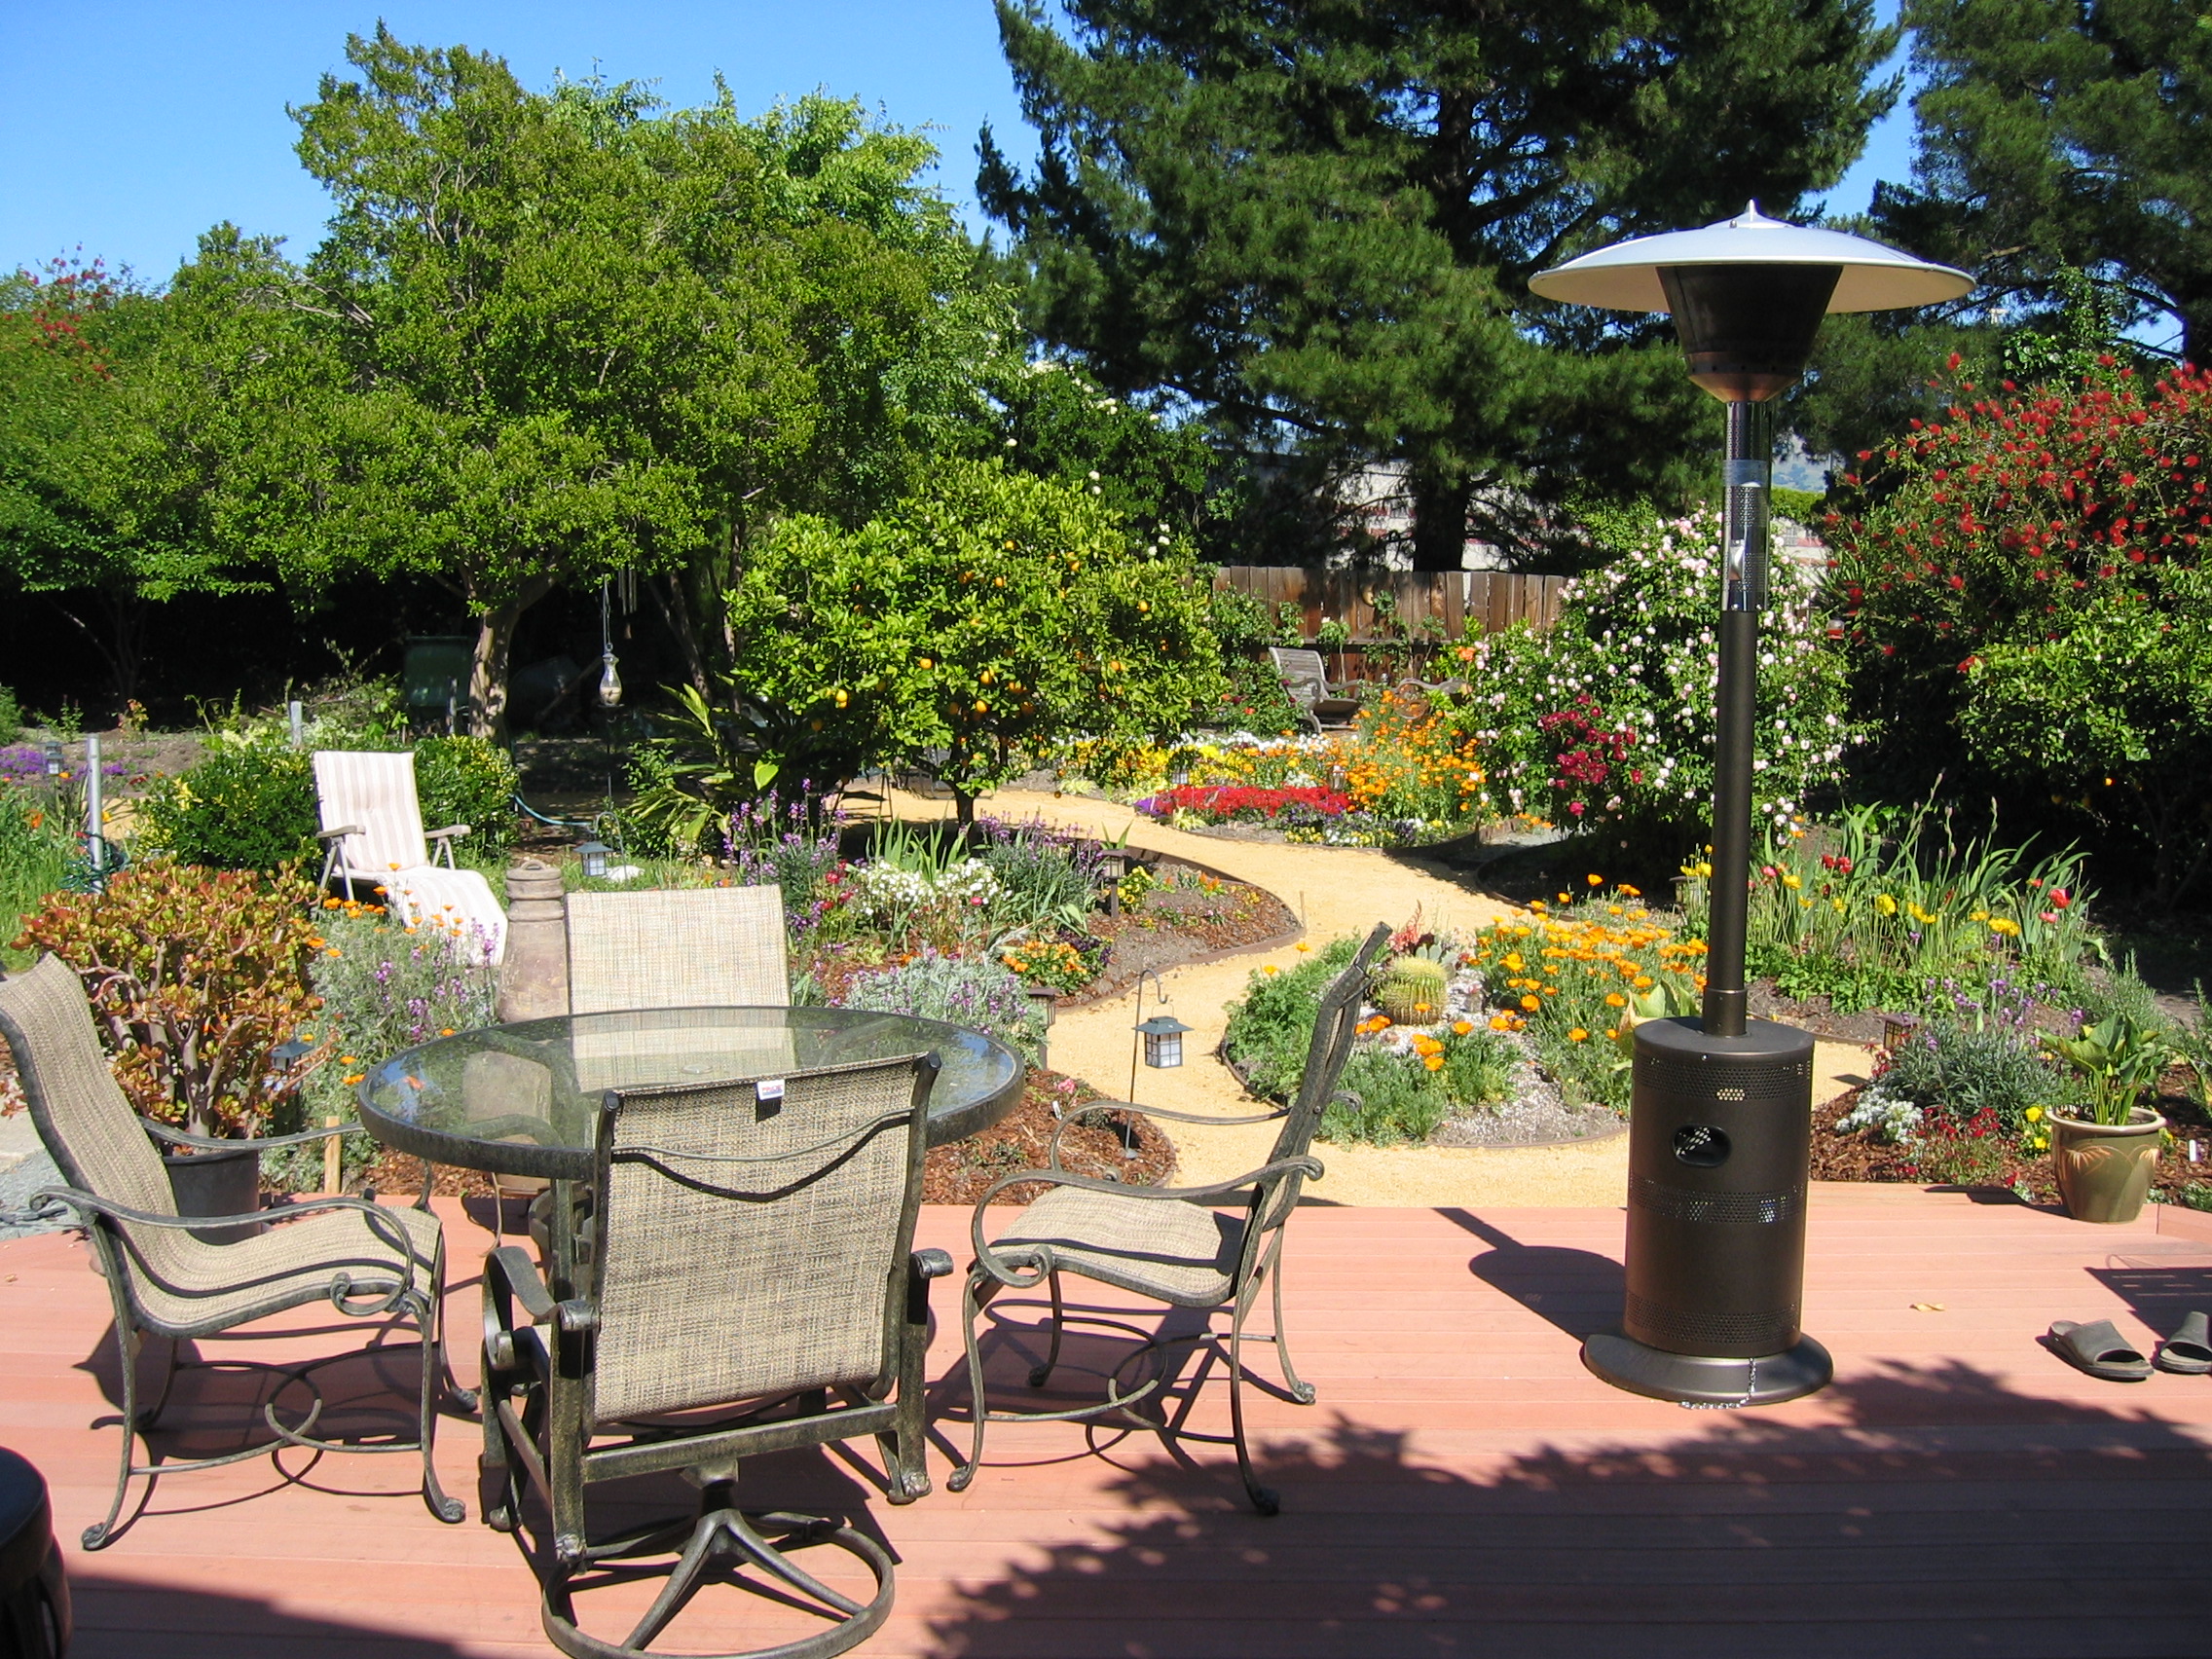
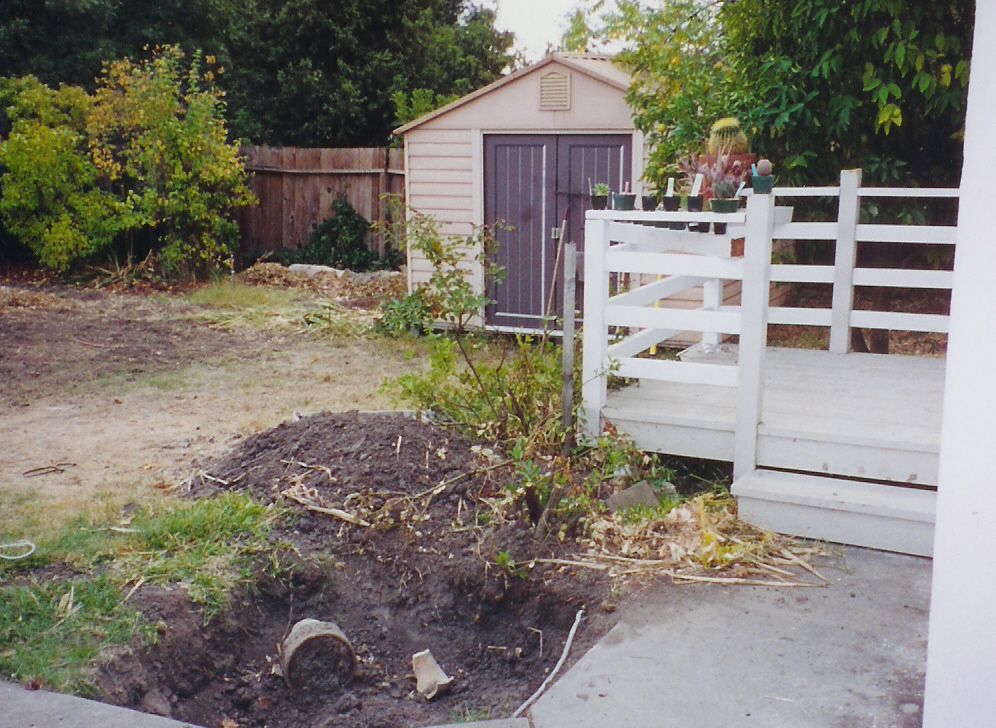
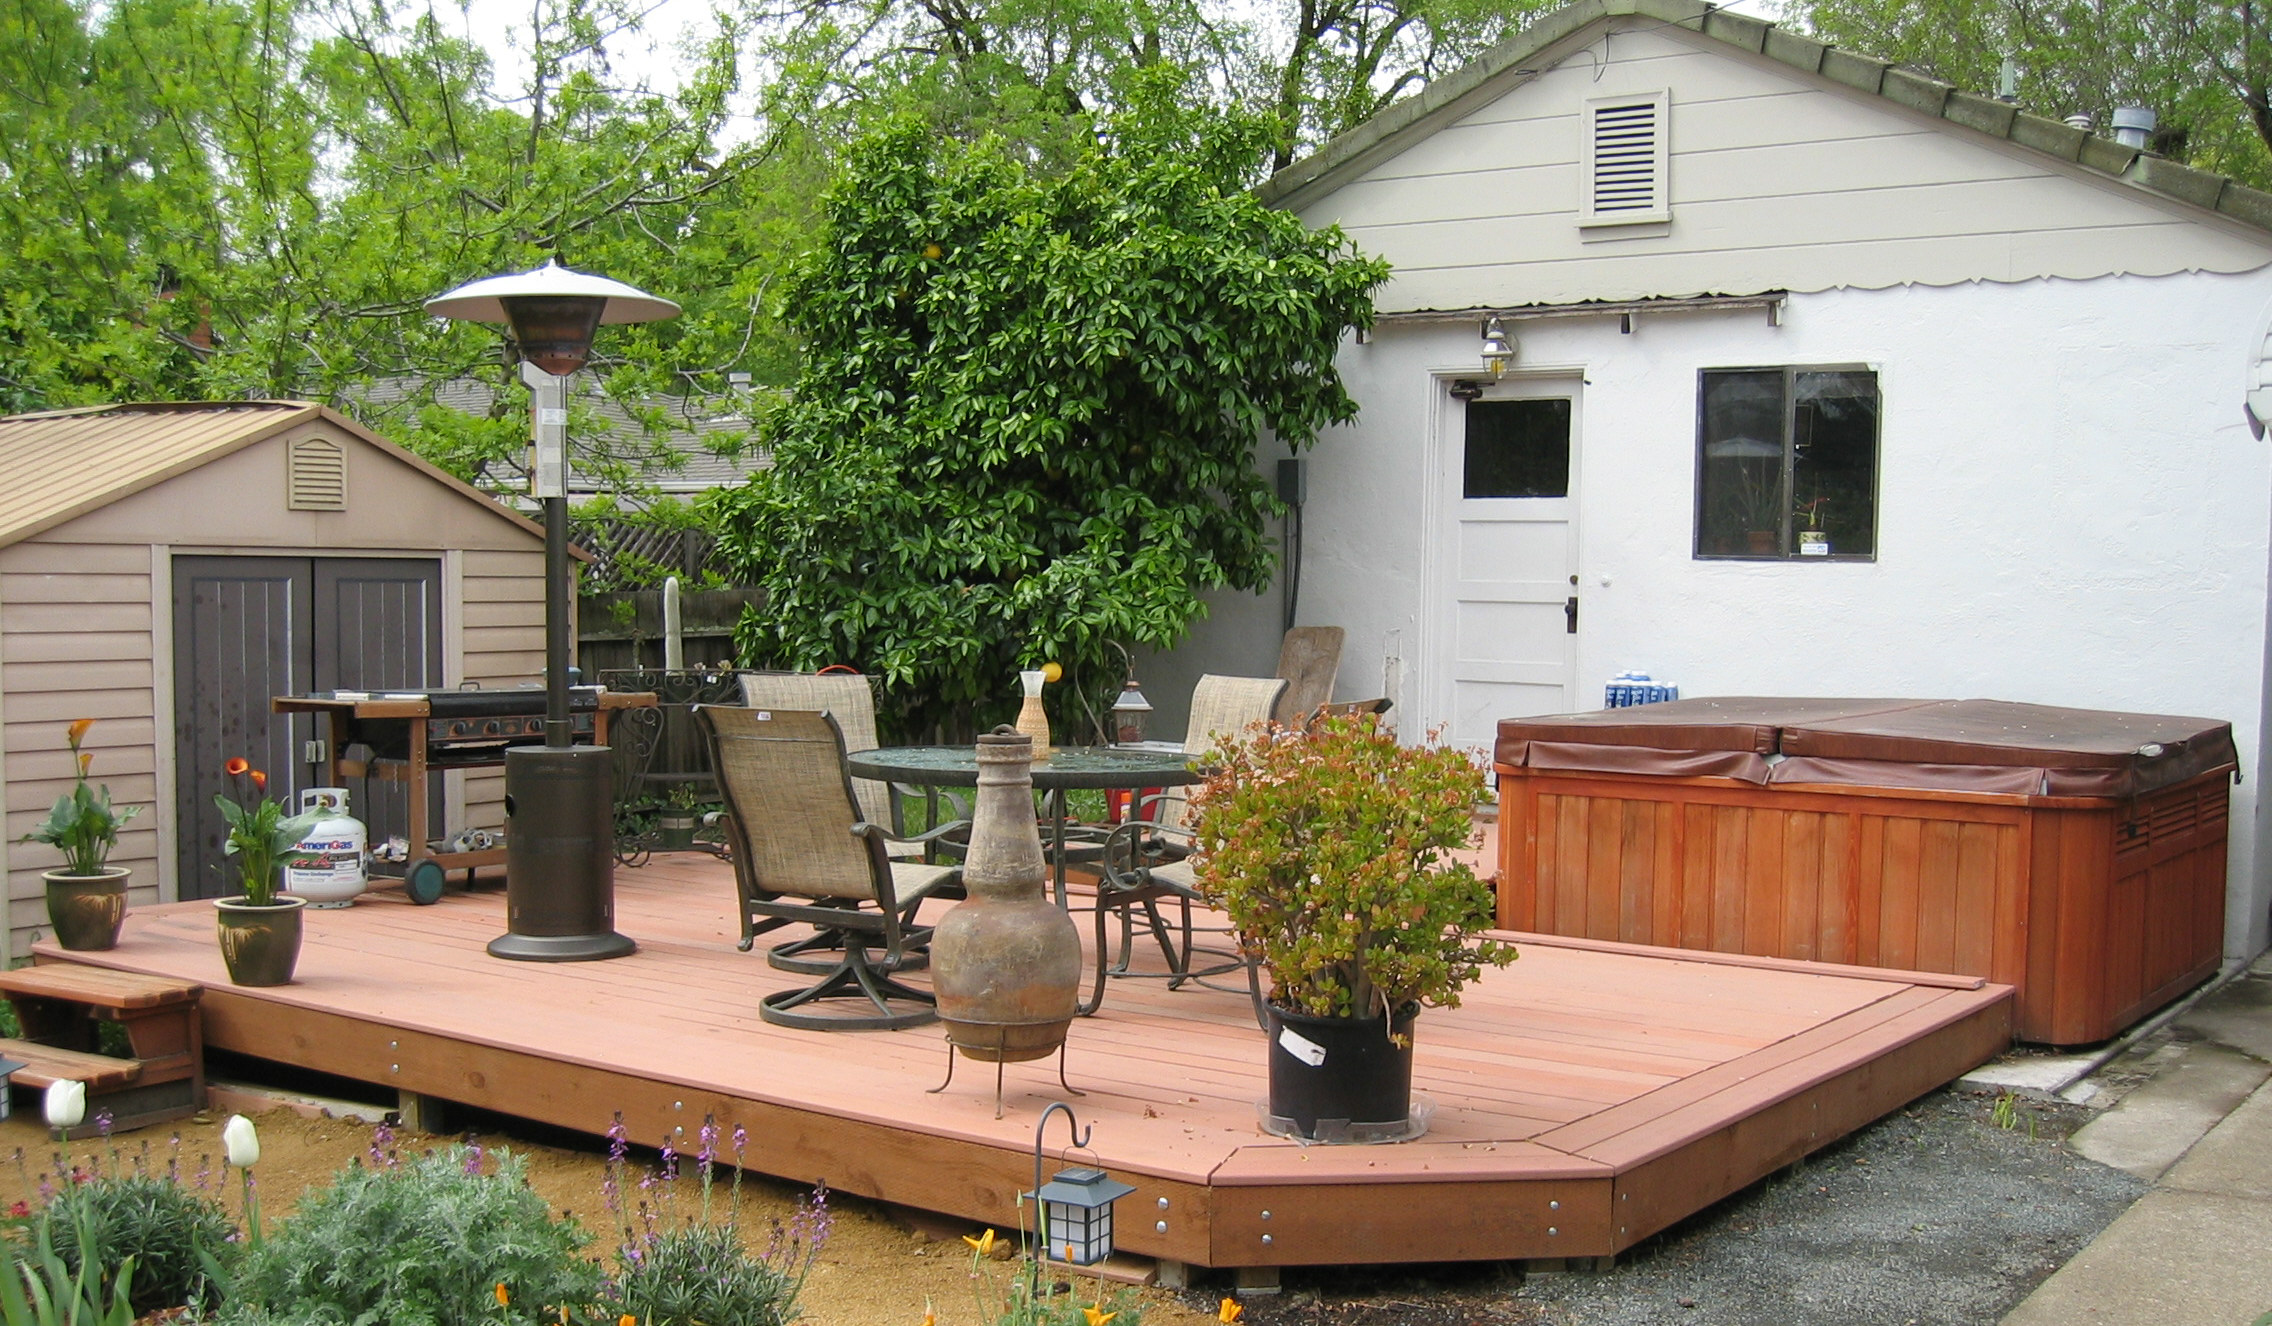
After sketching in some rough sitting areas in the backyard, we decided to tackle the completely useless back deck area. We had to move a tree (hence the large hole) to fit our hot tub, and we poured our own concrete pad for the hot tub and the deck footings. Our neighbor was a contractor, so I borrowed his chop saw for the fancy edges on the deck. For decking, we decided to go with the synthetic wood: recycled plastic and sawdust, essentially. We liked the nice even feel of the material, plus it was rated higher than regular wood for fire safety. But the big win turned out to be the zero maintenance required! In over 10 years, the main deck needed no cleaning. It had no splinters, no warped wood, no rotting, et cetera. When we added the second level to the deck, it got fairly dirty from the leaves of the walnut tree, but an hour with a pressure washer took away 10 years of grime!

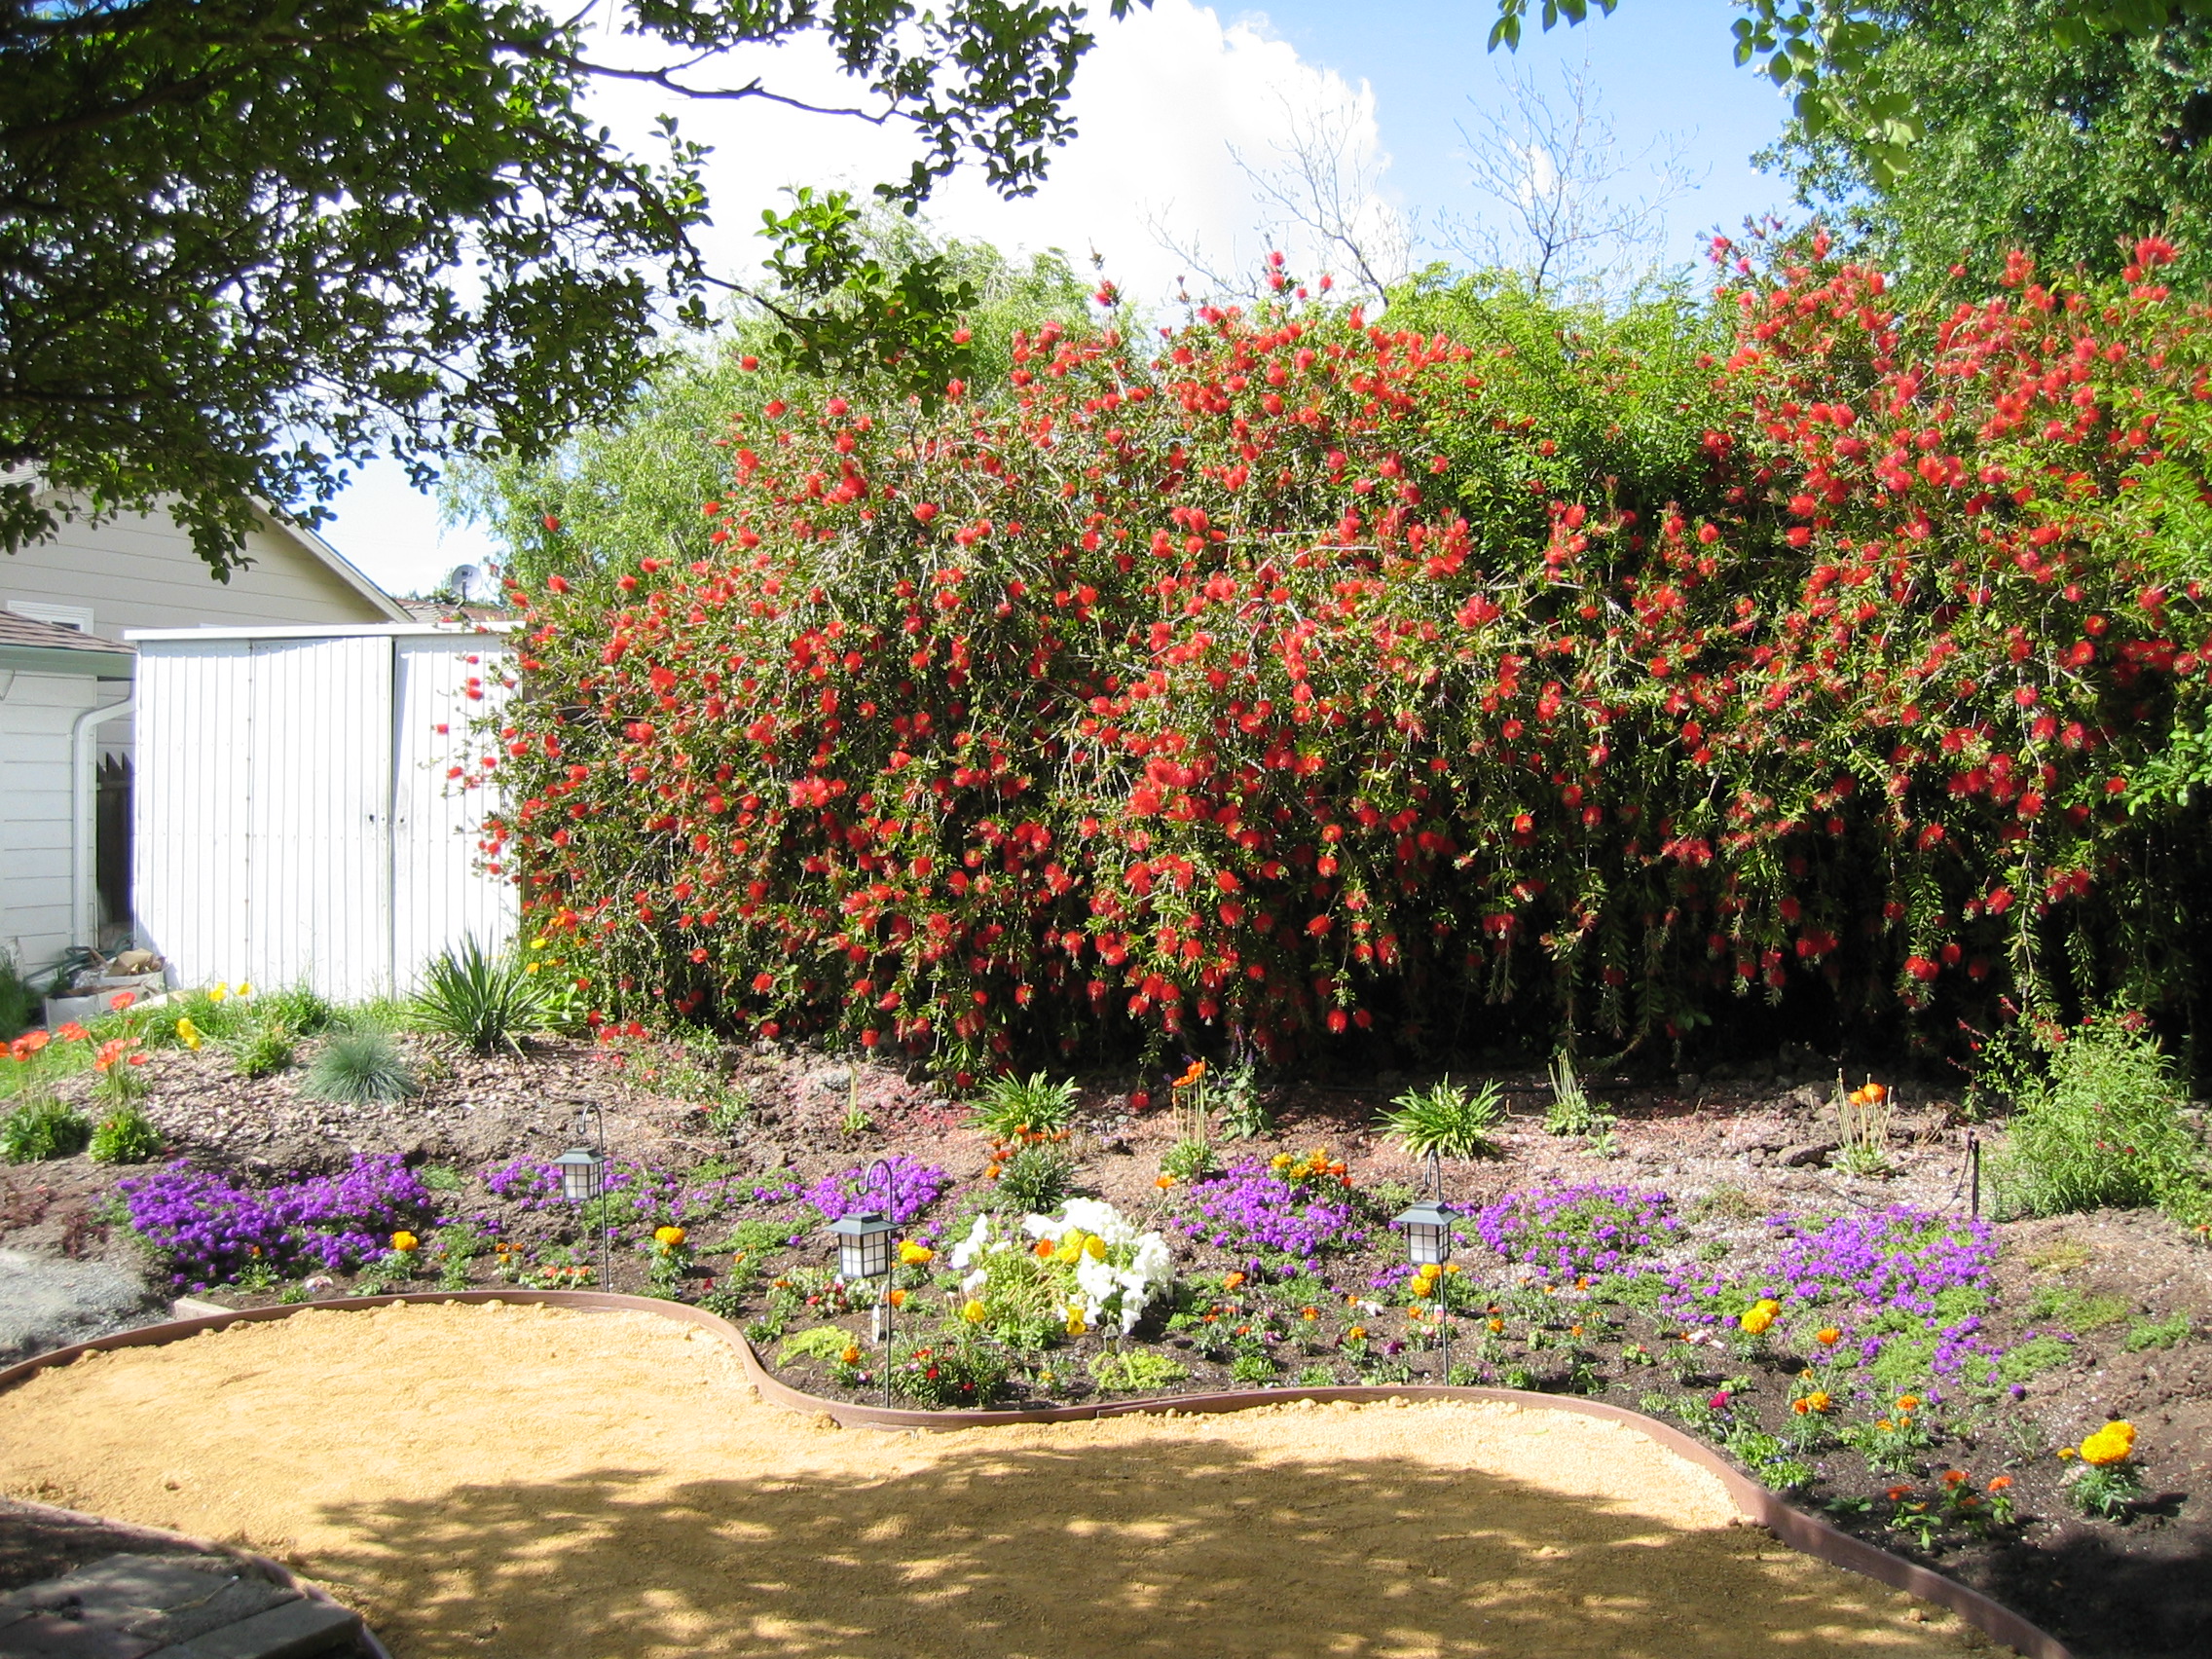
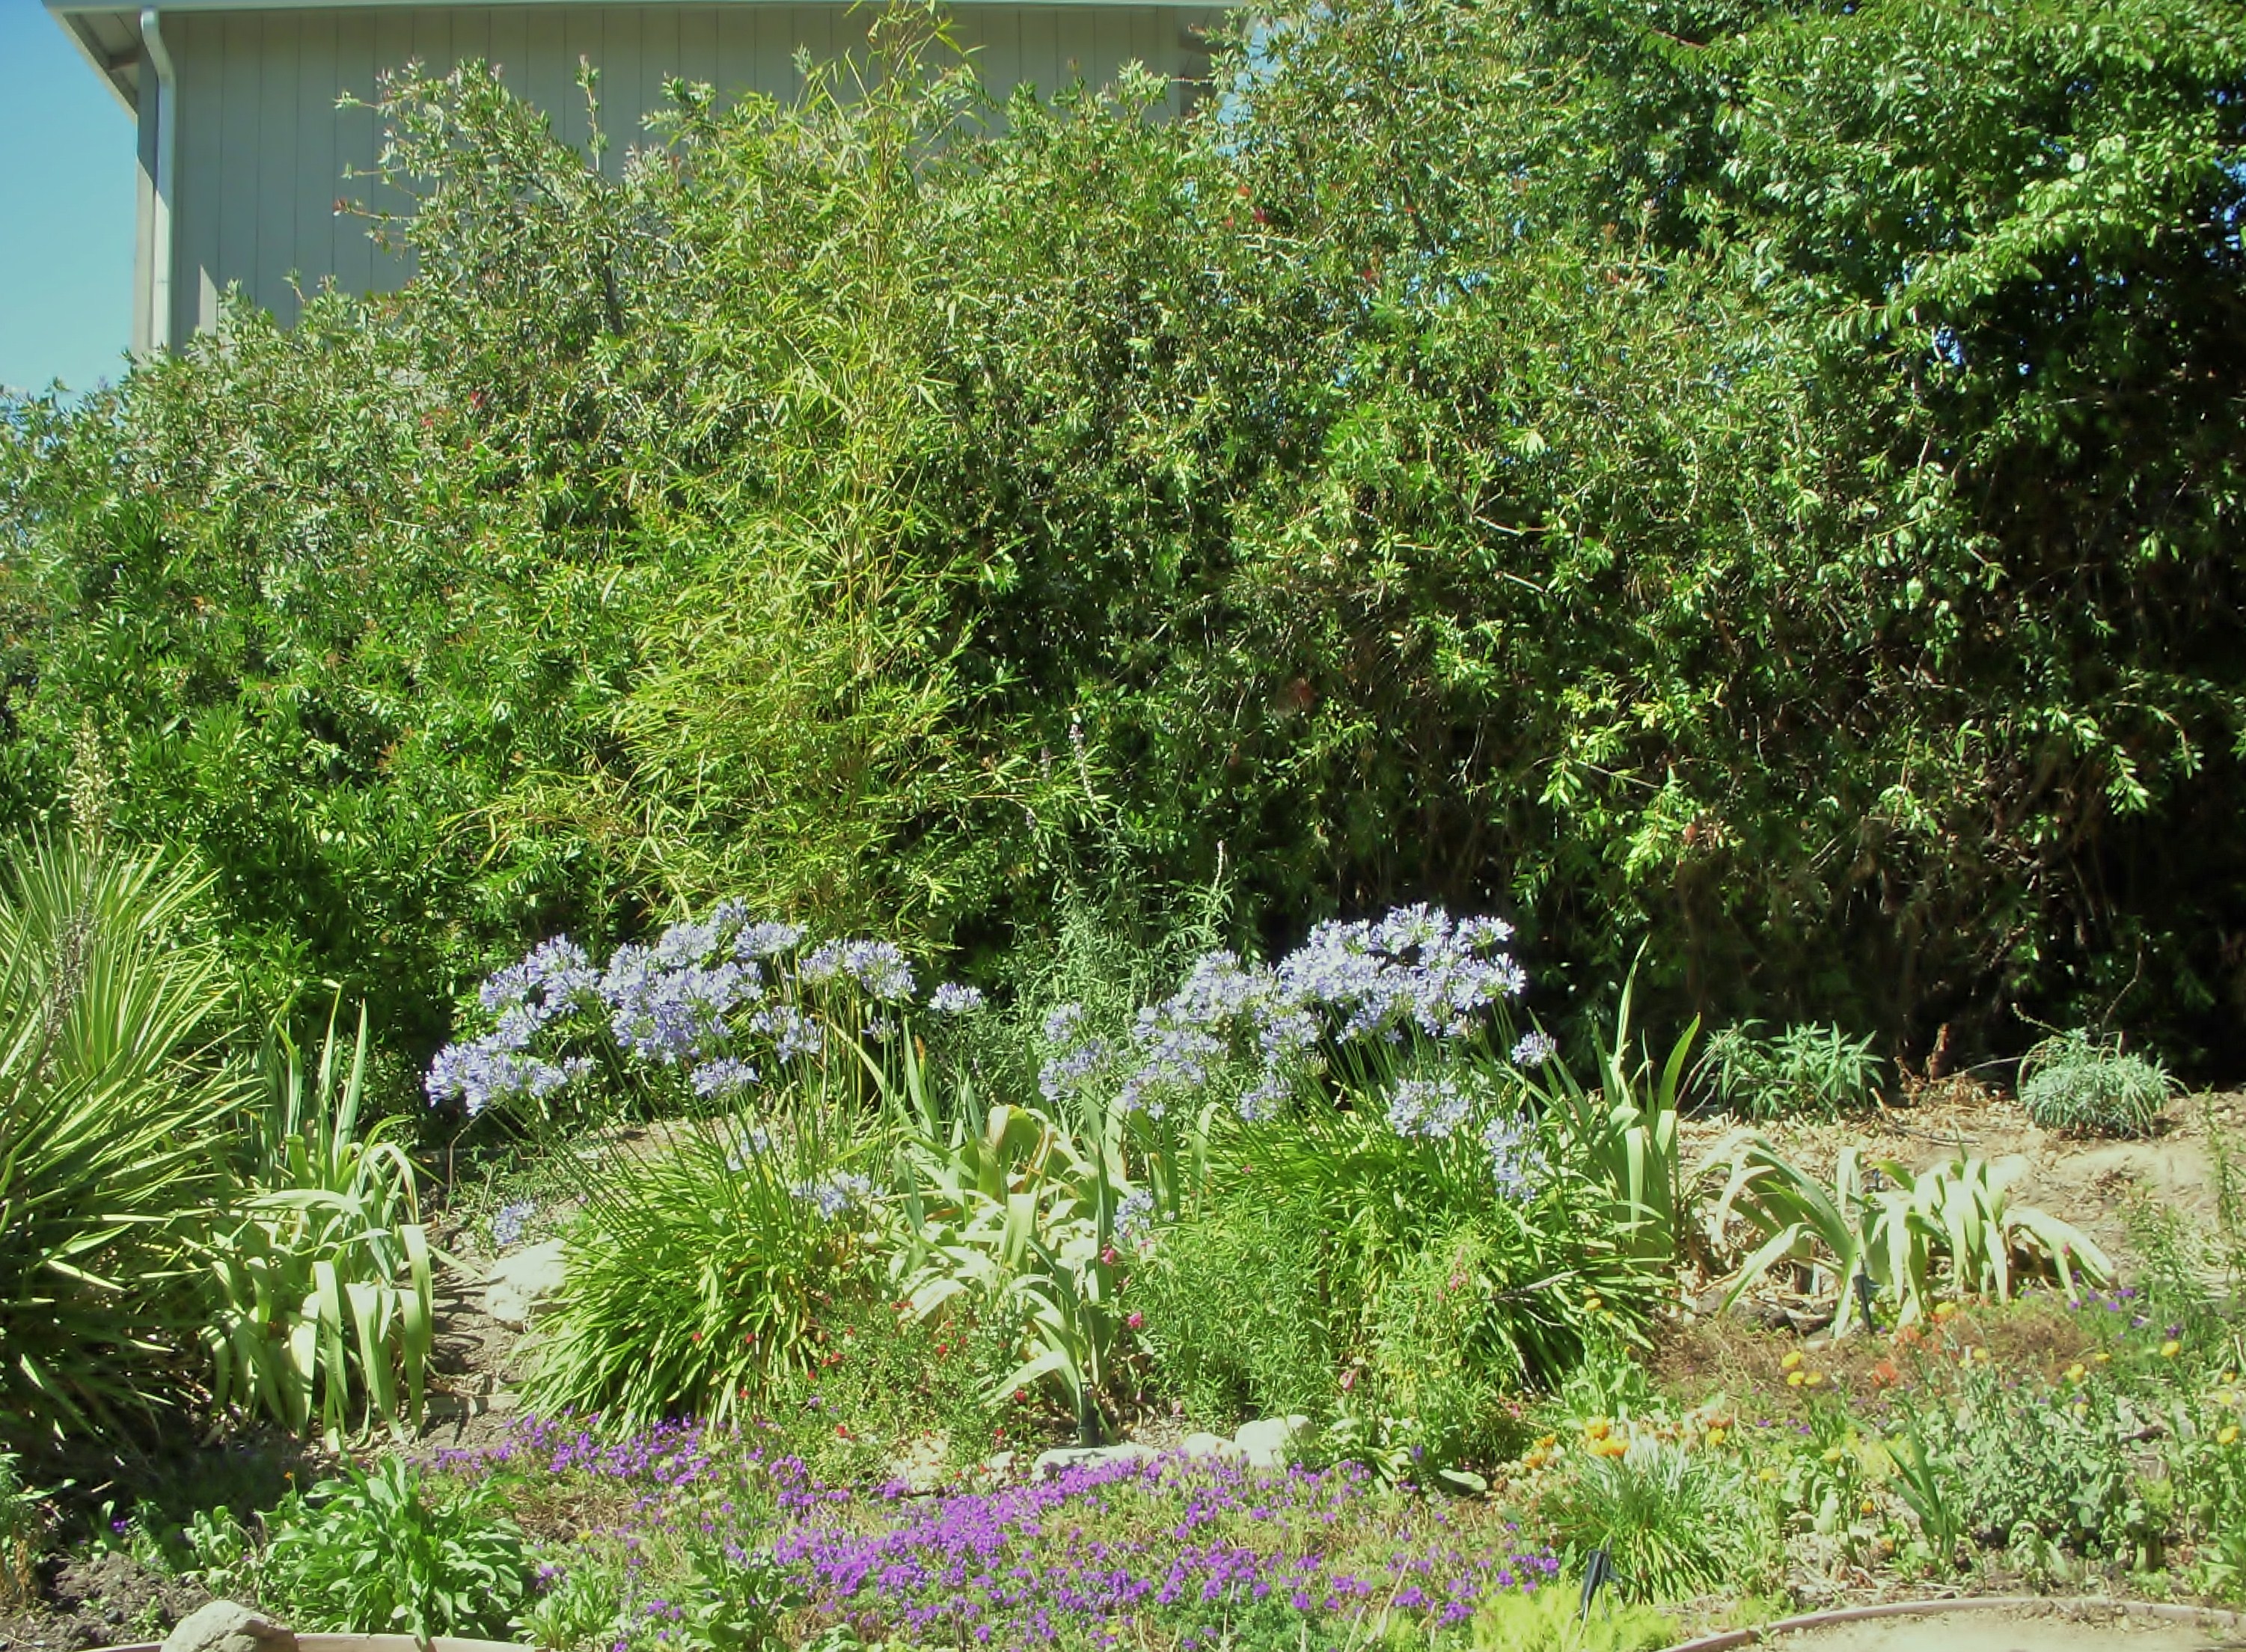
The major variable for the deck turned out to be its height; we wanted a seamless transition between the indoor living spaces and the outdoor living space. But pouring concrete is an expensive thing to have to redo if you don't like your prototype, So I went with a design that let me pour the footings to keep the basic deck shape and place, but also allowed me to raise or lower the deck, fix it in place and then we could try the deck over the course of weeks at different heights. It only took a couple of tries to get the transitions right. Ease-of-use was paramount, but so was an open view of the garden space. To get the open view, I went with a one step transition down from the deck to the garden, which by California code, does not require hand railings for one step, so we could go with the open, connected vibe with the garden itself! Given our entire backyard was on a slight slant, the original plan was to use that small stepping stool in the lower left corner until we got the deck had a height we liked, and then backfill the garden to that level. Alas, the contractor we brought in to do finish parts of the deck when we moved to Los Angeles took the traditional view that the ground height was fixed! So he ran a step the entire length of the deck and just buried it in the dirt behind. Adequate, but it took away some of the effect I wanted. C'est la vie!


Left side, facing the house  right side, facing the house

The five seasonal beds taking shape. Michelle had the idea for beds that would light up by season; I found a way to blend the shapes into the flow of the space.
These are the views from the back yard, facing the deck. The deck turned out so nicely that we, after much experimentation, took out the brown shed and placed a lower deck level there to take advantage of the shade from the walnut tree.


 near the deck michelle_pacific
Funny side note: you could see a massive increase in the number of worms in our garden soil!
it would've been great in the worm harvesting phase of my childhood:-)
Our soil is pretty much pure clay, so while we were prototyping shapes and locations of beds, in each iteration, I would rotor-till the soil to mix in perlite, compost and Peat moss. In field trials, the perlite turned out to be essential. The areas where I only added organic matter quickly turned back to into clay; a darker version of the original clay, but Clay nonetheless. The perlite helped keep the clay broken up (and thus aerated) and also aids in water retention and soil insulation. The organics quickly decayed, but helped jumpstart the plant growth. And when we planted long-term perennials in their final locations, they were able to thrive with very little maintenance, long after the added organics were gone.

We brought in several truckloads of compost and topsoil to amend the original soil, and also to do the multilevel planting beds. The backyard is hidden from the front, so eventually the increasingly puzzled truck driver finally broke down and asked "what are you guys doing back there?" He had never seen a home garden project need so much dirt before! Of the field trials, the best turned out to be a mix of large, chunky wood chips (free from a tree-trimming company), perlite and organic fines.


Prepping for the hot tub! michelle_pacific
We did the concrete work ourselves: only took half a day.
But we learned this is best to contract out :-)
When we can, we like to tackle new types of work ourselves, as a learning/creative exercise. Bonus points: when we contract for similar work, we have an idea of what is possible, versus being at the mercy (or limited creative vision) of the bidder.


reused planting experiment michelle_pacific
Early Spring View
This is from the center seating area, by the bonsai-shaped lemon tree.
This is an early working prototype. We reused some plants in the space just to fill it up and try it out. After a better view of where we liked to spend time, everything went except the lemon tree and crepe myrtle tree (which we only found after hacking down twenty years of crap around it).


the pit bull fence michelle_pacific
We added trees, a lower deck and some trellis/vine living walls!
I'll have to take an updated picture?
These are two side areas we had to improve: a falling-down fence that kept two aggressive pit bulls out, and a really blah view from our deck into our neighbor's yard. We had also fallen in love with the terracing experiments, so we added three more layers of planting beds to transform a dangerous eyesore into quite a nice little space!


 the original space behind the cottage  the tub!
This was the cottage area before adding the extra screening terrace.
We also moved the shed to White Trash Alley area, left fallow for future projects :-).
Cottage Beds & the first terraced beds. The entire backyard had quite a tilt to it: we were on the side of a low hill. So I started digging up the high side and moving the dirt to the lower side. This was quite a bit of dirt! But I wanted to try an incremental approach, as we had no real idea what we would build back there, and I was very busy at work, even on the weekends, and thus having anything ready for fall testing would be at risk. So every morning, I would move three wheelbarrows of dirt before heading into the office. This worked really nicely. Popping a slight sweat is a great way to wake up in the morning, and we were working crazy hours (10am to 3am), so I needed something to wake back up ;-) A quick glass of fruit juice, move some dirt, eat, shower and walk to work: very satisfying! And it only took one growing season, so no harm done to the long-term plans. Here was another great example of incremental refactoring.

We seed new areas with wildflowers as a cheap way of getting some green in there, then check it out through the course of the year. I had dug deeply enough into the hillside to leave a big edge of raw clay, which the winter rains softened into a natural-looking slope. And because of the slope, we could see more of the wildflowers! So I went a little crazy and added multiple levels everywhere I could. Then I discovered the joys of fiddling with line-of-sight, and reshaped the beds and seating areas again, this time making sure each seating area looked and felt different from the others. Over about four years, it started to look pretty good!


 Bamboo level added  cottage terracing
We plant in layers, so spring is a festive display of daffodils, wildflowers and bulbs!
Michelle designed these beds.
Here I had to add another level and move some trees around. Our neighbor put in this butt-ugly garage while we were living in LA. He claimed the city made him put in a two-level, which is probably a lie, but it is too late now do do anything about it, and I've seen this guy at the frothing-mouth, mad dog stage already: I can pass on another viewing. Years later, he still refuses to make eye contact, even if I say hi when we are both working on our front yards! But you can't have everything, so I redid the landscaping to hide the building. I put in two clumping bamboos, a grapefruit tree and a evergreen fir tree, then radically reshaped my favorite orange tree to basically train it to grow in a different direction. Too dense, of course, but the experimentation theme required it: I needed to see what would do best as a screener in that location: growth times, height, bushiness, water consumption, visuals and habitat were the key variables. The orange tree went into shock after the heavy reshaping, which I expected, but it took over a year to recover. One of the bamboos looks great, screens well and is low water. The other, I'm going to pull. The fir tree died in the drought, so it is up to the two citrus trees to screen the area, backed by the bottlebrush hedge.


 Springtime seasonal beds  cottage terracing
Spring from the deck.
It is OK, but a lot better after reshaping the trees at the back.
Behind our house is some CalTrans open space: those are the big pine trees. Behind those, I found a great view of Mount Diablo: the killer-app view in Walnut Creek. And from the front of the house, we get an OK view of Acalanes Ridge, with great sunset overlays!

After a few years of tree growth, I pruned for views: spectacular! (I need to find a recent one with Mt Diablo framed by trees).


 bike path wildflowers  cottage terracing
We love to bring the garden inside!
Optimizing for cut flowers is very interesting.
This is not in our garden per se, but I spent a lot of time here ;-) This is the Contra Costa Bike Path, one of many paved, off-road trails in the Walnut Creek area. This was an experiment in Guerrilla Gardening. There were a few straggly looking California Poppy plants trying to survive in the midst of grass and weed invaders. I love poppies! But they need a little help to deal with the invasive species. So I made this area a 'stop and stretch' spot on my regular rides, and twice a month I would spend 5 to 10 minutes yanking weeds. The poppies had the area fully pimped out by the second year. People loved it! Not enough to help me weed, but they loved this sight. When we move back to the Creek, I'm going to start a Flower Trails project! When I was on the bicycle council, they always needed ideas, and this turned out to be a vey low effort, high return type thing. If I can get people to adopt 10 foot segments of the trails they walk on the most, everything could look like this!

After trying about thirty different varieties of roses, we had a solid idea of what we liked the most. And that's bringing the flowers into the house! This Black Magic variety has amazing blossoms (shape and color) and they do very well in vases: over a week! They have very little scent, which is the one thing I don't like about them. But our rule is: who busts up the dirt gets to control the design, and Michelle wanted a dozen of these out front, as a long-stem rose factory!


 bike path wildflowers  cottage terracing
the left picture is the seasonal bed area, and the right picture is the space behind the cottage. You can see the unshaped lemon tree on the left, and lower-right is the hot tub location of the new deck.
caption these pictures individually.
More pre-workviews.

Whenever we crack open a new piece of the yard to convert from gloomy to glowing, I scrape some basic seating arrangements together, and then try out the space for months at a time before deciding exactly where the beds, the seating areas and the connecting paths will flow. This lets me check for sun and shade variance, as well as Sunset view versus Moon view versus starry night view, and of course, Garden views :-).


Iris cutting Daffs cutting
We have things staged so that there is almost always something in bloom.
Michelle is great at these!.
I just plant stuff. Michelle is the one who makes things beautiful! She has a real knack for arrangements.


 Bamboo level added  cottage terracing
We plant in layers, so spring is a festive, rolling display of daffodils, wildflowers and bulbs!
Michelle designed most of these beds.
These are two of the views behind the cottage. We have one fallow space back here as well, under the probably-plum trees. I've been shaping a high-ceiling shade canopy over the past several years. It is ready for use now, and I've got a movable hammock in the space to do field testing ;-) It may well end up being the best of the spaces when done: a great view (that I can't find a picture for) that shows off all of the different spaces, and is very shady: a must in California gardens! We were going to do a ruined-temple-in-the-jungle theme, complete with a water feature, but this stupid drought has shelved that plan. I buried a rain-water storage tank under this space as well. Alas, there has been no rain :-(


 Bamboo level added  cottage terracing
Find a picture viewing the garden from within this nook.
Michelle designed these beds, I did the hardscaping and the canopy.
Shady nook, up close and distance views. This is one of the two fallow spots left to develop. I've been shaping the canopy for several years and testing with chairs, tables and hammock. The views from here are great!

I still need to find the views-out pictures.


 Bamboo level added  cottage terracing
After we tuned the space several times, we finally locked it down and put in the golden granite gravel pathways.
This is a good example of us working together. The idea was hers, the tuneups were mine, and we found a way to blend her niche into the center niche I had put in earlier (find a picture of that space too, and the finished paths!)
Michelle and I both love roses, so here is the first iteration of Michelle's Rose room. We converted the very back of our yard into a rose lined path, and a small seating area. The space was beautiful, but really not very usable as we crammed all whole lot of plants in the back corner. After the initial field trials showed a low utilization rate, I re-factored the area to bridge two small seating areas into a medium seating area, which Michelle loved. So I yanked a few more plants to allow a table and chair set up back there. Currently, it's my favorite area of the garden! It has almost a secret Garden feel to it, as a tea rosebush, a bottlebrush and a dwarf orange tree hide this corner from most of the other garden areas, and particularly from the main house deck area. You can get a nice sunset view from here too, depending on cloud conditions, and the moon rises over the spot, making it a great place to work after midnight via candlelight and moonlight! It also ranks quite high on the shade factor; it stays cool until early afternoon, even in a hot California summer.


 White Trash Alley  the tub!
Find another view of the side deck!
And a closet interior.
This is the fallow view of the side parking space, designed for an RV. We dump stuff there until the county spring trash pickup, as it can't be seen from the front or back :-) We planted some native trees here when we first moved in, hoping at least some of them would be useful. We ended up splitting the alley into two segments: one is a lower deck off the main deck: very shady, very private. The back chunk will eventually be a front yard garden seating area: something we lack right now. I still need to find a good picture of this reshaped area as it went through these changes.

Add pictures here.

The other picture is in the master bedroom. We added closet space: always a good idea in older homes! Michelle needed shoe rack space, which got me huge bonus points at Maxis! Maxis had a very high percentage of women working there (not typical in the game industry at the time), and several loved the fact I 'got' women enough to know that she needed shoe space :-) Michelle designed the interior space as an L-shaped walk-in closet and more than tripled our rack space!


 the original bathroom  the tub!
The first picture is the side-deck we added, but not a great picture of it
Our cost-effective kitchen remodel (above)
This is the only kitchen renovation we decided to do. The linoleum floor is pretty ugly, but only if you look closely at it, and it is wearing like iron. We weren't huge fans of the Formica countertops, But they were in great shape, and also wearing like iron. So we decided to maximize the Limited light into the kitchen, and to make the counter by the sink feel less claustrophobic. It also maximizes the view out in the garden, and we will eventually put a picture window to fill the entire space!

This is also a classic "low-hanging fruit" type project! All we had to do was remove two small cabinets, held on by about four screws each. Then we cheated and did not remove the wood paneling or the wallpaper; I just spackled on top of them, and then a nice light paint. We found some open shelf kits at the container store, and the halogen light rack. The entire project took about two half days, from demolition to finish! The impetus for the project was a couple of friends from Germany coming in to spend a week chilling in wine country and our chill-tasic garden spaces. Ingo had the German nationals ultimate Frisbee tournament coming up, so he wanted to train with me as well. We were really looking forward to their trip; we planted a rolling field of basil, of different types, for nonstop pesto action, and six different types of peppers! The training was going to be awesome as well! I tuned up my backup bicycle for him and set out a road trip through a small Redwood grove and two state parks. The ride ends up at one of my favorite throwing fields, where I often work on accuracy and distance. I was really looking forward to having someone to throw with so I could work on my catches, plus it's just a lot more fun then doing throwing drills by yourself:-)


 the original bathroom  the tub!
X
The contractor did an amazing job on the floor and wall!
NOTE: fix picture shape, or better still, find a picture with the pedestal sink.

We replaced the nasty sink with a pedestal sink, and added shower heads to both sides of the tub. That let us convert the shower stall into a much-needed linen closet just be adding shelves!


 the original bathroom  the tub!
this was the original tub!
Brown paneling (sides and ceiling) :-(
I'll move these to another page eventually, but here are a couple of our home renovation projects. Because we both tend to be busy with work, we either pick projects that can be accomplished over one or two weekends, or projects where I can spend 15 minutes a morning on, spread out over say, eight months.

This is the original bathroom: a horribly, criminally ugly brown for the walls and ceilings, and a grungy brown for the floor.

We had expected it was going to be a simple cosmetic upgrade, but once we got the paneling off the walls, we could see some nasty infrastructure problems. The original plumbing was rusted out and starting to leak, and most of the wiring was way, way below code: just wires taped together and thrown into the wall cavity! Further, the circuit was heavily overloaded! It ran to two bedrooms, the bathroom, outside lights, hallway lights, and living room lights! And of course the drywall was completely trashed under the paneling. We ended up having to rip out everything down to the studs, and then live with a 10% refinished bathroom for months until I had time to work on the drywall. We had a plumber come in and pull copper pipes throughout the house, and had an electrician add a dedicated, 20 amp circuit for the bathroom. We didn't want to tackle the tiling either. I've done some tiling, but it's hard to get everything perfectly square, and level, in all directions, all at the same time. So we had somebody come in and do the tub wall and floor; They were going to be major accents of the space and we wanted them to look perfect, especially the wall pieces, which are even harder to get perfect than floors. We had found some really nice Italian tiles at a remnants sale: a fraction of list price, so we bought a few different types, knowing we'd find a use for them at some point. Years later, yup, all gone. Large off-white floor tiles for the bathroom, a slate'ish type for the foyer, and cream for the cottage. Because we were buying remnants, we had to get creative to get full floor coverage in the cottage: Michelle did a killer layout!

Pull the cottage pictures into here, then branch this full page into garden projects and home projects pages.